

 Cart
Cart
Automatic Mailbox Creation in Office 365
Creating mailboxes one by one before a migration is exactly as tedious as it sounds — and on large deployments, it's where a lot of time gets lost before the actual work even begins. EdbMails takes that off the table entirely. When migrating to Office 365, the tool automatically creates mailboxes on the target server and assigns the necessary licenses without any manual input from the administrator. No missed users, no licensing oversights, no configuration errors from doing things by hand. Whether the team moving across has ten people or ten thousand, EdbMails handles the pre-migration setup at scale — so by the time the migration starts, every mailbox is already in place and ready to receive data.
Steps to Create Mailboxes Automatically
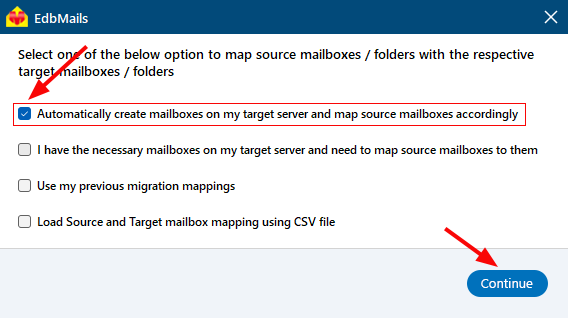
- In the mapping window, select the option to ‘Automatically create mailboxes on my target server and map source mailboxes accordingly’ then click Continue to move to the next step.
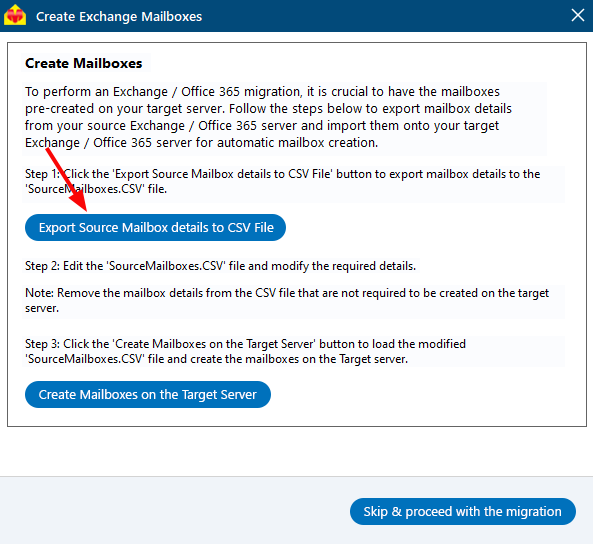
- Click the ‘Export Source Mailbox Details to CSV File’ button to export the source mailbox details.
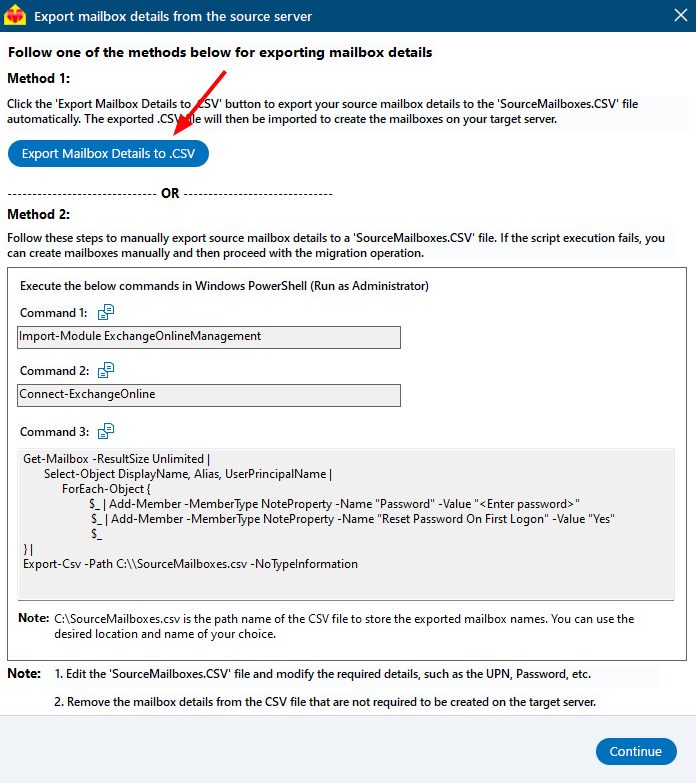
Click the ‘Export Mailbox Details to .CSV File’ to automatically export source mailbox details to .CSV file and select the location to store .CSV file on your computer.
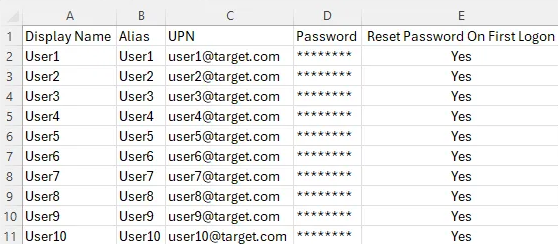
- Edit the details such as Display Name, Alias, UPN, Password in the SourceMailboxes.csv file.
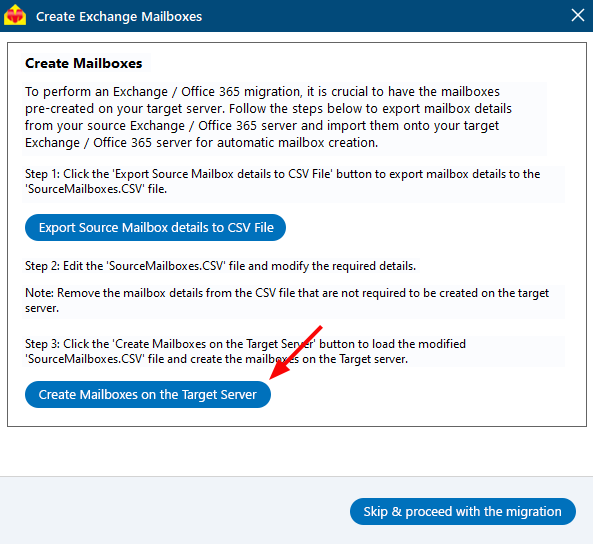
- Click the ‘Create Mailboxes on the Target Server’ button and load the modified csv.
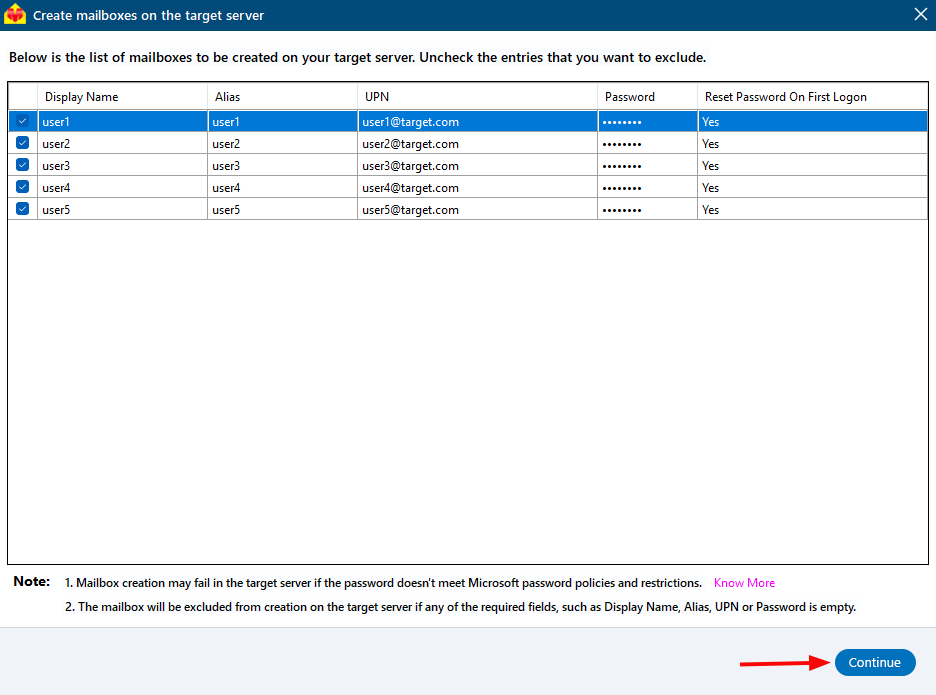
- Select the list of mailboxes you want to create and click the ‘Continue’ button.
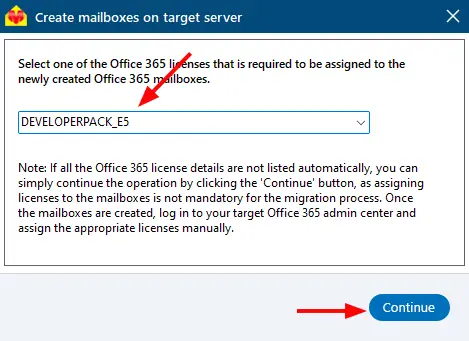
- Select the required licenses you want to assign to the newly created mailboxes.
- A message will appear once the mailboxes are created successfully. Click ‘Skip & Proceed with the migration’.
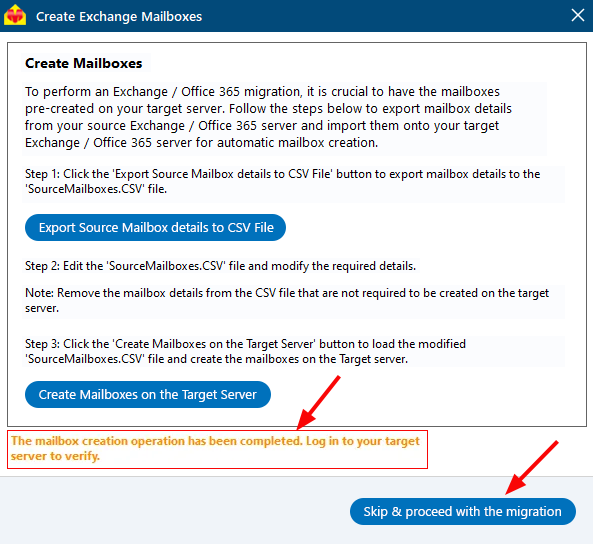
The newly created mailboxes may take a few minutes to become available for mapping. If they don’t show up right away, wait for a short time and try the operation again.
- Proceed with the next process.