


Office 365 to Office 365 Migration: Step-by-Step Guide
Moving mailboxes between Office 365 tenants sounds straightforward until you start. Then the edge cases show up. Public folder permissions that didn't carry across. An archive mailbox that was never enabled on the target. Outlook profiles that won't reconnect because of one wrong autodiscover record. Industry data is brutal here — over 90% of major migration projects miss their deadlines, and roughly half experience significant downtime. The pattern's almost always the same: something got skipped in planning.
This guide walks the full sequence end-to-end. EdbMails Office 365 Migration software handles the bulk of the automation — modern authentication via OAuth 2.0, automatic target mailbox creation with license assignment, source-to-target mapping without a CSV, incremental delta migrations with no duplicates, and up to 20 mailboxes in parallel — but the planning, prerequisites, and post-migration cutover are still on you. That's what this page covers.
Who this guide is for
Tenant-to-tenant migrations, specifically. The Mergers and Acquisitions (M&A) scenario is the most common one — this happens when two companies merge into a single organization, or when one company acquires another, and both sides are already running their own separate Office 365 environments that now need to be consolidated into one. Rebrand projects are another common trigger, where a company changes its identity and moves everything from its old tenant into a freshly provisioned one. Divestitures fall into the same category as well — splitting a department or business unit off into its own standalone tenant when it becomes a separate entity. If you're coming from on-premises Exchange instead, that's covered in our Exchange to Office 365 guide. For PST consolidation into Microsoft 365, see PST to Office 365. And for the other direction — Office 365 out to PST for archive or offline access — Office 365 to PST export is the right page.
Prefer a condensed action list instead? Our Office 365 migration checklist covers the same planning stages in a quick-reference format.
Planning and preparation
Migrations that fall apart almost always fall apart for the same reason: something got missed in planning. A public folder nobody owned. A regional office on a 10 Mbps link. An Outlook 2013 install in accounting that hasn't been updated since the last admin retired. None of these is a disaster on its own. All of them together, on go-live weekend, is.
So slow down at this stage. The four steps below take a few hours and save you days of cleanup later. Run license assignment reports in both tenants two weeks before your scheduled start date — discrepancies between what you thought you had and what's actually allocated are one of the most common sources of last-minute scrambling.
- Step 1: Map out what you actually have
Start with an inventory. Not a fancy one — a spreadsheet is fine. List the mail servers on the source side, every client device that touches them (Outlook on Windows, Outlook on Mac, mobile users, the OWA-only crowd), and the bandwidth at each office. Then list every application that sends or receives mail through the current setup. CRMs, ticketing systems, network scanners, any custom app with an SMTP relay configured. These are the things that will break first if you forget about them.
Pay special attention to anything fragile. An Outlook 2013 install that nobody's touched in years probably won't authenticate against the new tenant cleanly. A regional office on a slow link will need its migration scheduled outside business hours. A custom app hard-coded to the old Exchange server needs a code change or a config update before cutover. If OneDrive is in scope, remember the hard limits — Microsoft enforces a 2 TB storage cap and 1 million item cap per OneDrive account. Anything beyond that fails the migration. Audit and clean up first.
- Step 2: Pick the right migration method
Four options, and you only need one. Cutover works if you have fewer than 200 mailboxes and can afford to move everyone in a single weekend. Staged is for larger user counts — you migrate in batches, usually by department or office, over weeks. Hybrid is the long-running coexistence option, where on-prem Exchange and Microsoft 365 run side-by-side for months. And IMAP covers everything else — Gmail, Zimbra, Zoho, cPanel, whatever non-Exchange mail server you're moving away from.
See our full comparison of Office 365 migration methods for a side-by-side breakdown of org size, source environment, and downtime for each option.
- Step 3: Decide what's moving
Three buckets here. Stuff that moves to the new tenant as-is — active mailboxes, the public folders teams actually use, shared mailboxes that haven't been decommissioned. Stuff that's better off archived rather than migrated — old leavers' mailboxes, project folders from three years ago, anything where the lift-and-shift cost outweighs the access value. And stuff that should just be deleted before you even start — automated bounce notifications, ancient calendar invites, the Junk folder in its entirety.
Getting this list right keeps the migration window short and the post-migration cleanup minimal. Getting it wrong means you'll spend six months after cutover wondering why everyone's mailbox is over quota.
- Step 4: Document the plan
Write it down. Even if it's just an internal wiki page. Cover the tenant-to-tenant migration approach you picked, the order of operations, who's responsible for each step, and the rollback plan if something goes wrong on the cutover weekend. The rollback plan matters. Most migrations never need it. The ones that do are the ones where nobody wrote one.
- Step 1: Map out what you actually have
Office 365 to Office 365 Migration Prerequisites
On the source Office 365 server:
- A global admin account with a mailbox attached. EdbMails uses this for automatic app registration against Entra ID (the new name for Azure AD). If your security team won't hand over global admin rights, manual registration is an option — that accepts any account with full access rights.
- Bandwidth. Specifically, upload bandwidth. That's the bottleneck that determines how fast mailbox data leaves your network. A 50 GB mailbox on a 100 Mbps symmetric line is fine. The same mailbox on a saturated 25 Mbps office connection will crawl. Microsoft caps a single EWS connection at 0.2 to 0.5 GB per hour — concurrent connections are how you get around that. Their detailed performance guidance is worth reading before you commit to a go-live date.
- Public folder permissions. If public folders are in scope, set the admin permissions now rather than at midnight on cutover weekend.
- Archive mailboxes. If In-Place Archives are migrating, they need to be enabled on the source first. Here's how.
- Disable directory sync on the source 24 hours before cutover. Once Active Directory Sync is turned off in the source tenant admin center, any changes to source AD DS will no longer sync to Office 365 — which is what you want. The catch: it takes about 24 hours for the change to fully propagate, so this is a plan-ahead step, not a day-of one.
- Language gotcha. If your source mailboxes use localized folder names — Boîte de réception instead of Inbox, for example — direct migration may not map them to the standard English folders on the target. This FAQ entry covers the workaround.
On the target Office 365 server:
- Set the tenant up properly. Microsoft's Tenant roadmap for Microsoft 365 is a sensible reference if this is your first time.
- Mailbox creation and licensing. EdbMails handles both automatically — creates the mailbox, assigns the license, moves on. If you'd rather do it by hand for governance reasons:
- Pick a licensing plan. The 30-day trial is the right place to start if you haven't committed yet — it gives you enough room to validate the migration before signing anything. Microsoft's comparison pages for business plans and enterprise plans lay out the differences.
- Public folder structure on the target. If you're moving public folders, create them on the target before the migration runs.
- Archive mailboxes on the target. Same story — enable them before the migration. Steps here.
- Use a global admin account on the target as well, with a mailbox, for the automatic EdbMails registration.
- Custom domain. If you're keeping the same domain on the target side — most companies do — it needs to be added and verified in Office 365 before cutover. One catch worth flagging: Microsoft only allows a given domain to exist on one Office 365 tenant at a time. So if you're keeping the same domain across both tenants, expect a brief downtime window when you detach it from the source and reattach it to the target. Add a custom domain and add DNS records cover the two halves of this.
- ADFS. If you're running Active Directory Federation Services, you'll need to set up a new domain on the target tenant for it before starting.
- Message size limit. Bump it up to 150 MB on the target. Here's how.
Office 365 to Office 365 Migration using EdbMails
The actual migration is mostly clicking through a wizard. EdbMails handles emails, contacts, calendars, tasks, journals, public folders, archive mailboxes, Office 365 Groups — everything in the mailbox structure. Here's the flow.
Step 1: Install
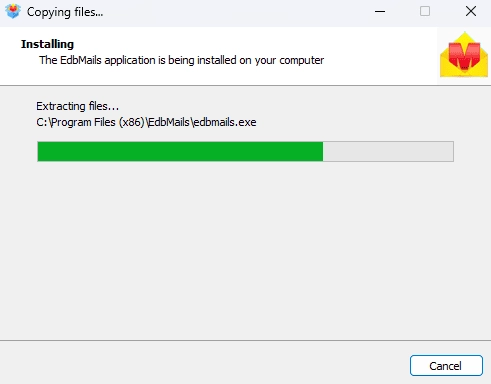
- Download the installer, run EdbMailsSetup.exe, follow the prompts. System requirements are on the docs site if you want to check first.
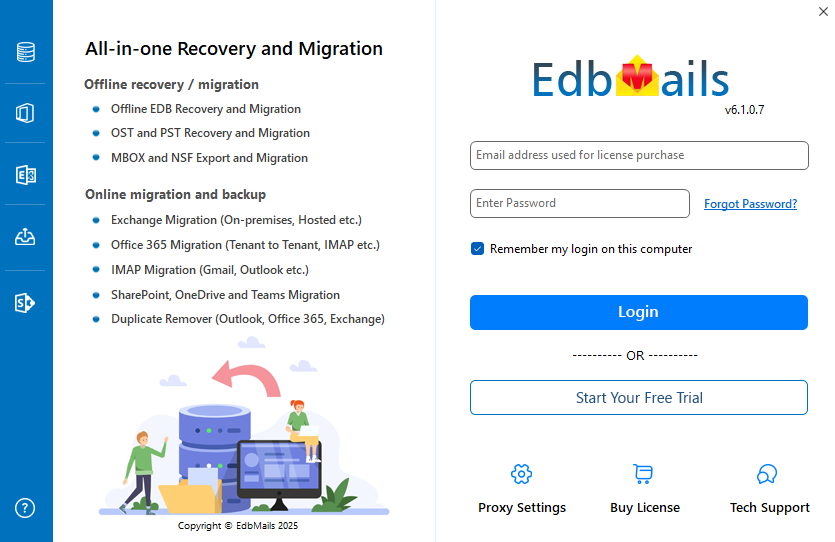
- Once installed, hit ,'Login' if you've got an account, or 'Start Your Free Trial' if you don't.
- Download the installer, run EdbMailsSetup.exe, follow the prompts. System requirements are on the docs site if you want to check first.
Step 2: Pick the migration type
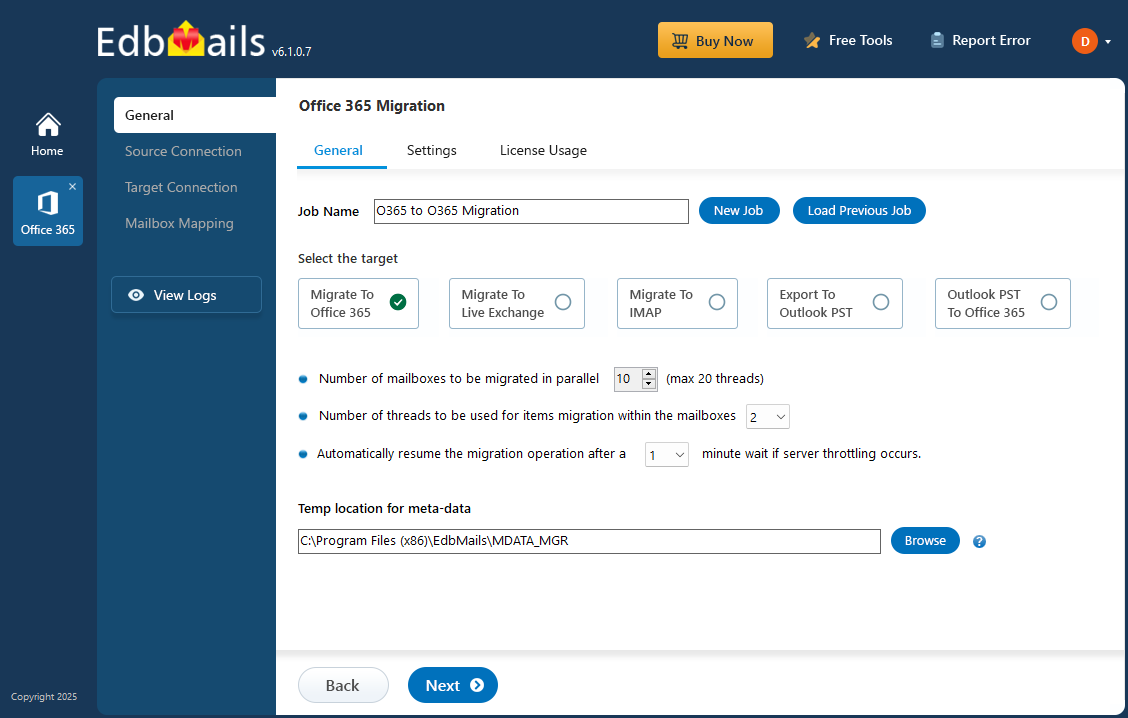
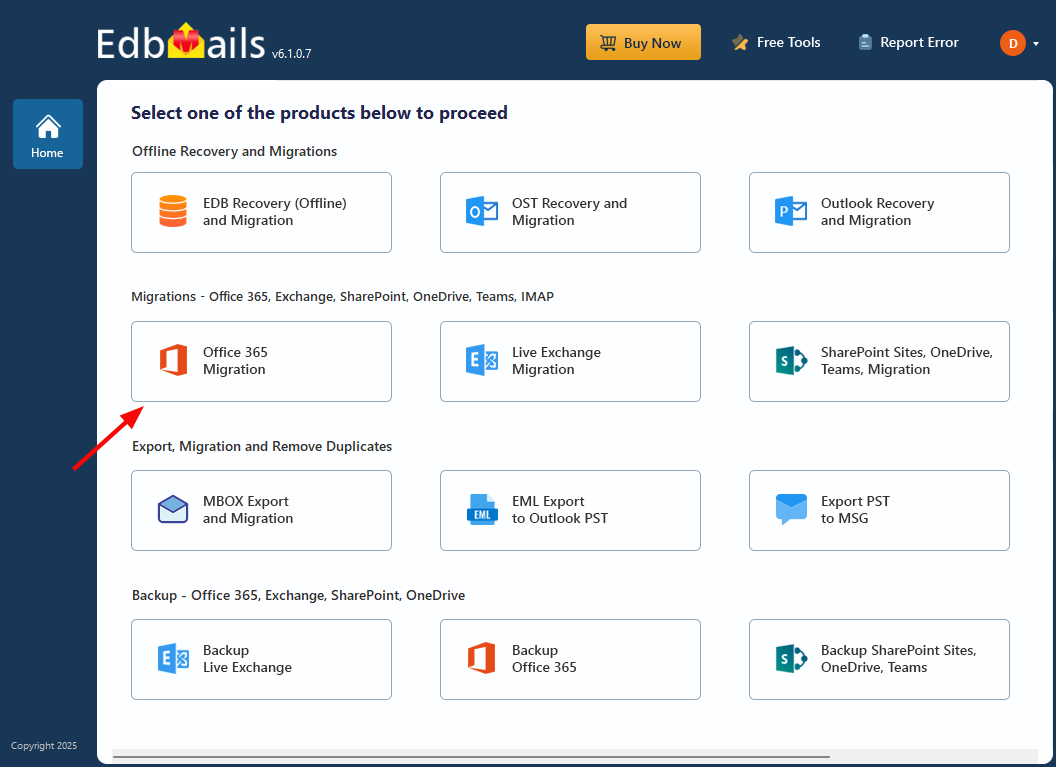
- Choose 'Office 365 Migration' from the main screen, then 'Office 365 to Office 365 Migration' from the sub-menu.
- Name the job something memorable — you'll thank yourself later if you have to come back to it. Or just hit 'New Job' and accept the default.
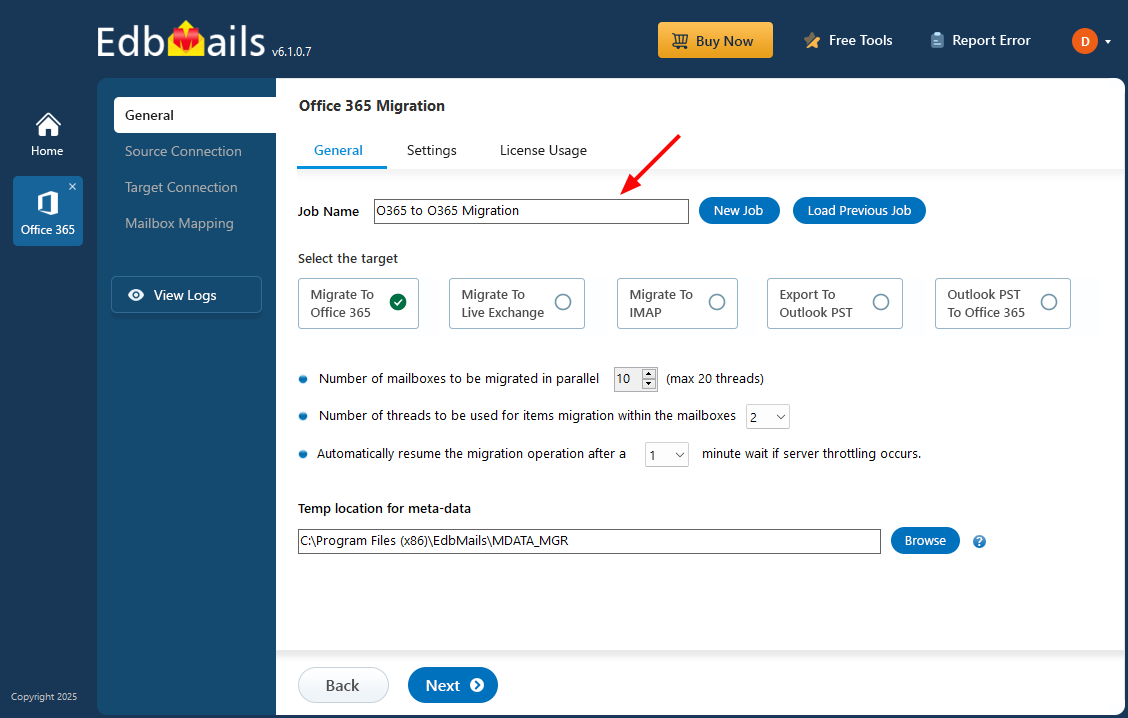
- Choose 'Office 365 Migration' from the main screen, then 'Office 365 to Office 365 Migration' from the sub-menu.
Step 3: Connect to the source
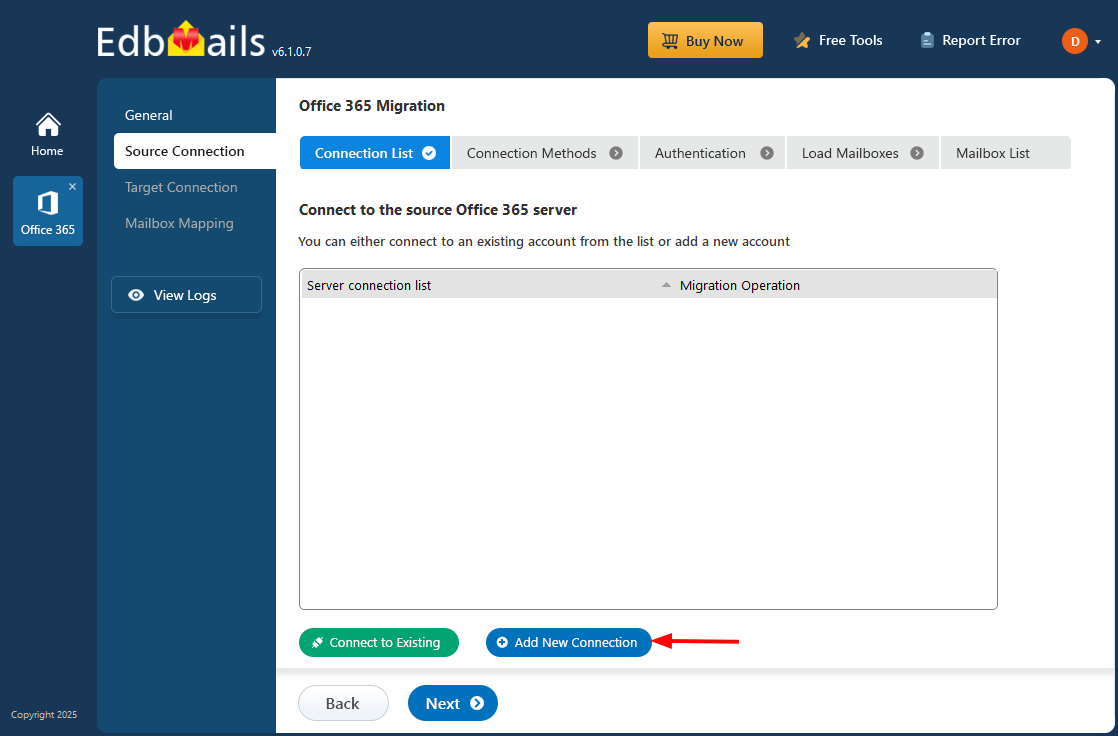
- Click 'Add New Connection'. For a previously-saved connection, pick it from the list and choose 'Connect to Existing'.
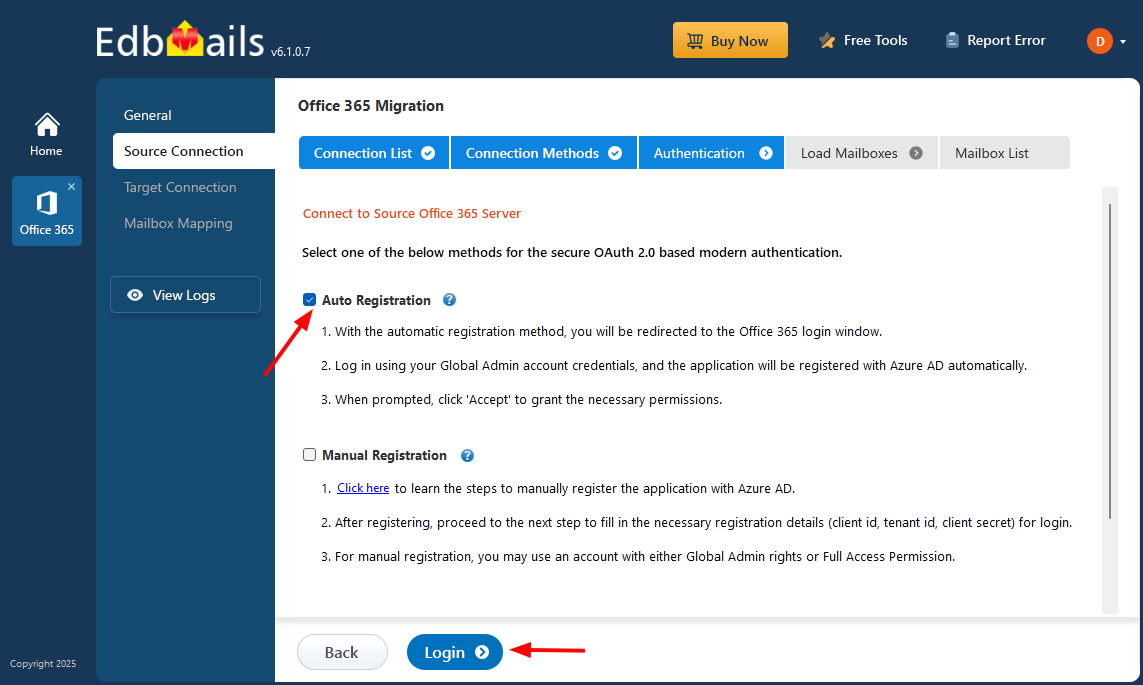
- Select your connection options, click 'Next', then pick an OAuth 2.0 modern authentication method. Reference here if you need it
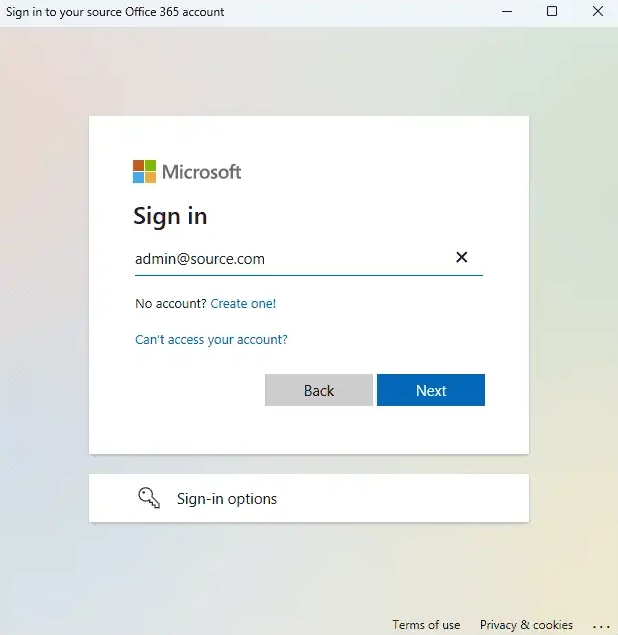
- Sign in on Microsoft's authentication page. After that's done, choose how mailboxes get loaded. By default, EdbMails automatically loads the first 100 mailboxes from the tenant — this is fine for most small to mid-sized migrations. However, due to a Microsoft-imposed limitation, tenants with more than 100 mailboxes cannot be enumerated directly beyond that count, so for larger environments you'll need to load mailboxes from a CSV file instead. The CSV method also gives you explicit control over exactly which mailboxes appear in the list, which is useful even on smaller tenants when you want a curated scope.
- Tick the mailboxes you want to migrate. Hit 'Next'.
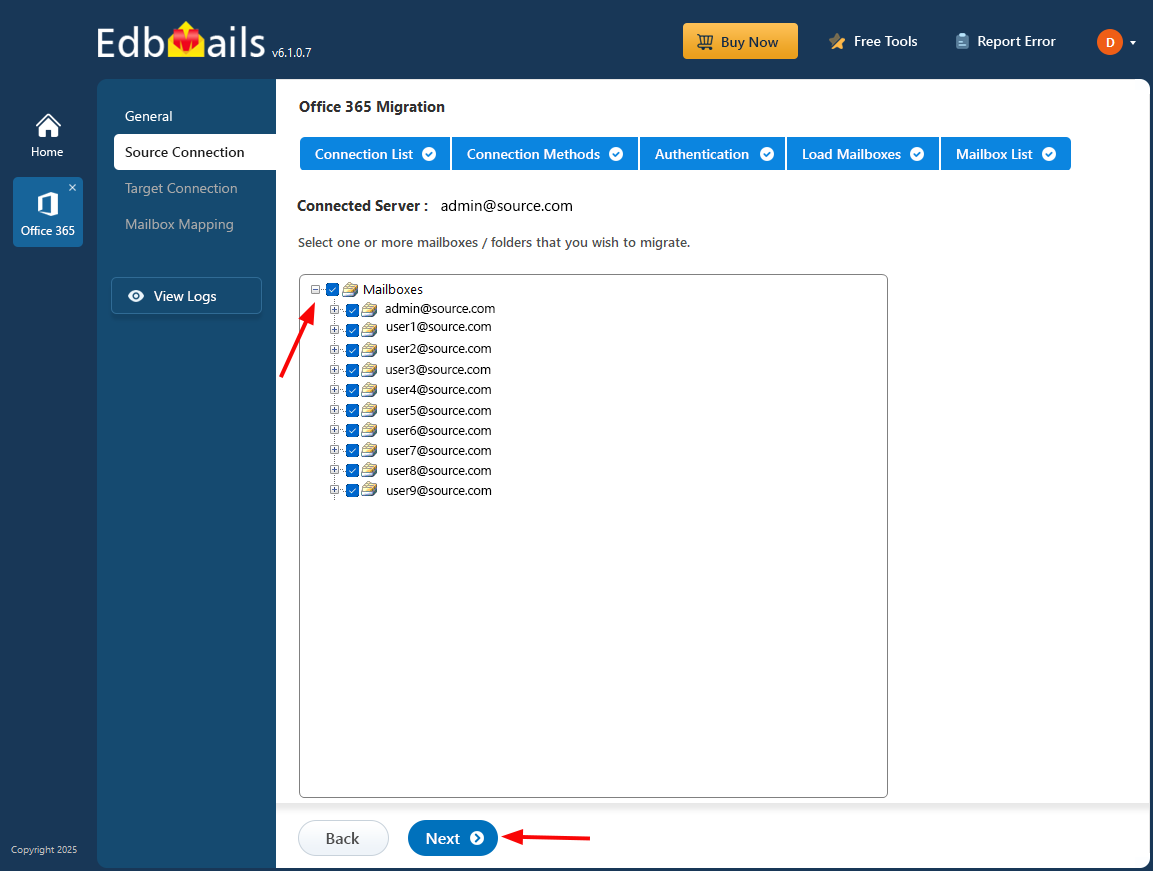
- Click 'Add New Connection'. For a previously-saved connection, pick it from the list and choose 'Connect to Existing'.
Step 4: Connect to the target
- Same pattern as the source side. 'Add New Connection' for a fresh setup, 'Connect to Existing' to reuse one.
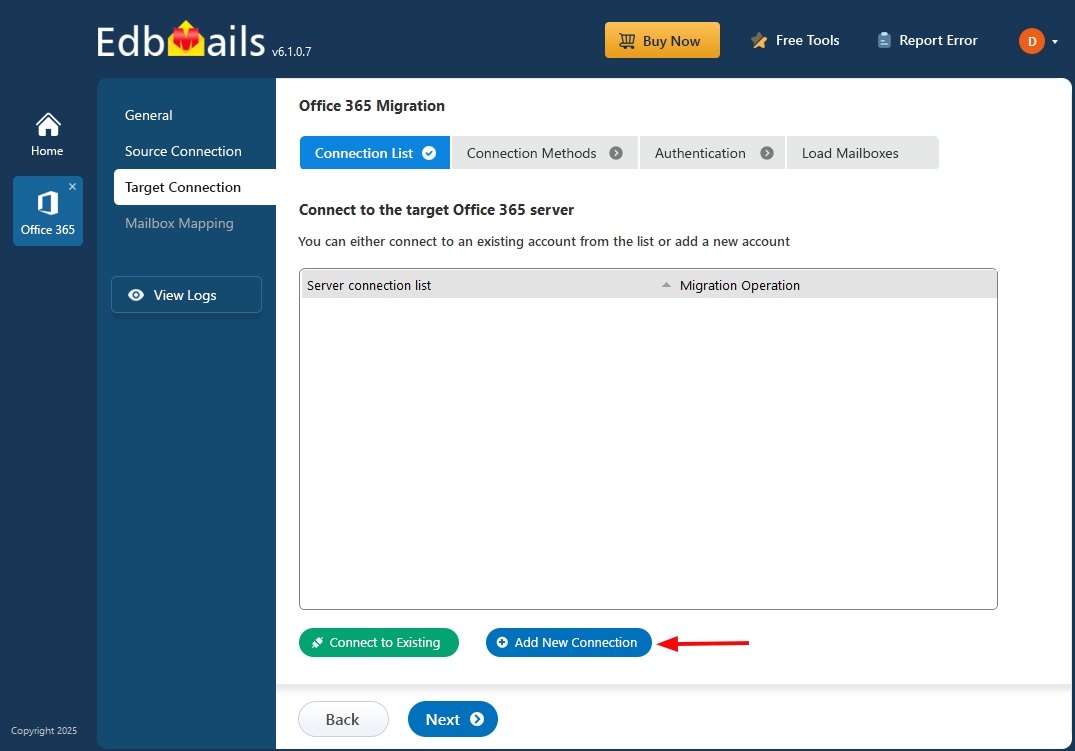
- Pick your connection options and authentication method, then sign in to Microsoft. As on the source side, EdbMails loads up to 100 target mailboxes automatically by default. If the destination tenant has more than 100 mailboxes — which is common in M&A and consolidation scenarios — you'll need to supply the list via CSV to work around the Microsoft enumeration limit. Load the target mailboxes using whichever method fits your tenant size.
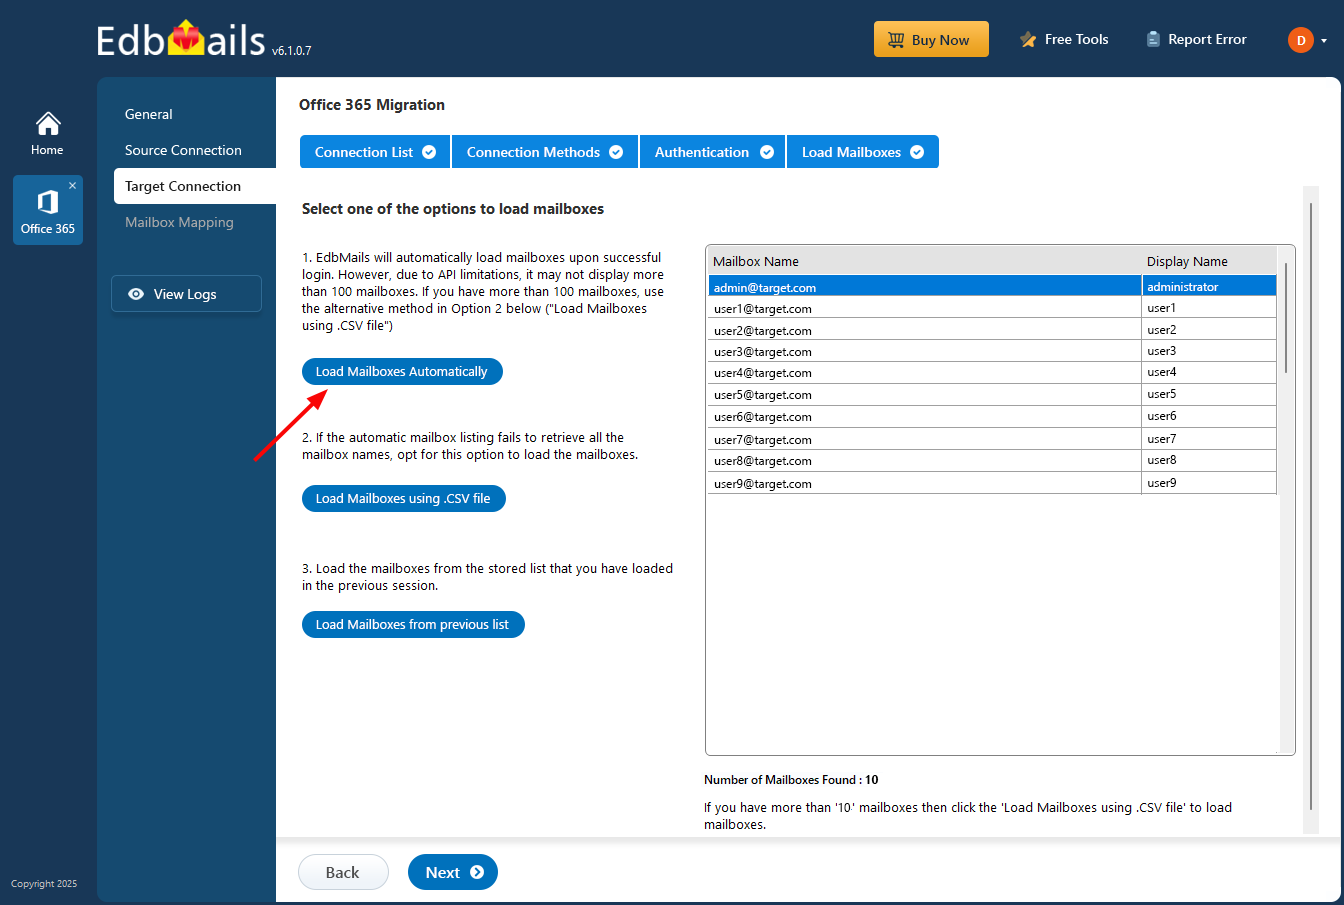
- Same pattern as the source side. 'Add New Connection' for a fresh setup, 'Connect to Existing' to reuse one.
Step 5: Map source to target
- Pick a mapping option. For most migrations, EdbMails' automatic mapping — matching by display name, first/last name, and email address — handles 95% of cases correctly.
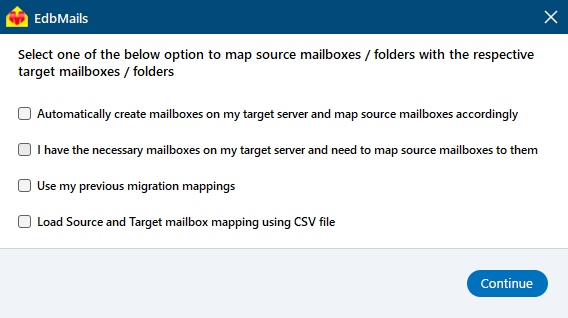
- Override the automatic mapping manually wherever you need to. Common cases: people who changed their last name between source and target, mailbox consolidation where two source mailboxes map to one target, or test mailboxes you want to point somewhere specific.
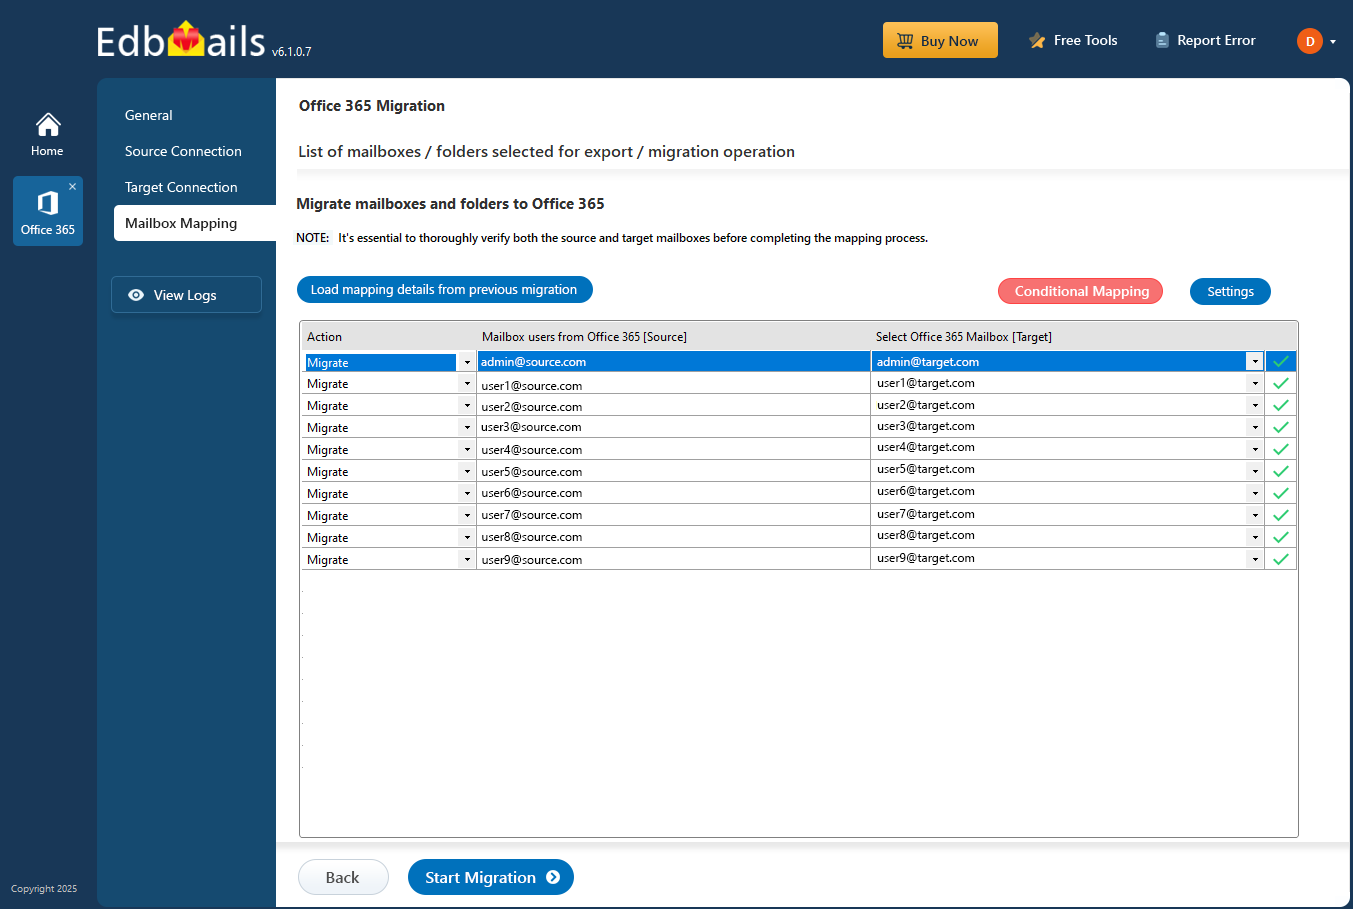
- Pick a mapping option. For most migrations, EdbMails' automatic mapping — matching by display name, first/last name, and email address — handles 95% of cases correctly.
Step 6: Start the production run
- Hit 'Start Migration'. The tool runs in the background. You'll get a notification when it's done.
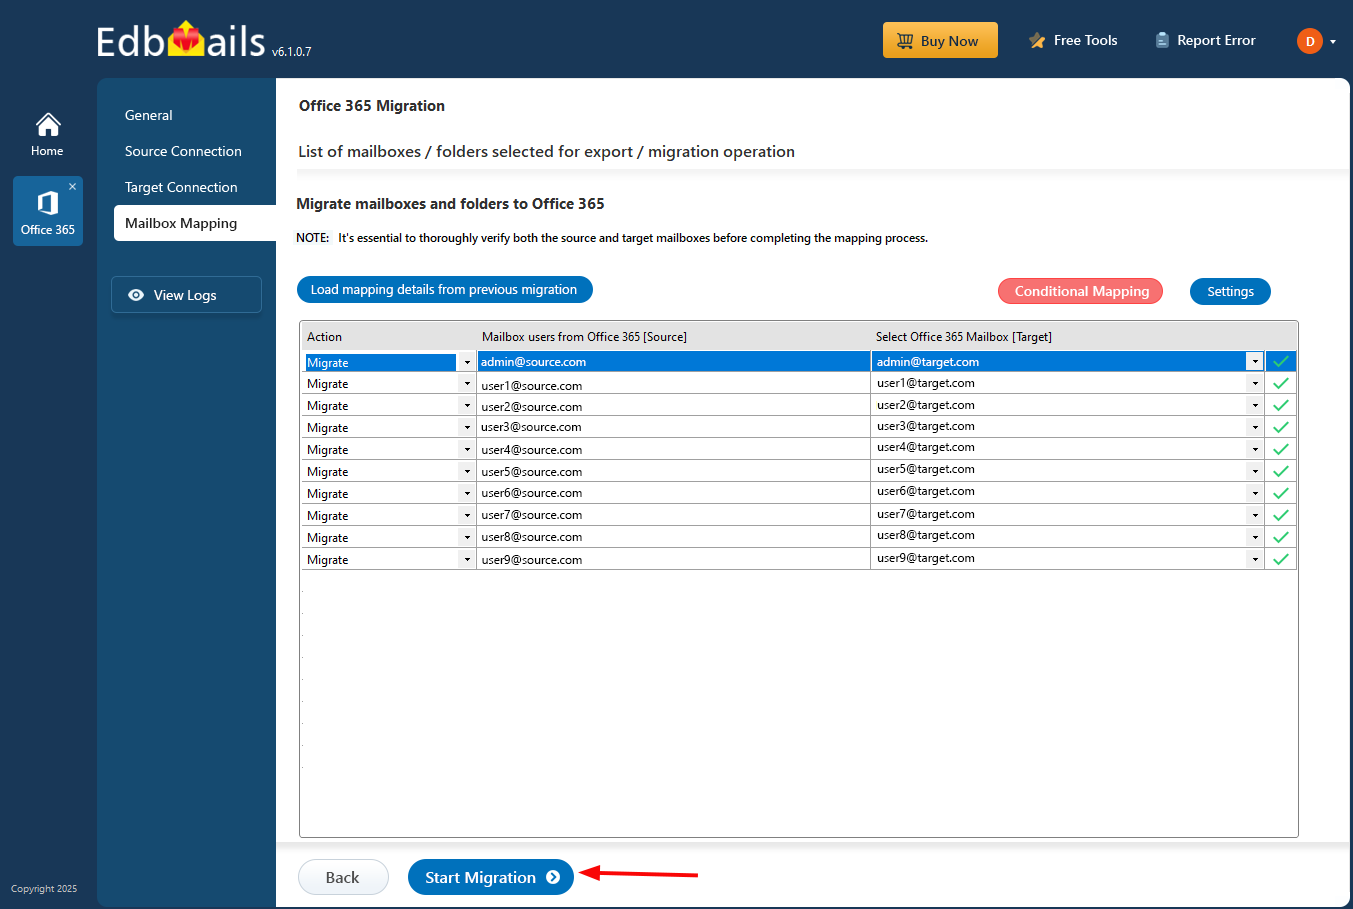
- Click 'View Logs' any time to see the migration report. Pause and resume work at any point — handy if something else needs the bandwidth, or if you need to take the migration machine down for an update
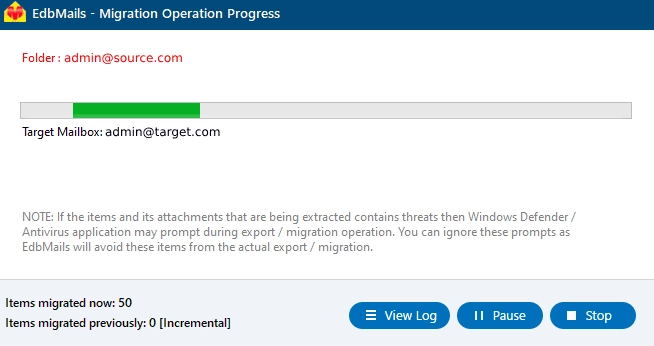
- Hit 'Start Migration'. The tool runs in the background. You'll get a notification when it's done.
Office 365 Post-migration Activities
- MX records and Autodiscover
Add your domain to Office 365 if you haven't already. Then update the MX records so new mail starts routing to the target tenant. Autodiscover needs configuring too — otherwise Outlook won't know how to find the migrated mailboxes.
- Run a final delta sync
Between the time the main migration finished and the MX cutover, new mail kept arriving in the source tenant. Run one more incremental migration pass after the MX switchover to pick up anything that landed in the gap. EdbMails only moves the deltas — items the previous run didn't see — so this is fast even on large mailboxes. Most teams forget this step. The ones who run it have noticeably cleaner go-lives.
- Clear Outlook's Auto-Complete list
This catches people. Outlook caches the email addresses users have sent to, and those cached entries still point to the old tenant after migration — so a reply to a colleague will silently fail. Microsoft's guide to managing Auto-Complete covers the cleanup.
- Recreate Outlook profiles
- Make sure everyone's on a current version of Outlook. Old versions can have authentication issues against the new tenant.
- Rebuild Outlook profiles for any user reporting connection problems.
- Set the new server details — address, username, password.
- Send a test email both ways to confirm everything's flowing.
- Reapply shared mailbox permissions
Worth calling out separately: shared mailboxes migrate cleanly, but only the store-level permissions carry over. Access permissions — who can open the mailbox, who can send-as, who has folder-level delegation — almost always need to be reapplied on the target side. Audit a sample of shared mailboxes within the first 48 hours of go-live. This is one of the most common sources of post-migration support tickets.
- Retire the old subscription
Once you've verified the migration succeeded and nobody's still working out of the old tenant, cancel the old Office 365 subscription and remove any domains that aren't needed anymore. Don't rush this — give it at least two weeks of running on the new tenant before pulling the plug on the source. People will surface things you missed.
- MX records and Autodiscover
Why Choose EdbMails for Office 365 Migration?
Plenty of tools claim to do tenant-to-tenant migration. A few things separate the ones that actually deliver from the ones that don't:
- No PowerShell scripting — the whole workflow is GUI-driven, which matters if the person running it is a sysadmin who hasn't touched PowerShell in years.
- OAuth 2.0 sign-in through Microsoft's own sign-in page — credentials never touch EdbMails servers.
- Incremental delta migrations — re-run the same job and only the changes since last time get moved. No duplicates.
- Concurrent mailbox transfer — up to 20 at once. Cuts a week-long migration down to days on large projects.
- Zero downtime — source mailboxes stay live throughout. Users keep working in the old tenant while data moves to the new one in the background.
Frequently Asked Questions (FAQ)
How long does a tenant-to-tenant migration take?
Can I migrate between Office 365 tenants in different geographic regions?
Is there any downtime during the migration?
Can I migrate only some of the data, not everything?