


Office 365 Archive Mailbox Migration: Step by Step Guide
Migrating Office 365 archive mailboxes honestly used to give IT admins nightmares. Between worrying about lost emails, duplicate items piling up, and keeping everything compliant during the switch, it was a lot to manage. But things have gotten much simpler, and once you understand the process properly, it's actually very straightforward.
So why bother migrating to Office 365 archive mailboxes in the first place? Storage costs alone are reason enough. Instead of throwing money at on-premises servers every time inboxes get too full, you let Microsoft's cloud handle it. Emails get automatically moved to archive storage, primary mailboxes stay clean and fast, and your team stops complaining about hitting storage limits every other month. Compliance also becomes far less of a headache, historical emails are organized, searchable, and ready whenever an audit comes around.
Now, the actual migration part. This is where most people either get it right or run into problems they didn't see coming. The tool you use matters more than people realize. After trying a few options, EdbMails Office 365 migration software genuinely stands out. It doesn't just move data from point A to point B, it does incremental migration, meaning it only picks up new or changed items each time it runs, so you never end up with duplicate emails cluttering the archive. Even mailboxes with years worth of data migrate without any issues.
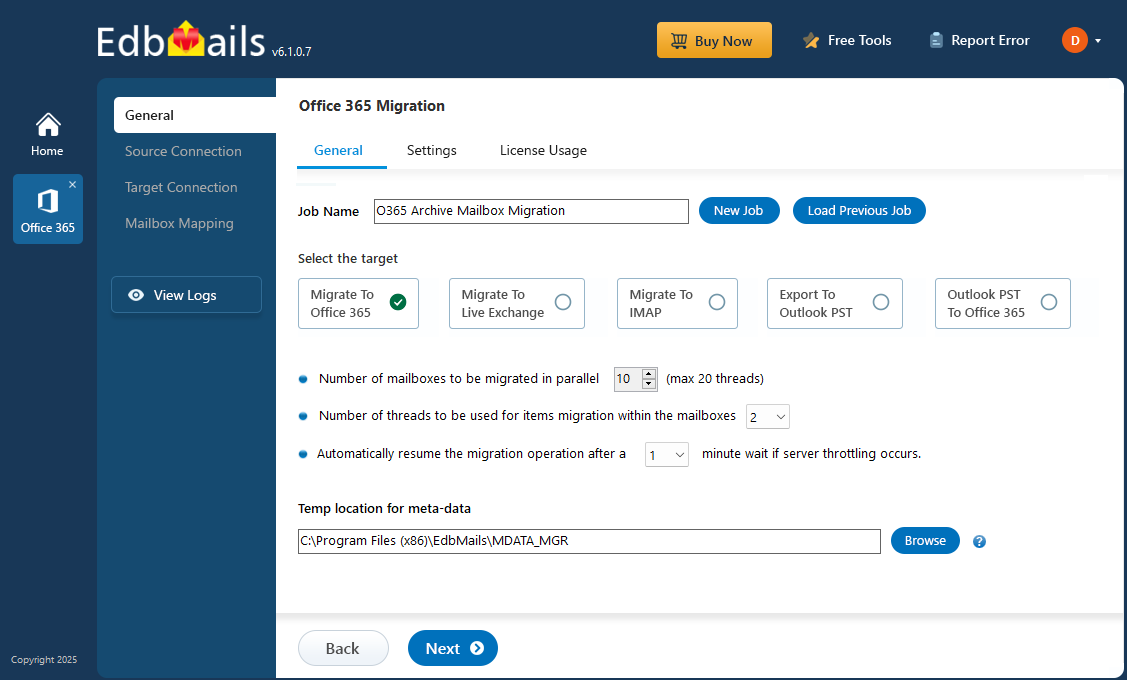
Throughout the whole process, EdbMails keeps you informed with detailed reports so nothing feels like a black box. You can see what migrated, what's pending, and flag anything unusual immediately. By the end, everything is exactly where it should be, archived emails accessible, compliance intact, and your storage situation finally under control.
Office 365 Archive Mailbox Migration - Planning
- Decide to migrate archive mailbox to primary mailbox or other archive mailbox in Office 365.
- If migrating to an Office 365 Archive mailbox, then enable auto-expanding archiving to store more items.
- Your Archive mailboxes are initially given 100GB of storage. Auto-expanding archiving will provide additional storage when necessary, and will expand up to 1.5 TB per mailbox.
- Ensure your Exchange Online license supports the archiving feature. Unlimited archiving need an Exchange Online Plan license or an Exchange Online Archiving license.
- Verify the auto-expanding archiving limitations and verify compliance with Microsoft policies. See how auto-expanding archiving works.
- Perform a test migration before the real migration.
Office 365 Archive mailbox migration : Pre-migration activities
- Your Entra ID (Azure AD) must have a global admin account with a mailbox for Auto Registration of the EdbMails application and either the global admin or any user with all access permissions can be used for manual registration.
- Check if your network and bandwidth is adequate to support the migration. See the migration performance parameters and best practices for Office 365.
- Ensure that the target Office 365 tenant is prepared with Office 365 tenant roadmap.
- Make sure the archive mailbox is enabled on the target server. See steps to enable online archive in Office 365.
Steps to migrate Archive mailboxes to Office 365
Step 1: Download and install EdbMails software
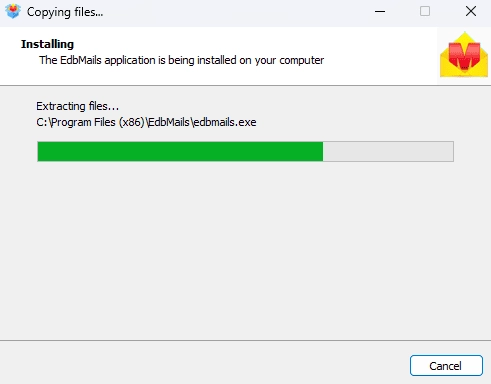
- Download EdbMails and install EdbMails application on a computer running Windows OS.
See the System requirements for EdbMails Office 365 Archive mailbox migration.
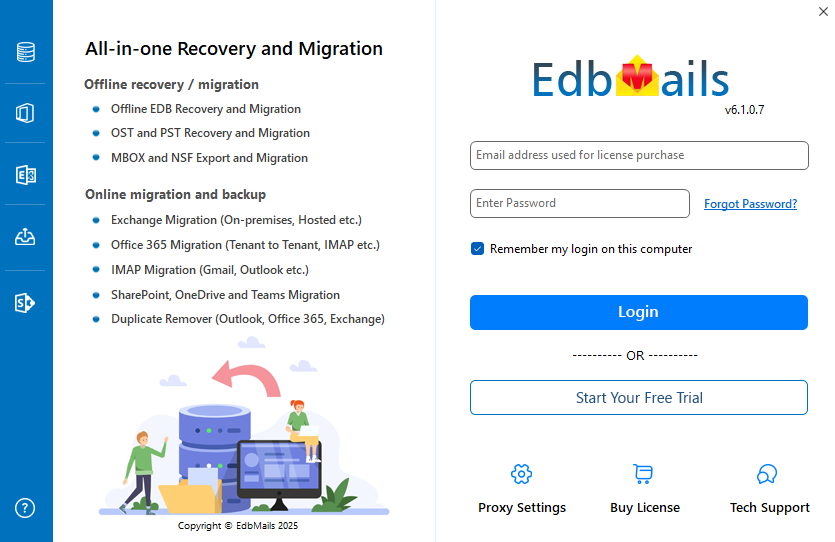
- Launch the application, enter your email address and password, then click ‘Login’ or click ‘Start Your Free Trial’.
- Download EdbMails and install EdbMails application on a computer running Windows OS.
Step 2: Select Office 365 migration product
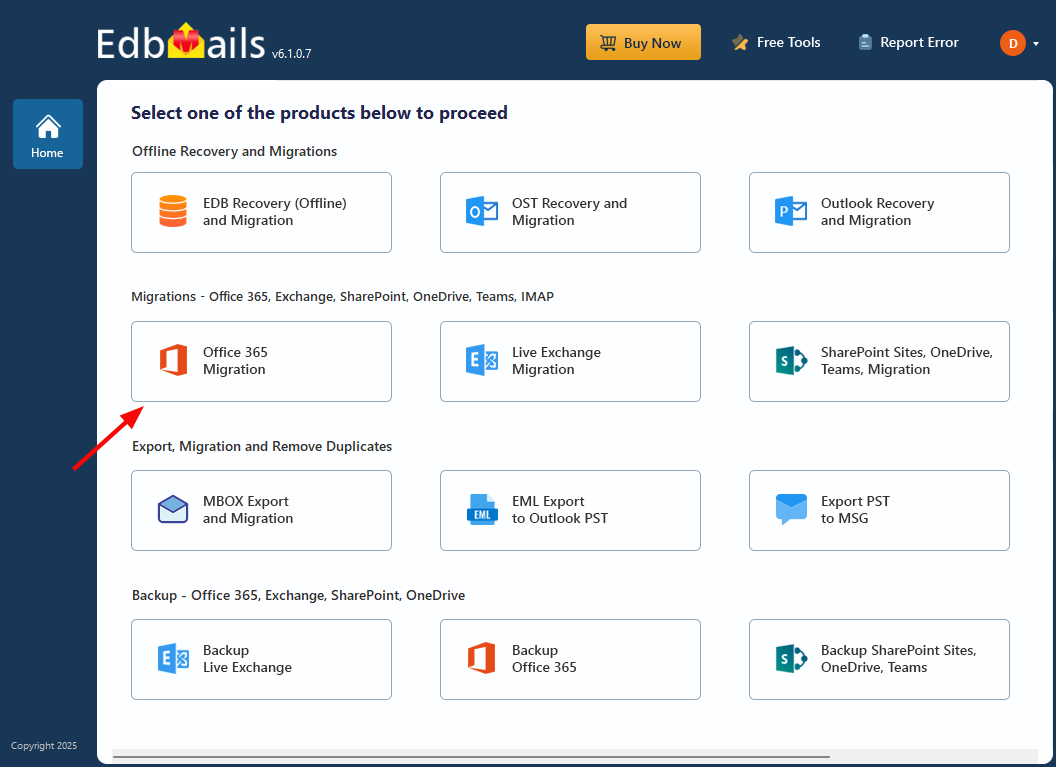
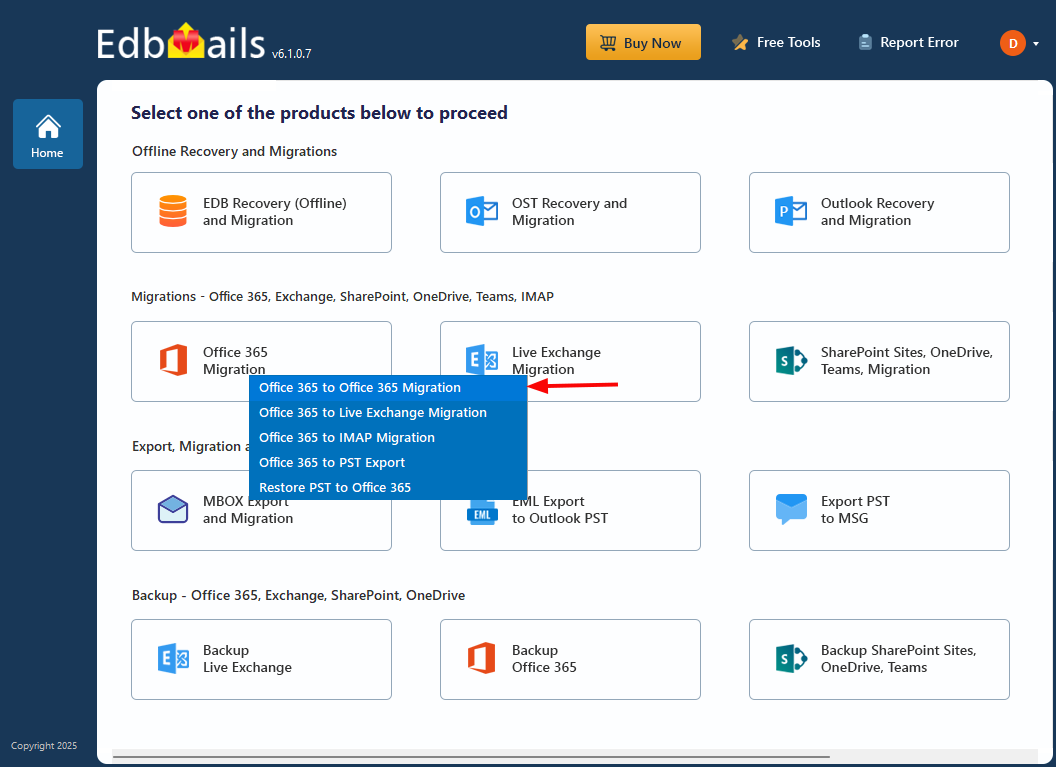
- Choose 'Office 365 Migration' product from the list of products.
- Select ‘Office 365 to Office 365 migration’.
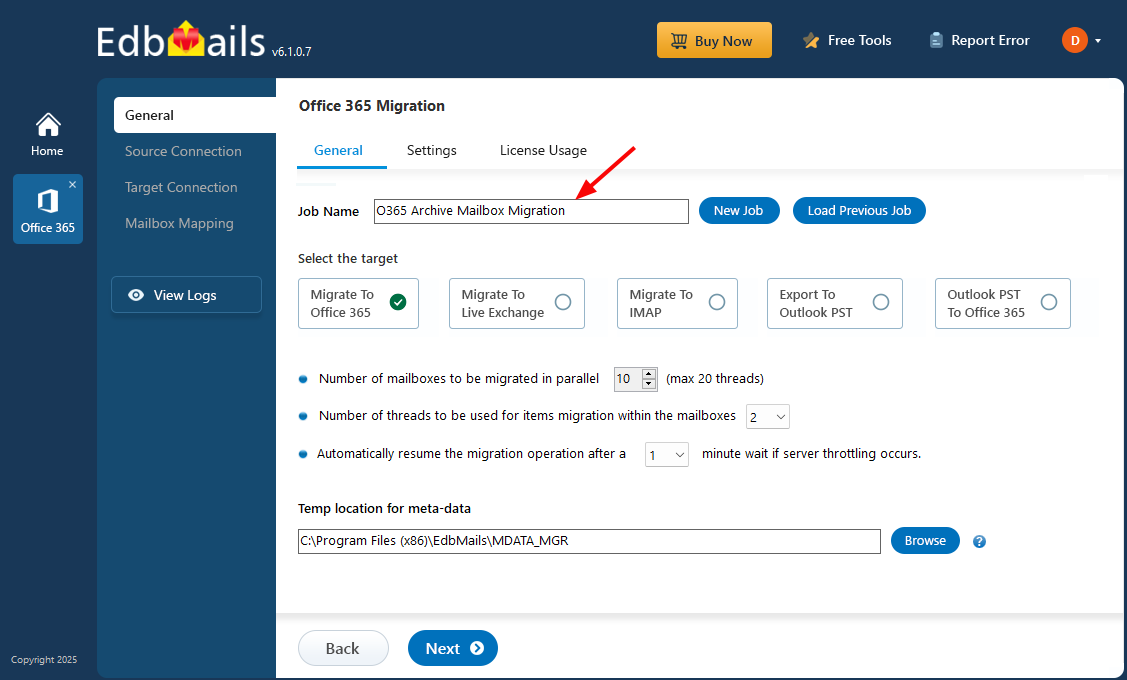
- Keep the default job name or click the ‘New Job’ button to enter the job name of your choice, then click the ‘Next’ button.
- Choose 'Office 365 Migration' product from the list of products.
Step 3: Connect to source Office 365 server
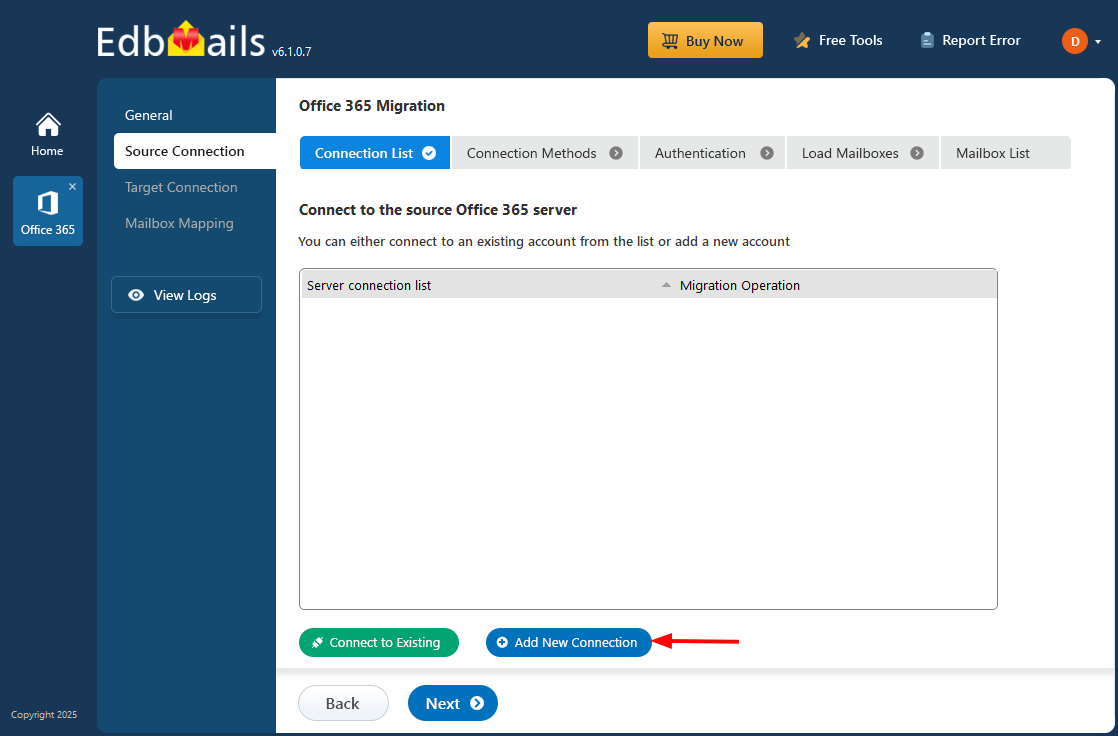
- Click ‘Add New Connection’ to create a new connection to the source Office 365. If you want to use an existing connection, select it from the list and click ‘Connect to Existing’ to continue.
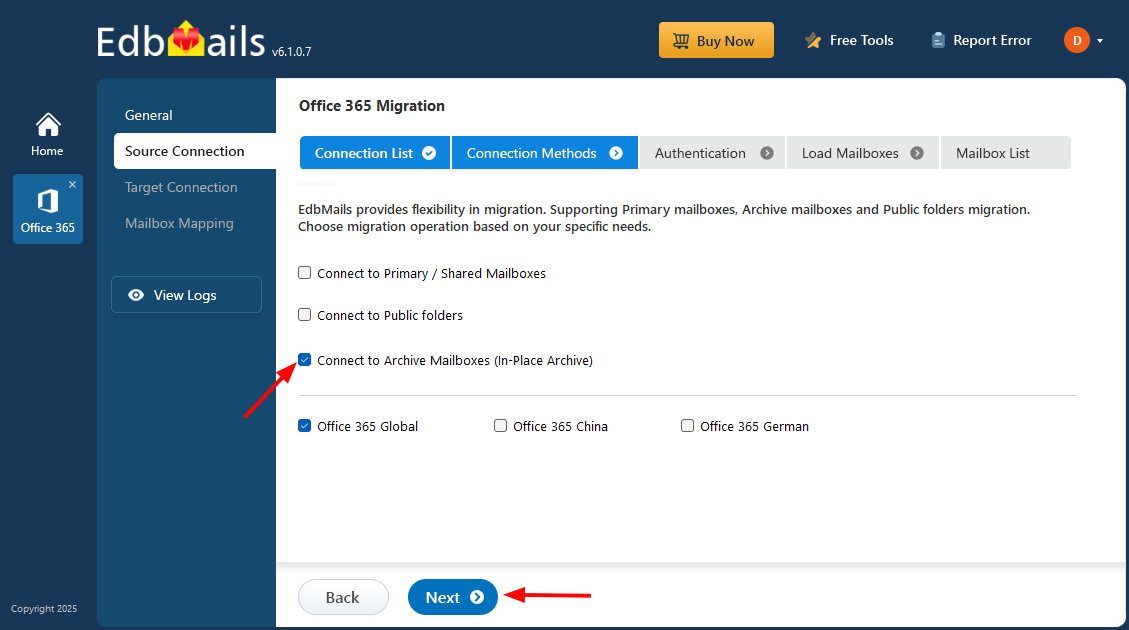
- Choose 'Connect to Archive Mailboxes (In-Place Archive)' and click ‘Next’.
- Choose the required authentication connection method and click ‘Login’ to proceed.
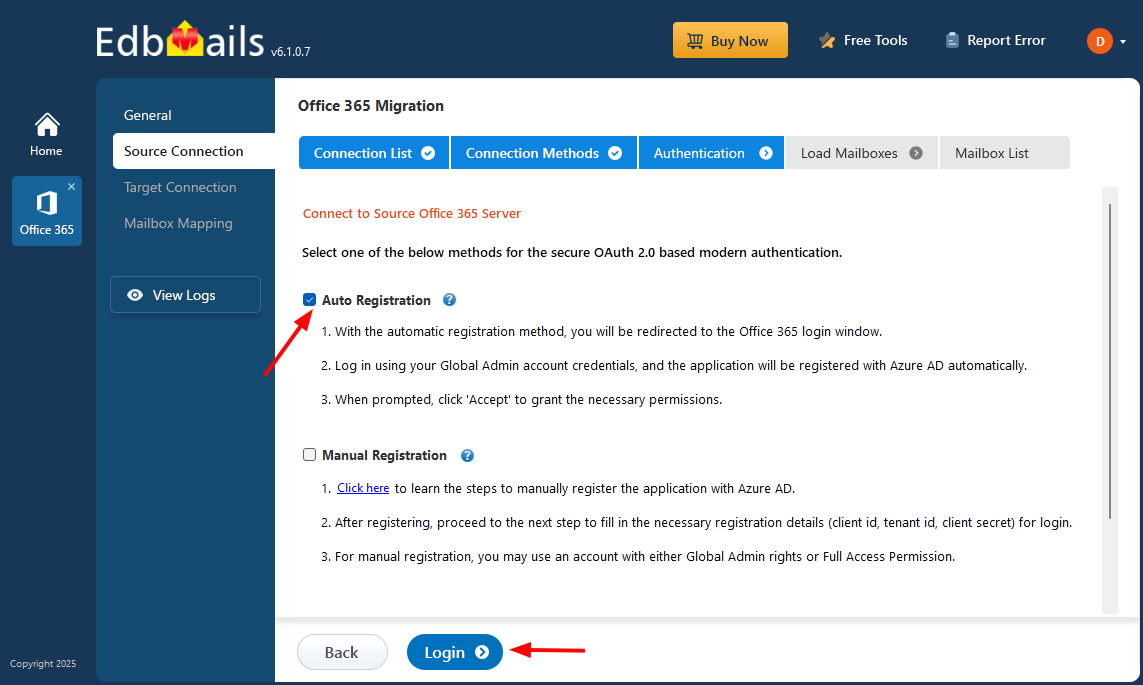
Connect to Office 365 server using secure modern authentication
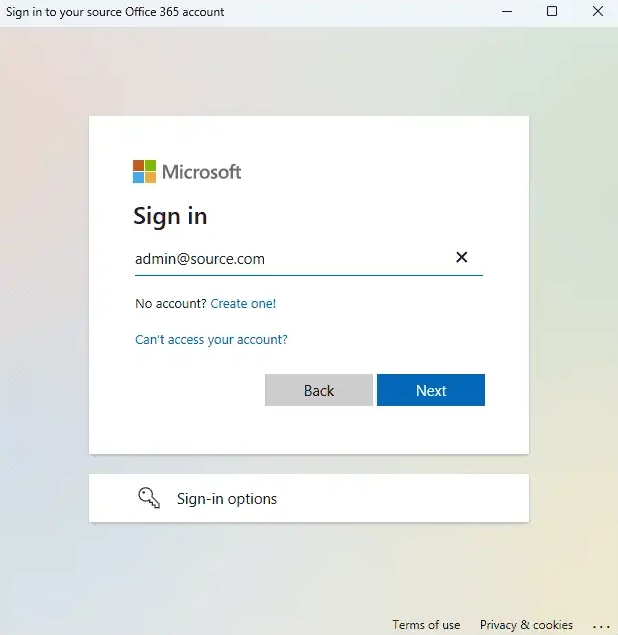
- Sign in on the Microsoft authentication page using a global admin account
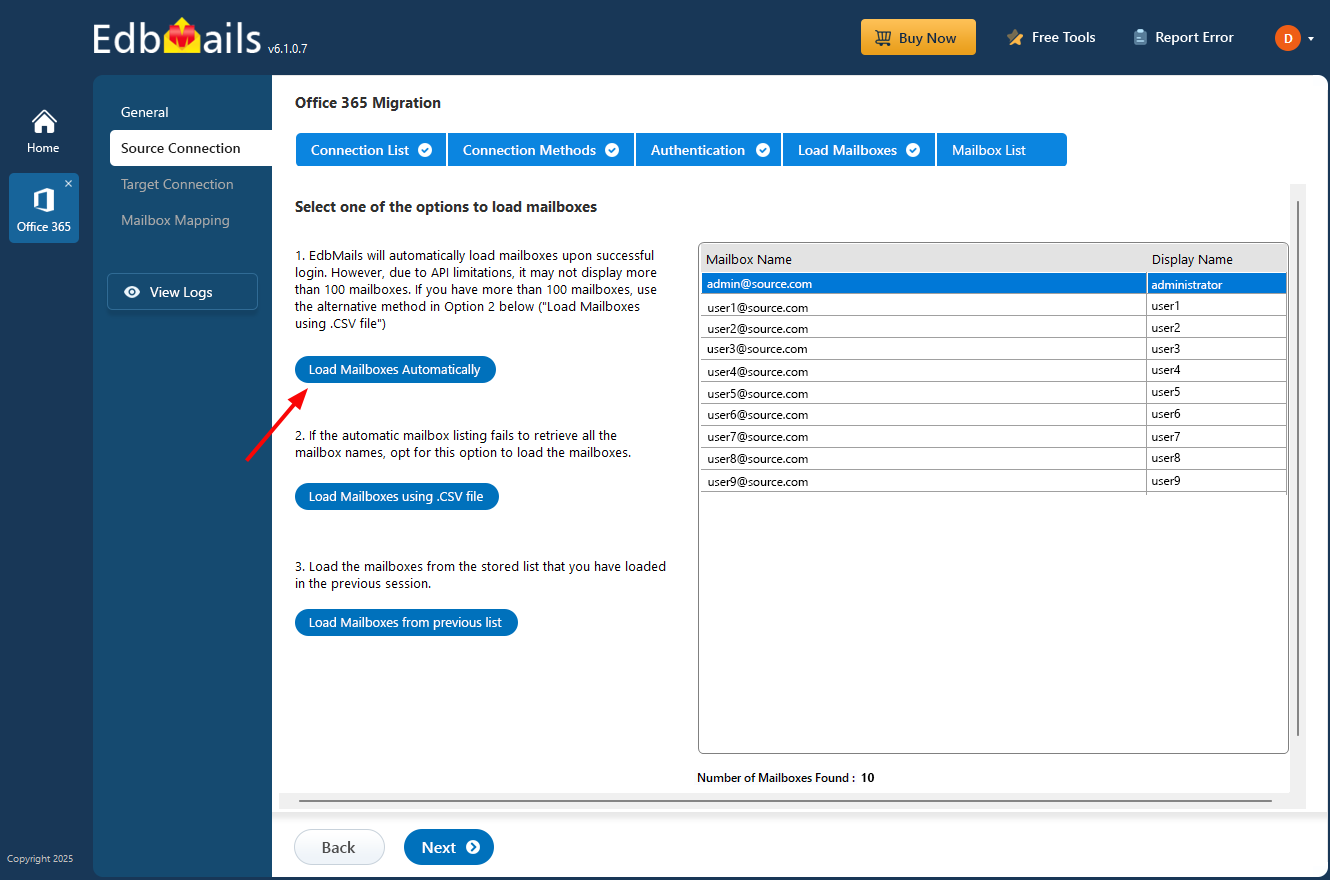
- After the successful authentication, choose one of the methods to load the mailboxes. You can also load and migrate the mailboxes using a CSV file.
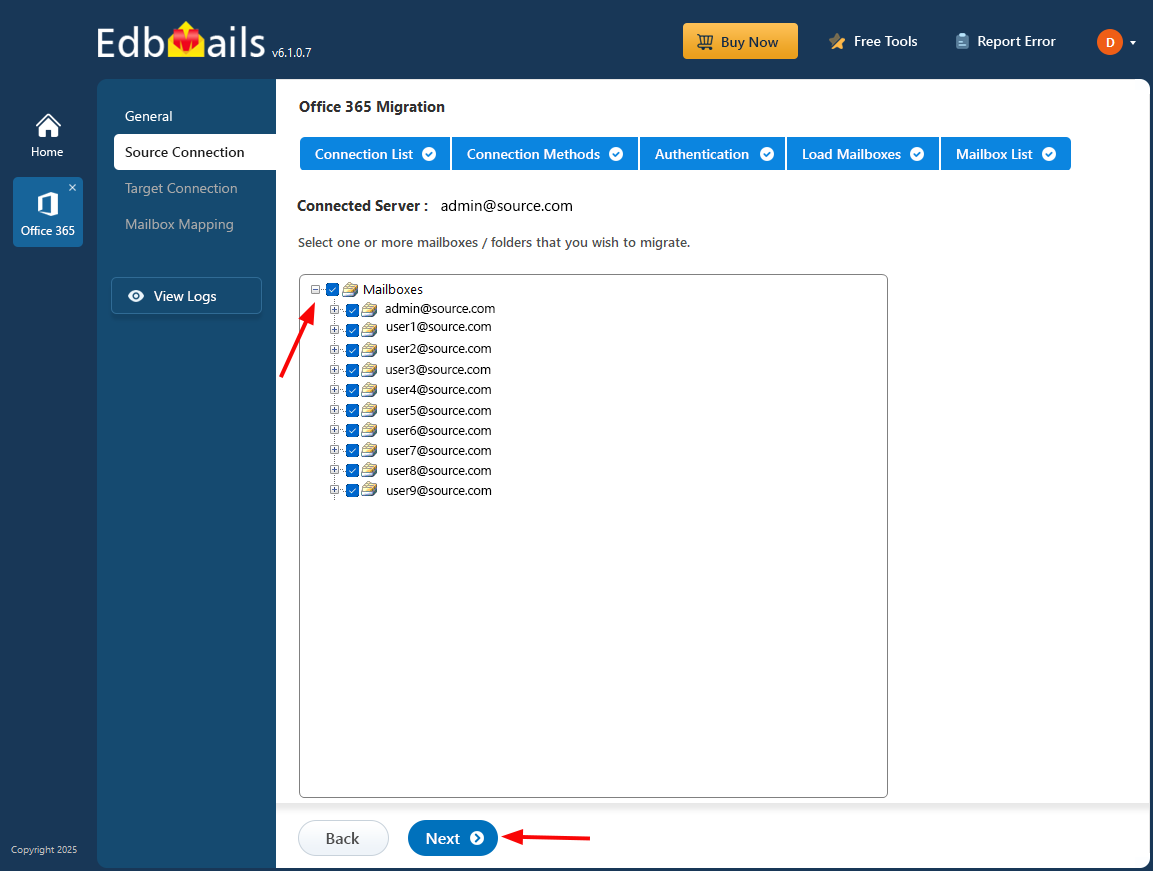
- Choose the archive mailboxes you wish to migrate, then click ‘Next’ to connect to the target server.
Tip:If this is your first time migrating with EdbMails, the migration will be a full migration. For subsequent migrations from the same source to the target, the process will be incremental.
- Click ‘Add New Connection’ to create a new connection to the source Office 365. If you want to use an existing connection, select it from the list and click ‘Connect to Existing’ to continue.
Step 4: Connect to target Office 365 server
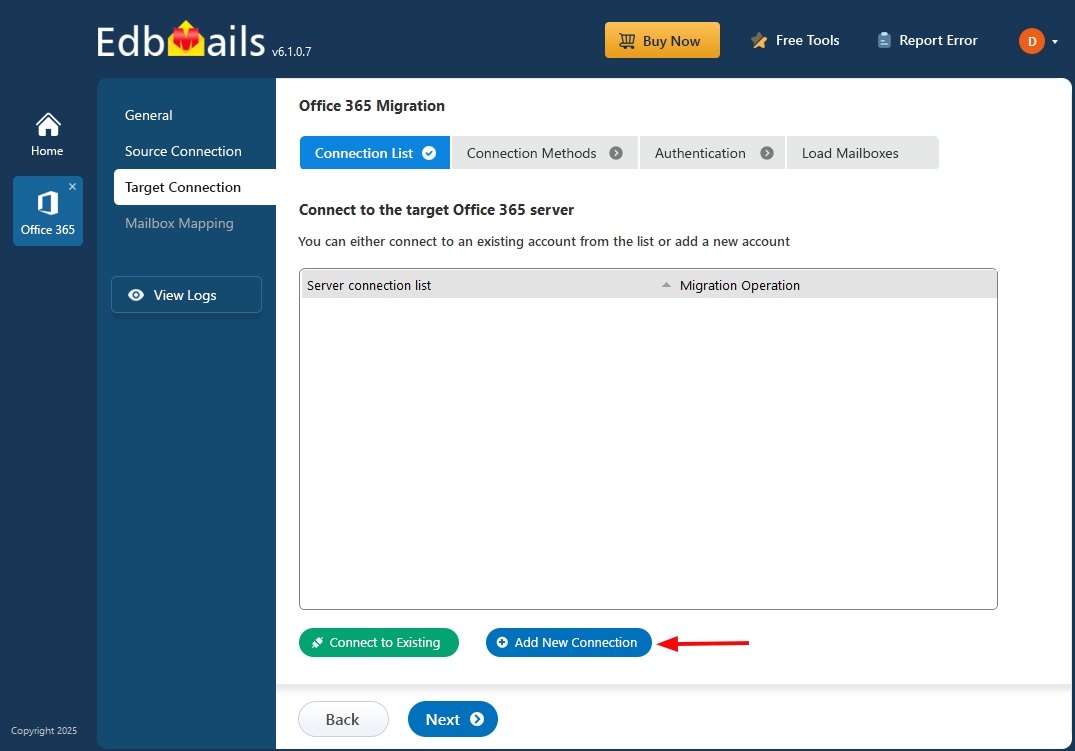
- Click ‘Add New Connection’ to create a new connection to the target Office 365. To use an existing connection, select it from the list and click ‘Connect to Existing’ to continue.
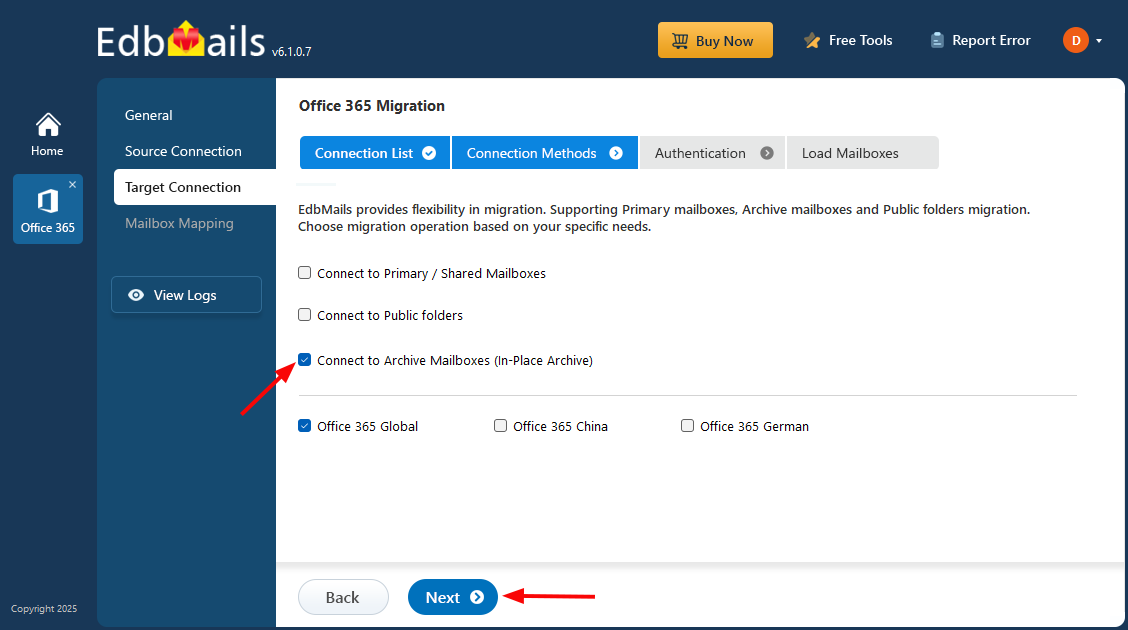
- Choose the necessary connection options and click ‘Next.’ to proceed.
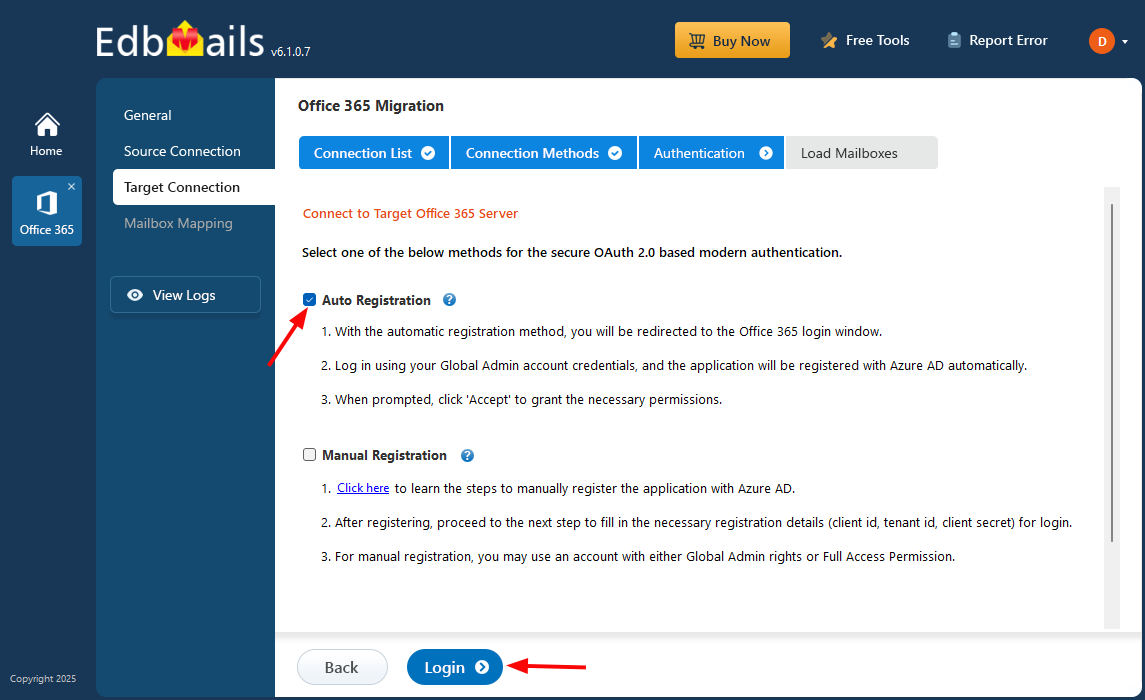
- Choose the required target authentication connection method and click ‘Login’ to proceed.
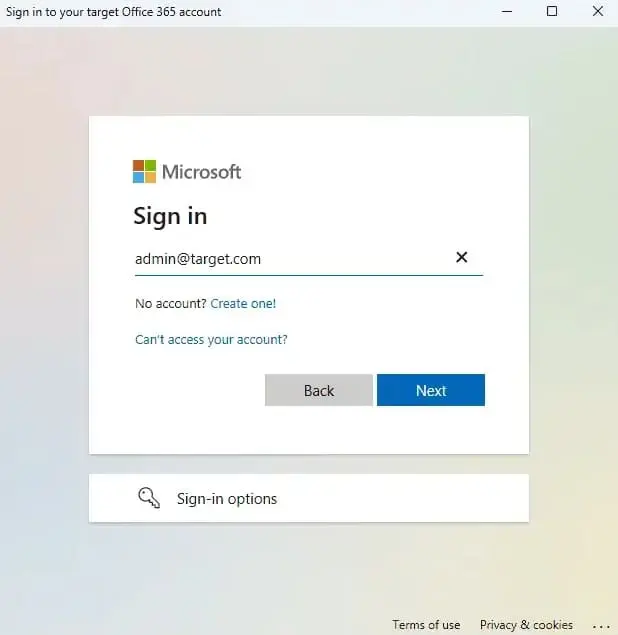
- Authenticate on Microsoft sign-in page.
- Choose a method to load the mailboxes. You can also load them using a CSV file.
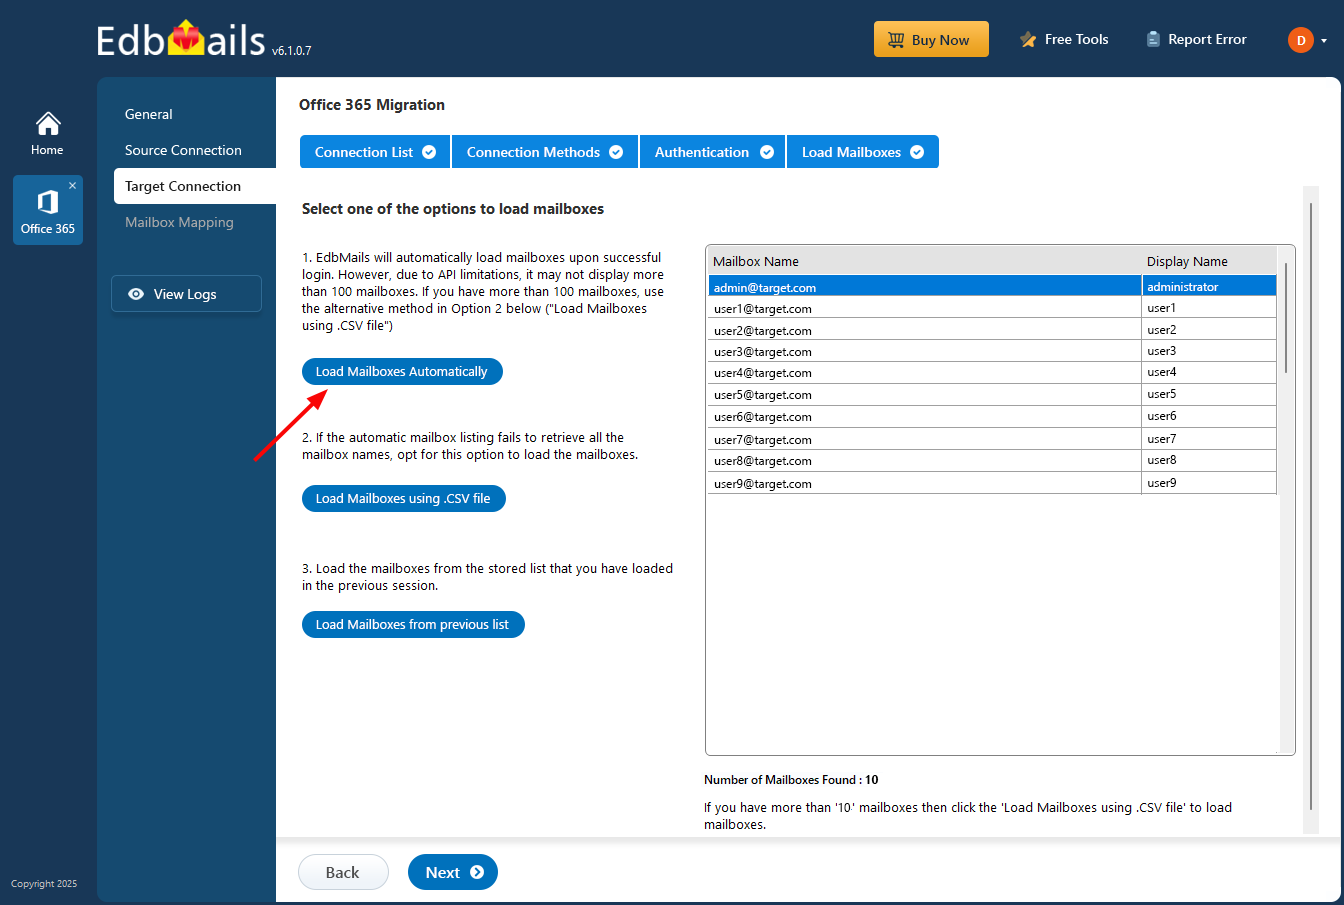
- Click ‘Add New Connection’ to create a new connection to the target Office 365. To use an existing connection, select it from the list and click ‘Connect to Existing’ to continue.
Step 5: Map Archive mailboxes
- Choose the required mailbox mapping option
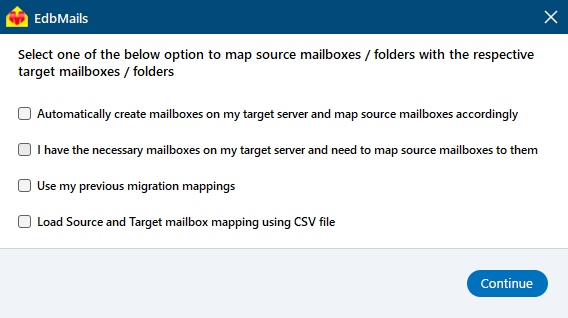
- EdbMails automatically creates mailboxes on your target server and assigns the required licenses.
Click here to know more about automatic mailbox creation
- EdbMails automatically maps archive mailboxes between the source and target servers, which is helpful for large migrations. Alternatively, you can manually map source folders and subfolders to specific target locations if needed.
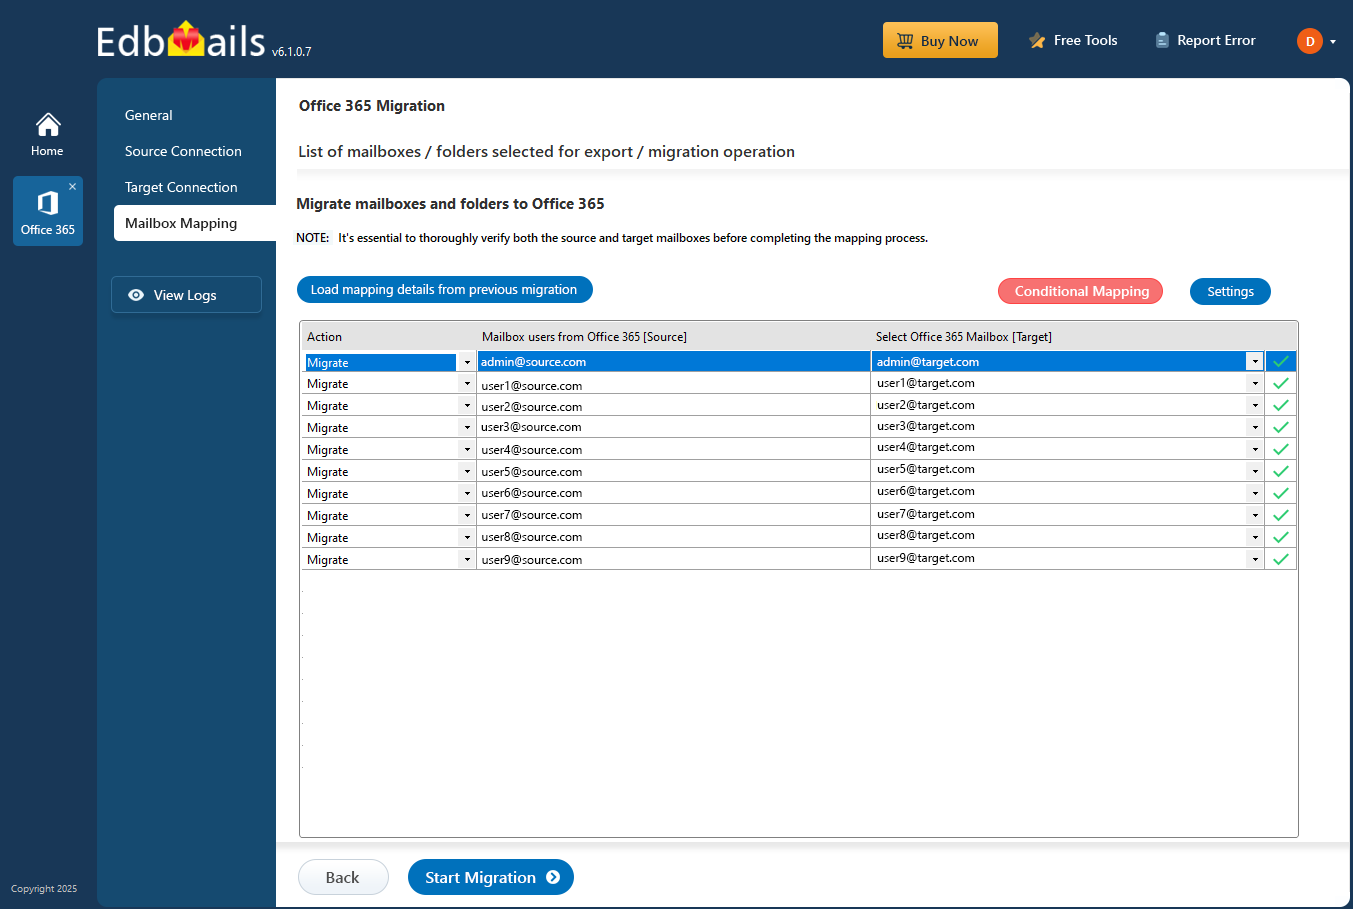
- Choose the required mailbox mapping option
Step 6: Start Office 365 Archive mailbox migration
- Click ‘Start Migration’ to begin the migration process.
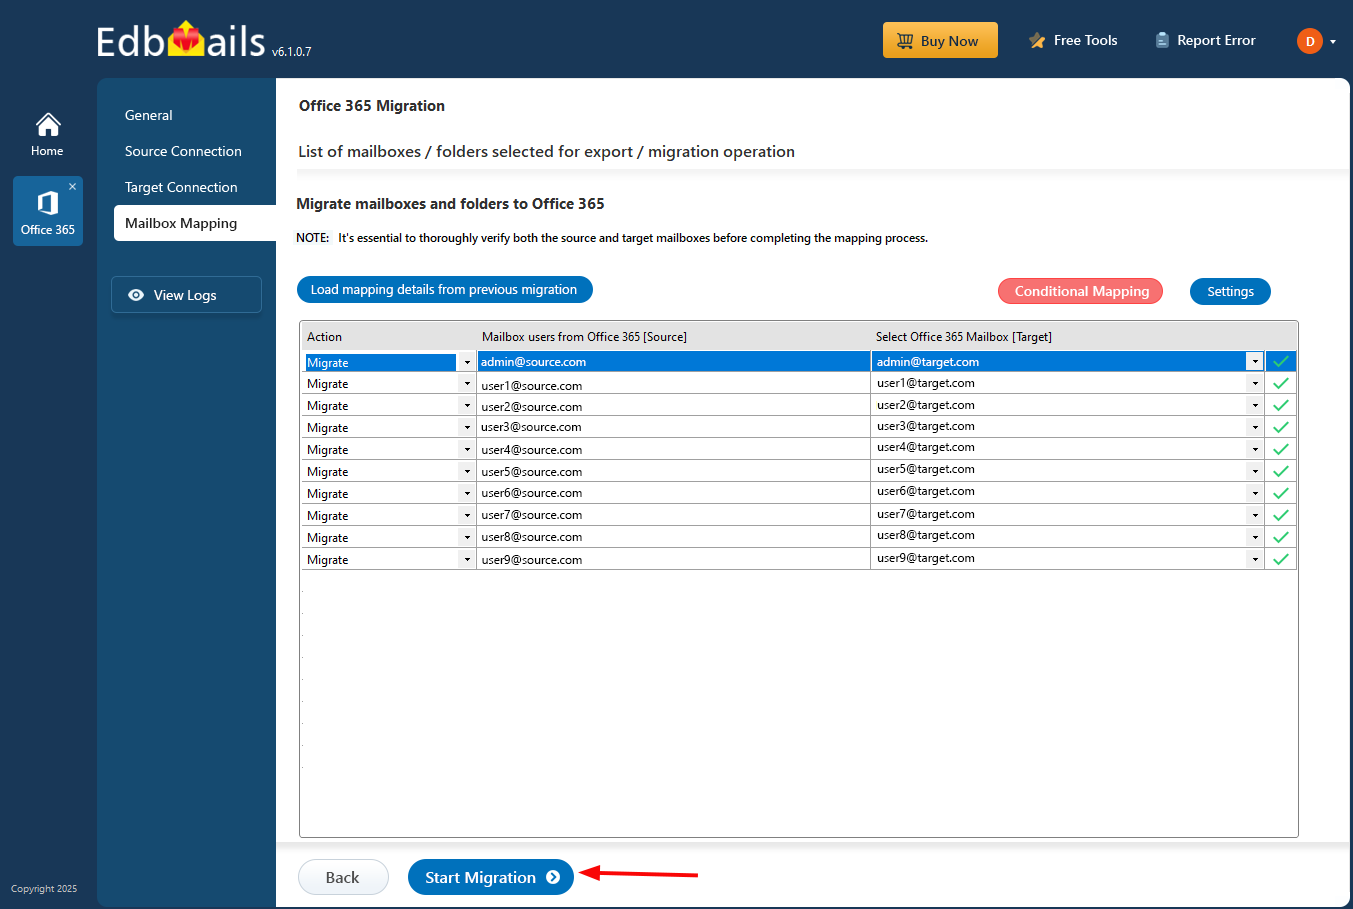
- After the migration finishes, a notification will appear. Click ‘View Log’ to see the migration report.
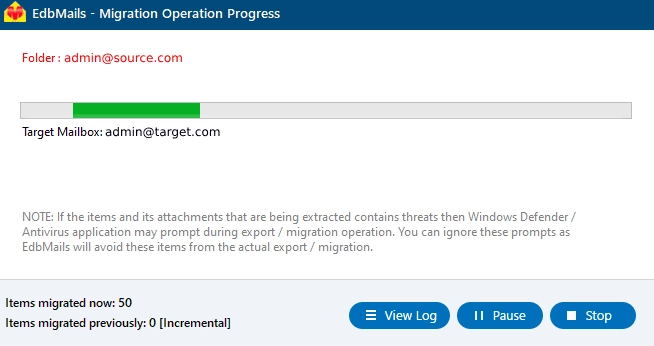
- Click ‘Start Migration’ to begin the migration process.
Archive mailbox migration troubleshooting
See the Archive migration troubleshooting guide for possible solutions related to migration errors. For more information on EdbMails Exchange migration refer to the frequently asked questions (FAQs)
Advantages of EdbMails for Office 365 Archive mailbox migration
- Simple solution to migrate Office 365 Archive mailboxes
EdbMails is an ultimate tool to perform in-place archive migration from one Office 365 tenant to another with minimal steps. The simple and user-friendly interface enables you to select mailboxes and perform migration easily, without requiring technical expertise.
- Incremental Office 365 Archive mailbox migration
EdbMails supports incremental migration, which transfers new and modified items in consecutive migrations. This feature also prevent duplicate items to be migrated to the destination server, and minimize the migration time and save the internet bandwidth.
- Secure modern authentication for O365 login
EdbMails offer secure Office 365 migration tool that offers migration of data using Microsoft's secure APIs. It supports modern Office 365 login using MSAL and OAuth 2.0 which enables you to login to your tenant through the Microsoft login page. It doesn't store any data or login credentials on its servers.
- Include or exclude email items and folders
With EdbMails you get enhanced filter options where you can include/exclude the mails to the archive mailboxes by Date, Subject, sender and receiver address. Additionally, the application provides the option to exclude standard and custom folders from the migration operation.
- Batch or individual Archive mailbox migration
EdbMails facilitates migrating archive mailboxes either individually or in batches. This flexibility is extremely useful for migration at both small and large scales. EdbMails has the capability of migrating the selected entire folder as well as specific items such as attachments, contacts, and calendar to other Office 365 tenants accurately, , ensuring precise and efficient management of your data migration needs.