


Migrate OST to Office 365
Importing data from an OST file into Office 365 is essential when access to the original Outlook profile linked to Exchange, IMAP, or another mail server is no longer available. The OST files can become orphaned, corrupt, or inaccessible, and you will not be able to access your emails, contacts, and calendar items. In such cases, the EdbMails OST to Office 365 Migration tool offers a secure, easy solution to upload OST data directly to Office 365 mailboxes without the need for the original server or Outlook profile. It simplifies the whole process and guarantees that folder structures and message properties are preserved.
Migrating your data to Office 365 gives you a secure cloud-based environment with features like Exchange Online and seamless integration with Microsoft 365. This makes the important information available from any device, even if the original mail server is not available or the OST file is corrupt. Migrating your OST data to Office 365 not only resolves immediate accessibility issues but also modernizes your email infrastructure with long-term flexibility and enhanced collaboration.
EdbMails enhances the migration experience with secure OAuth 2.0 authentication to keep your connection to Microsoft 365 secure while transferring. As a trusted Microsoft partner, it provides a fast and stable migration process that is built for precision and dependability. Its incremental migration feature smartly migrates only new or changed items after the first upload, saving you time, bandwidth consumption, and duplicate entries.
With its built-in preview module that helps you check the mailbox items from the OST file before initiating the migration for absolute clarity and precision. EdbMails provides enterprises the ability to migrate OST data to Office 365 with full data integrity and without disruption with enterprise-grade security, high performance, and efficient workflow.
Prerequisites to Import OST to Office 365
To import OST to Office 365, first, prepare the Office 365 server for OST import as mentioned in the following section.
- Make sure that you meet the network and bandwidth requirements for the migration. See network and migration planning, performance factors and best practices for Office 365 migration.
- Get your target Office 365 tenant ready. See the Microsoft 365 tenant roadmap.
- Select an Office 365 licensing plan that meets your needs. You can also sign up for a 30-day free trial and then decide which plan suits you best. Compare the Office 365 business plans and Office 365 enterprise plans so you can make an informed decision about which is best for your organization.
- Create mailboxes for your organization’s users and assign the appropriate licenses.
Add users and assign licenses to Office 365 users
- In case you want to import a Public folder from an OST file into Office 365, ensure that you create and configure the Public folder mailboxes on the target server.
- To migrate In-Place archives to Office 365, enable the archive mailbox on the target server. See how to enable online archive in Office 365
- If you want to receive emails from the source to a custom email domain, you need to add and verify the custom domain on Office 365 after migration.
Follow the steps to add a custom domain to Office 365 and the steps to add DNS records to connect your domain.
- Configure Office 365 to send and receive large messages
Follow the steps to increase the message size on Office 365 to 150MB.
Steps to Import OST to Office 365
Step 1: Download EdbMails OST to Office 365 Migration Tool
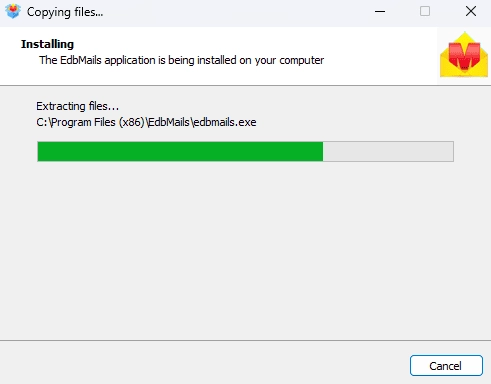
- Download and install the EdbMails application on your computer.
- See a detailed list of EdbMails system requirements for OST file conversion
- Launch the EdbMails application.
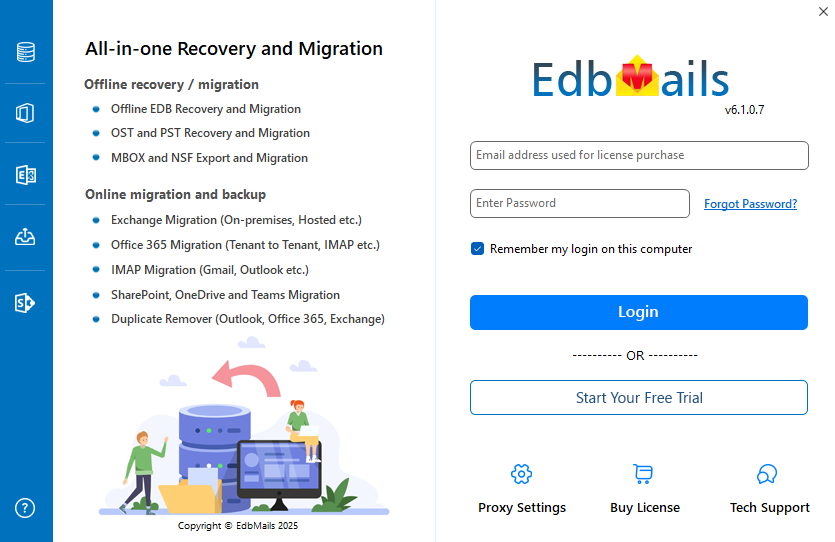
- Sign in using your email address and password, then click ‘Login’. If you’re new to EdbMails, simply select ‘Start Your Free Trial’ to continue with the trial version.Note: The Free Trial version allows you to explore all features and migrate up to 30 items from each and every folder. To migrate all the items, a license is required.
Click here to purchase the license from the EdbMails website.
Once your purchase is complete, close and reopen the EdbMails application, then log in again using the same email address and password used during license purchase. Your license will be activated automatically.
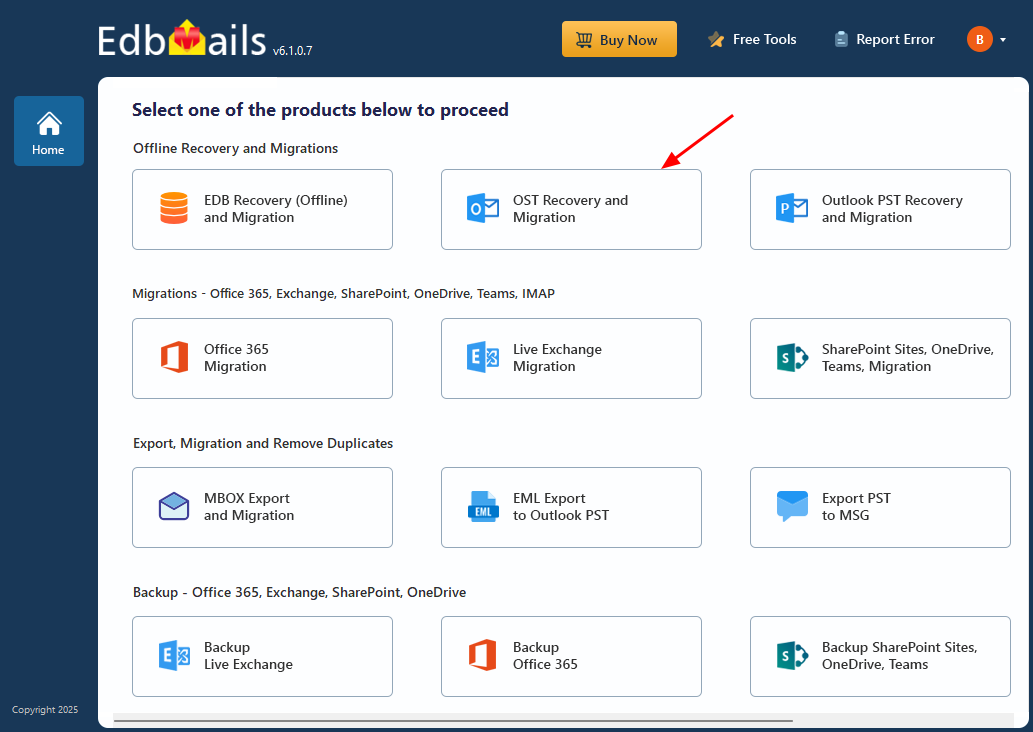
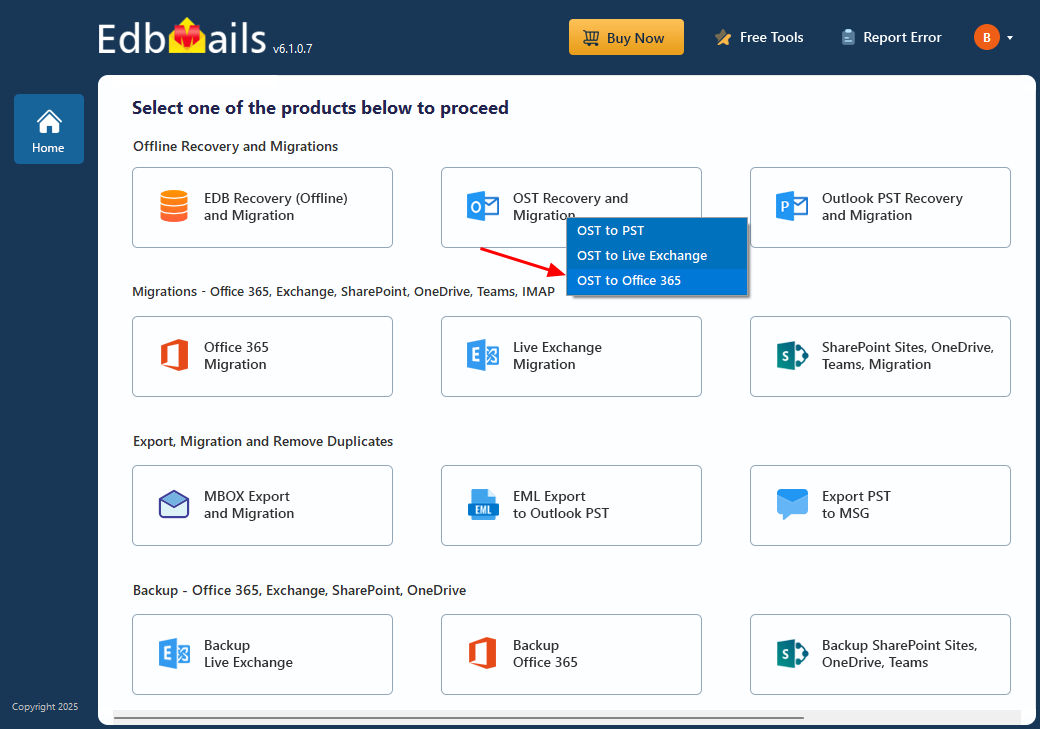
- Select ‘OST Recovery and Migration’
- Select ‘OST to Office 365’.
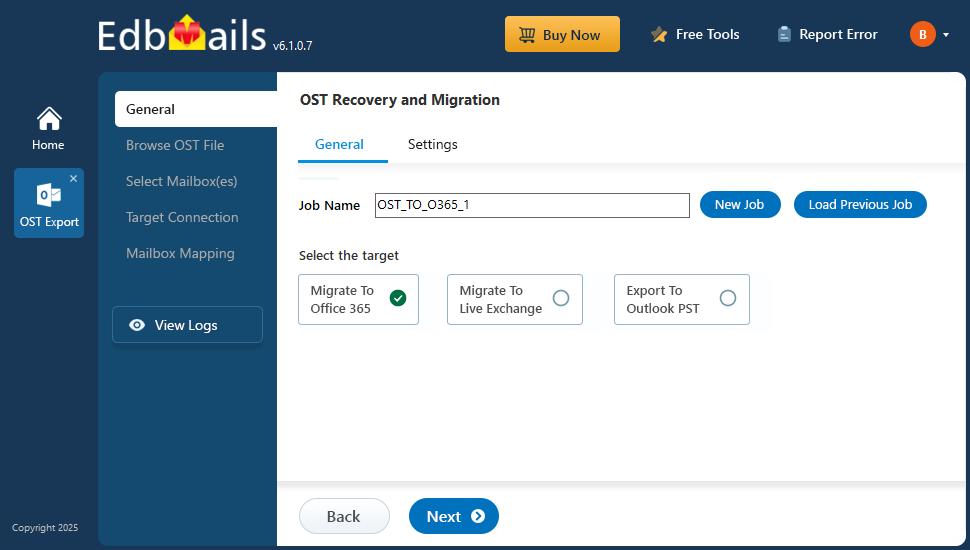
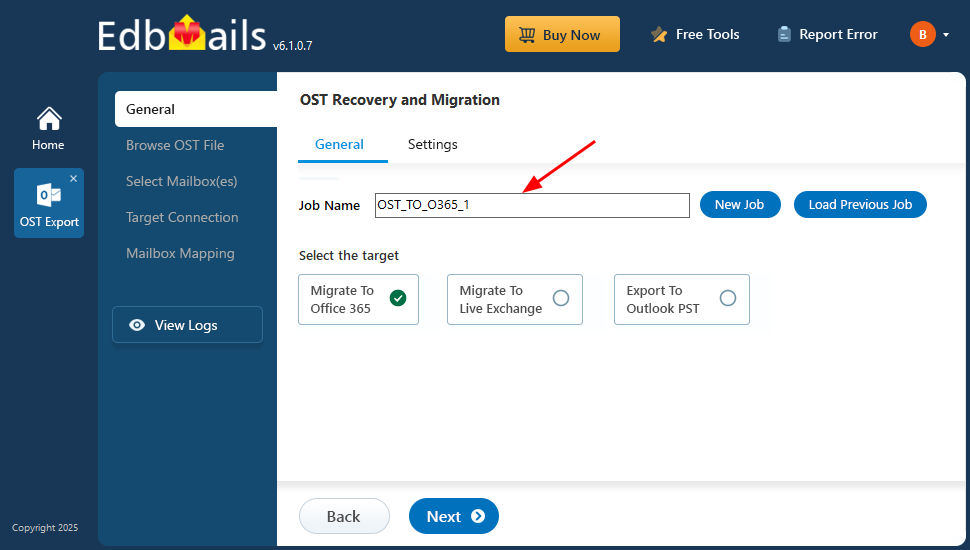
- You can continue with the default job name or select the ‘New Job’ button if you prefer to change the job name.
- Download and install the EdbMails application on your computer.
Step 2: Select the offline OST files
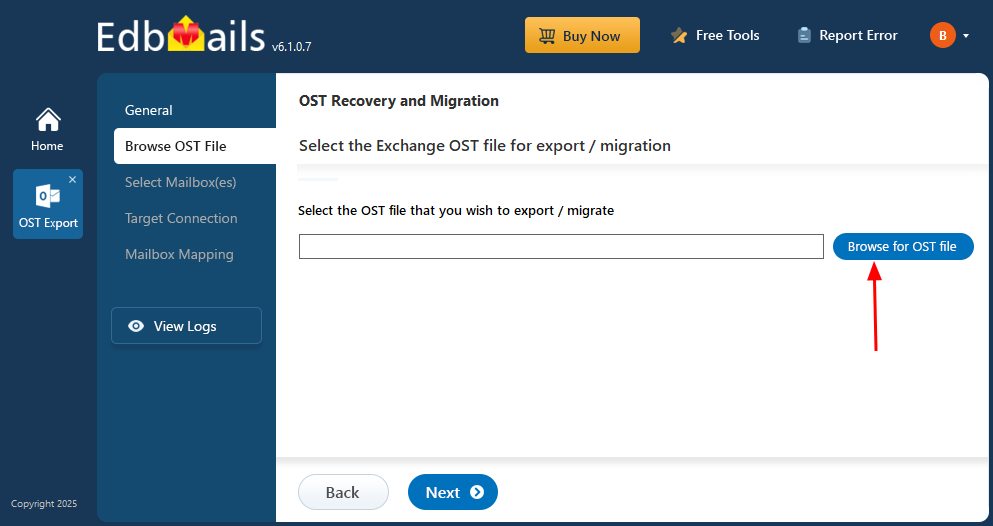
- Click ‘Browse for OST file'.
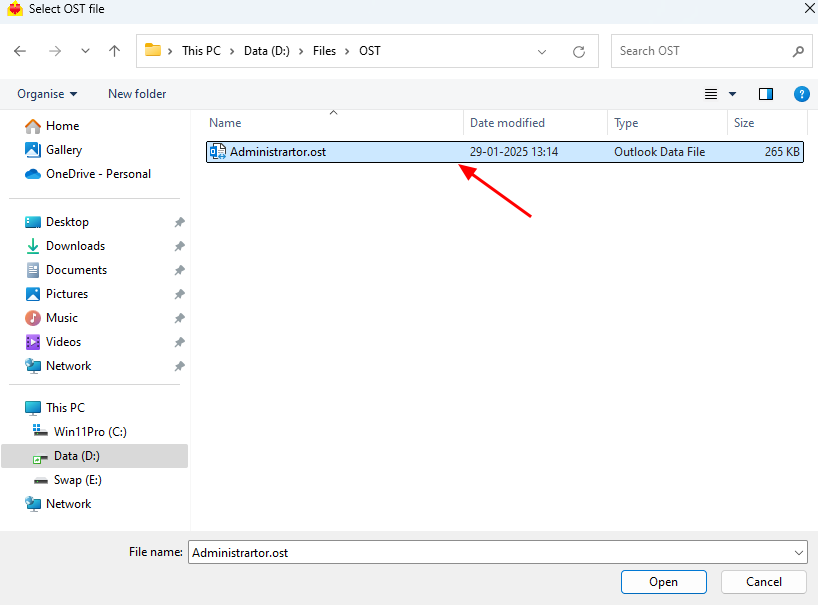
- Select the offline OST file from your local drive, then click the ‘Next’ button to continue. You can also share the OST file on a network with read and write permissions enabled.
- Click ‘Browse for OST file'.
Step 3: Preview and select the mailbox
- EdbMails thoroughly scans the offline OST file and restores mailbox data even in cases of damage or corruption. The software evaluates the internal structure of the OST and retrieves emails and other mailbox items. The duration of this process varies based on the file’s size and the extent of corruption. Allow the scan to finish completely to ensure accurate and comprehensive recovery of your data.
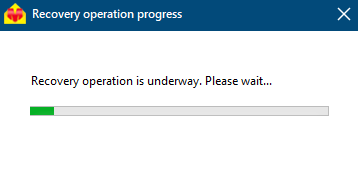
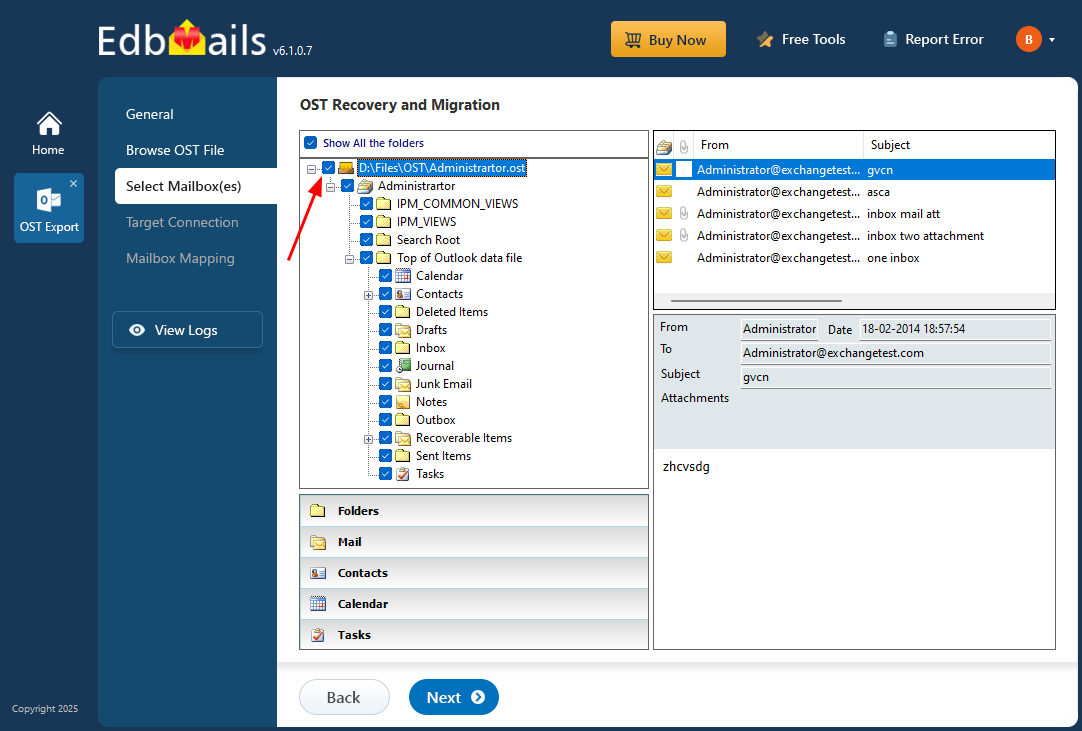
- Once the recovery process completes, EdbMails presents the restored OST mailbox in its full folder and subfolder structure within the main interface. You can easily navigate through any folder or subfolder to view its data. Selecting a specific category, such as Emails, Contacts, Notes, Tasks, or Calendar, displays all corresponding items, along with a detailed preview of the highlighted content on the right pane. EdbMails OST to PST Converter allows you to open an OST file without Outlook.
- Select the entire OST file or the required folders / subfolders and click the ‘Next’ button.
EdbMails flexible filtering options that help to customize your export process. For instance, you can apply date-based filters to export only the items that fall within a specific time range. To configure this, navigate to the ‘General’ section on the left pane and then open the ‘Settings’ tab located at the top-right corner.
Click here to learn more about setting date filters for OST to PST conversion.
- EdbMails thoroughly scans the offline OST file and restores mailbox data even in cases of damage or corruption. The software evaluates the internal structure of the OST and retrieves emails and other mailbox items. The duration of this process varies based on the file’s size and the extent of corruption. Allow the scan to finish completely to ensure accurate and comprehensive recovery of your data.
Step 4: Connect to the target Office 365 server
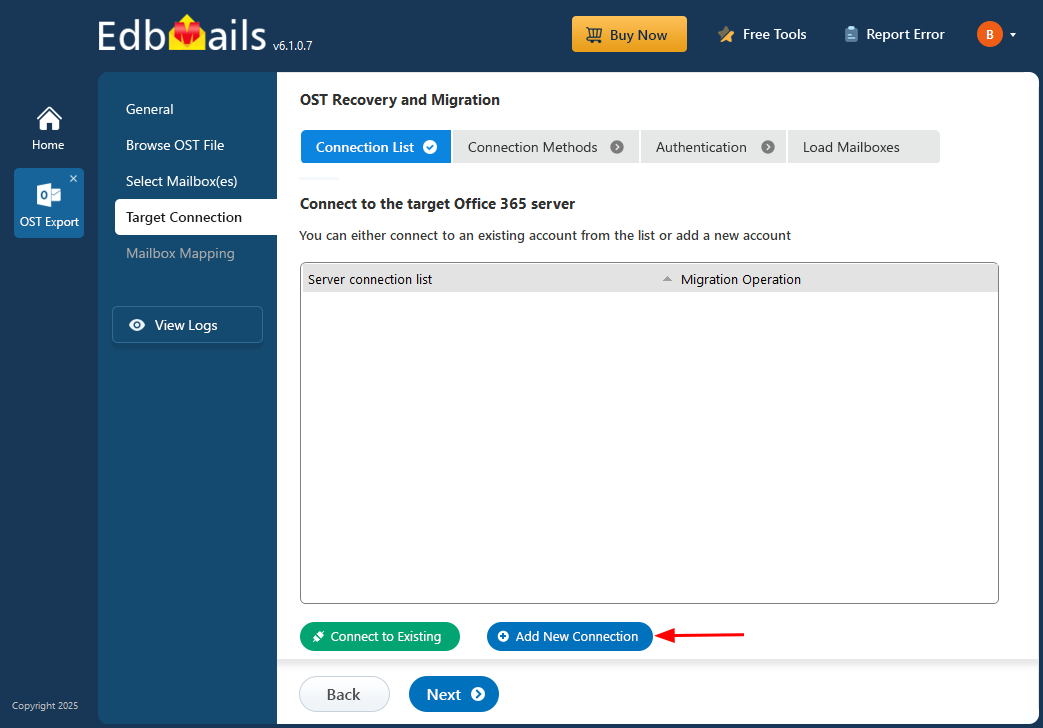
- Click ‘Add New Connection’ to create a new connection to the target Office 365 server. To reuse an earlier configuration, select it from the connection list and click the ‘Connect to Existing’ button to continue.
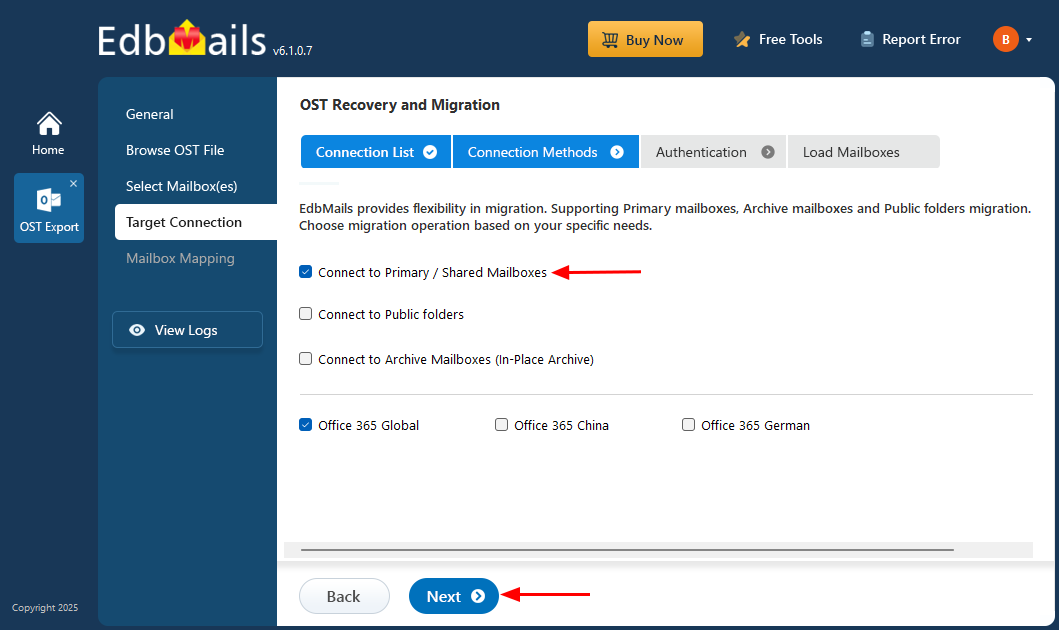
- Select the required connection options and click the ‘Next’ button.
- Choose your preferred authentication method and then click ‘Login’ to proceed.
Connect to Office 365 server using secure modern authentication
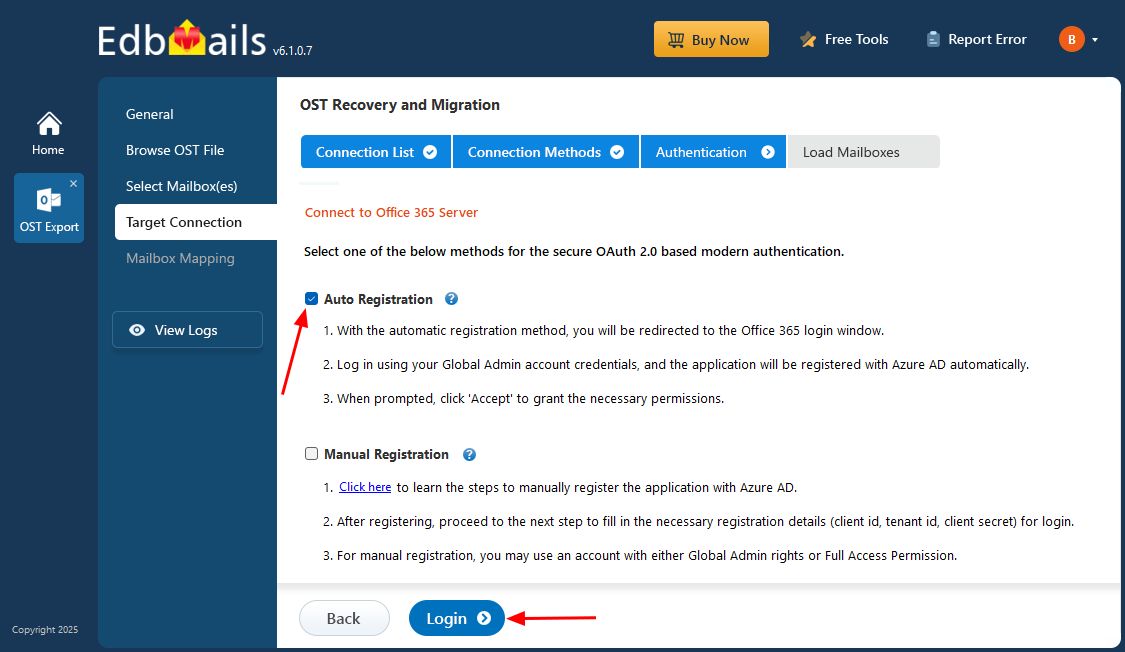
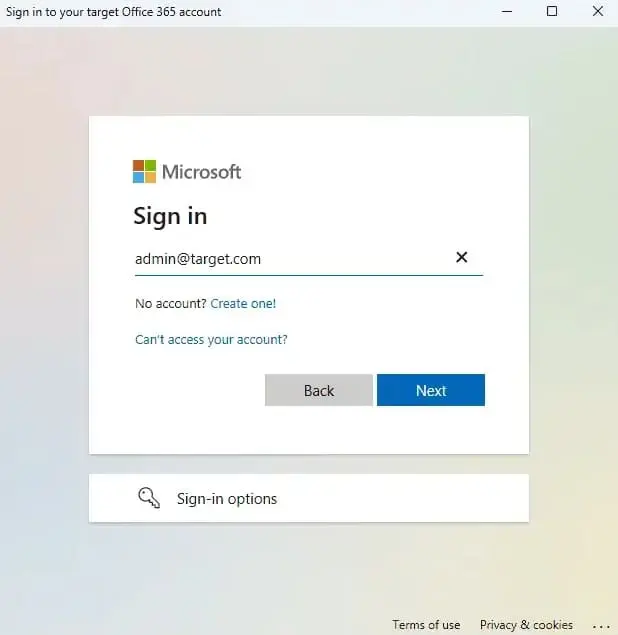
- Authenticate on Microsoft sign-in page.
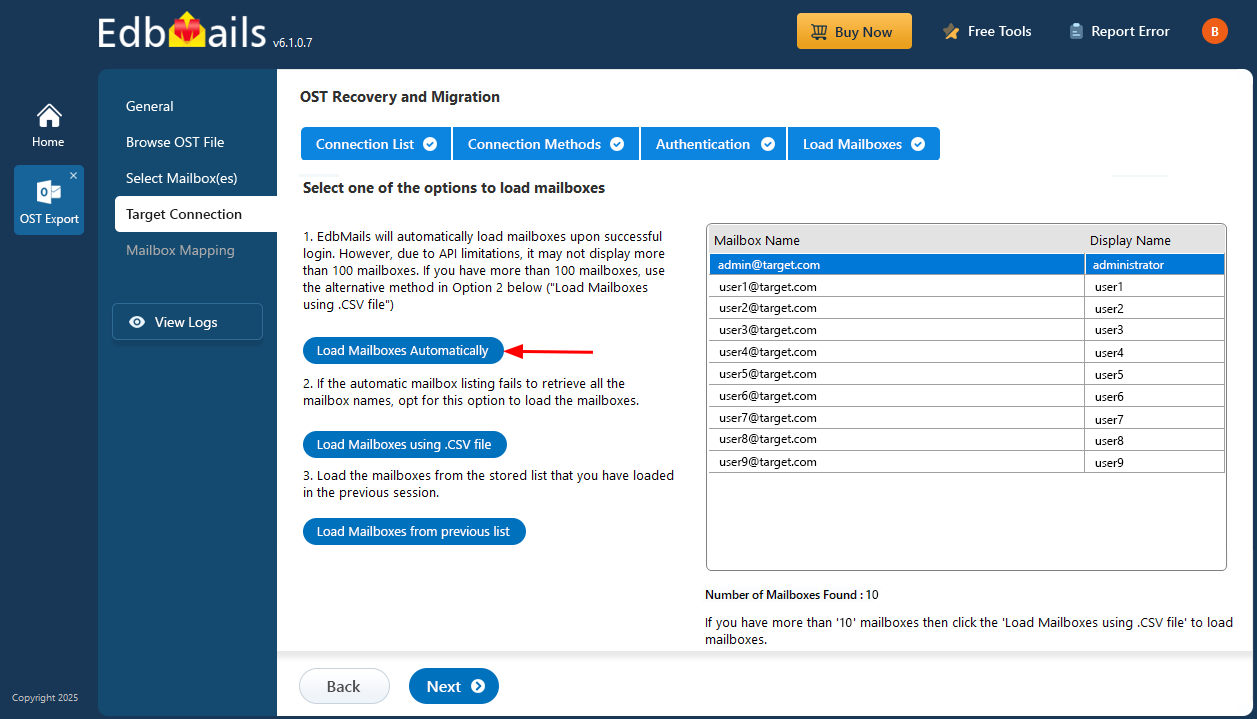
- Select one of the methods to load the mailboxes. You can also load the mailboxes using a CSV file.
- Click ‘Add New Connection’ to create a new connection to the target Office 365 server. To reuse an earlier configuration, select it from the connection list and click the ‘Connect to Existing’ button to continue.
Step 5: Map source and target mailboxes
- Choose the required mailbox mapping option
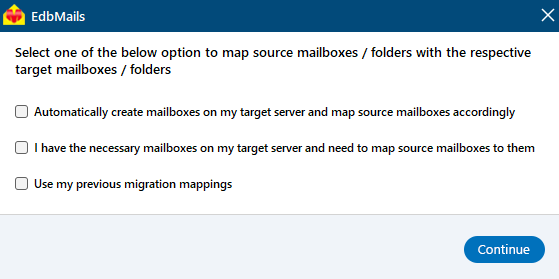
- EdbMails automatically creates mailboxes on your target Office 365 server and assigns the necessary licenses.
Learn more about the automatic mailbox creation process on the target Office 365 server.
- By default, EdbMails performs automatic mailbox and folder mapping between the source and target servers, ensuring a smooth and consistent migration experience. You can also manually map individual source mailboxes to their corresponding target mailboxes, enabling precise alignment based on your organizational or user-specific requirements.
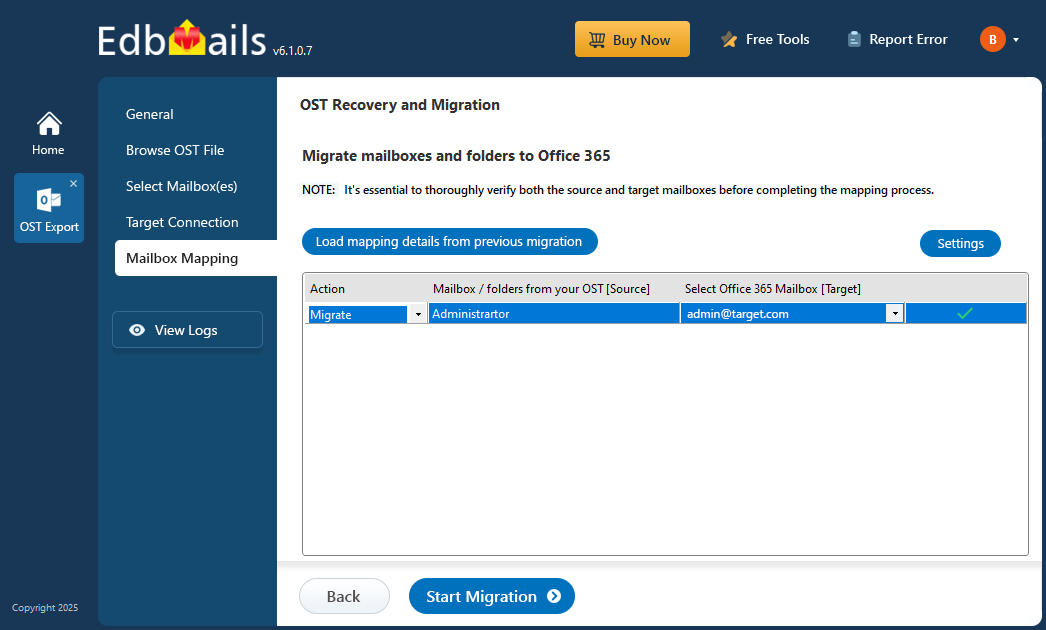
- Choose the required mailbox mapping option
Step 6: Start OST to Office 365 migration
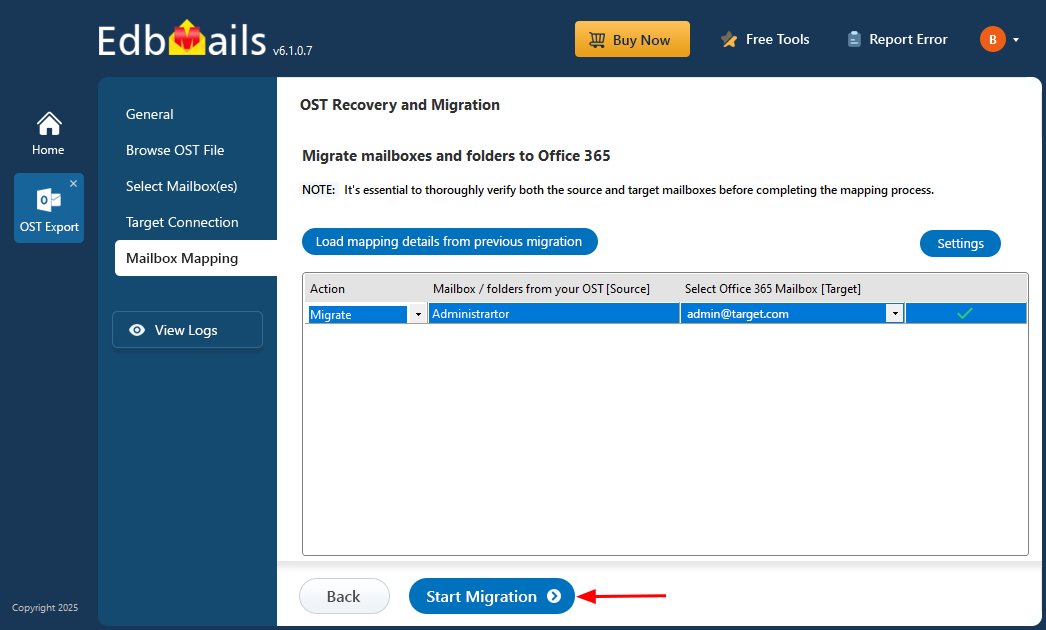
- Click the 'Start Migration’ button to initiate the migration process.
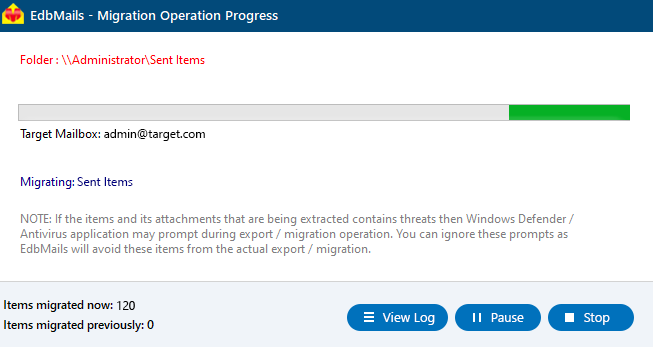
- The migration process is in progress, and you can monitor it in the progress bar. You also have the option to pause or resume the operation at any time. Once the migration operation is completed, EdbMails will display a confirmation message.
- You can verify the list of migrated folders and mailbox items with EdbMails text-based migration log report.
- Login to your target Office 365 server and verify the migrated items.
- Click the 'Start Migration’ button to initiate the migration process.
OST to Office 365 Post-Migration Tasks
- Step 1: Update the MX records to point to Office 365
Update the MX records to direct incoming emails to the target Office 365 server, ensuring email delivery. Additionally, set up the Autodiscover record to enable Outlook to automatically connect to the newly migrated mailboxes.
- Step 2: Create a new Outlook profile for users in the new domain
Configure the Outlook profile for each user in your domain if Outlook has problems connecting to Office 365 mailboxes.
- Step 1: Update the MX records to point to Office 365
Troubleshooting Guide for OST to Office 365 Migration
For troubleshooting, visit our Knowledge Base. For more queries, refer to the Frequently Asked Questions or reach out to our support team.
Benefits of EdbMails to Import OST to Office 365
- Recovery and Direct Migration: EdbMails enables you to recover mailbox data from corrupted or orphaned OST files. Post data recovery, the software allows you to import OST to Office 365 directly and migrate data to the Live Exchange server without the need for multiple tools or manual steps. The complete process is smooth and reliable.
- Rebuild & Conversion: Rebuild Outlook data files and convert OST to PST in the same application with EdbMails. This simplifies mailbox management by removing the need for multiple tools, and the integrated interface makes the repair and conversion process smooth.
- No Size Barrier: EdbMails allows you to import an OST mailbox to Office 365 with no size barriers. This allows large mailboxes, archive folders, or large OST files to be migrated without affecting the migration speed.
- Wide Compatibility: EdbMails is fully compatible with all Windows operating systems and can handle OST files from any Outlook version, such as 2021, 2019, 2016, 2013, 2010, 2007, and 2003. The wide compatibility makes it suitable for both current and legacy systems.
- Secure Authentication: EdbMails provides highly reliable when importing OST to Office 365. It does not save your account credentials, and also uses secure OAuth 2.0 Modern Authentication along with TLS encryption on each part of the migration procedure to securely save your Office 365 migration process.
- Deleted Items Recovery: EdbMails can restore and migrate all deleted items of the OST mail database in Office 365, which helps in retrieving deleted emails and ensures entire mail recovery during OST to Office 365 migration.