


Steps for Manual Registration of EdbMails in Azure AD
Registering EdbMails into Azure Active Directory manually provides the capability for an administrator to create a direct and safe relationship between the EdbMails application and Microsoft 365 services. Manual registration is suitable when the organizations want full control over app permissions and authentication settings instead of using the automatic process. Manual registration of the EdbMails application is performed on Azure AD, which ultimately helps to obtain specific credentials needed to safely sign in and authenticate the application. Registration must be made using an account that is a Global Admin or has Full Access permission for successful authentication.
Manual configuration can be split into two main stages: application registration and configuration of core parameters for a trusted relationship to Azure AD.
Step 1: Manually register the EdbMails application in Azure AD
- Log in to the Azure Active Directory Admin Center using your administrator account.
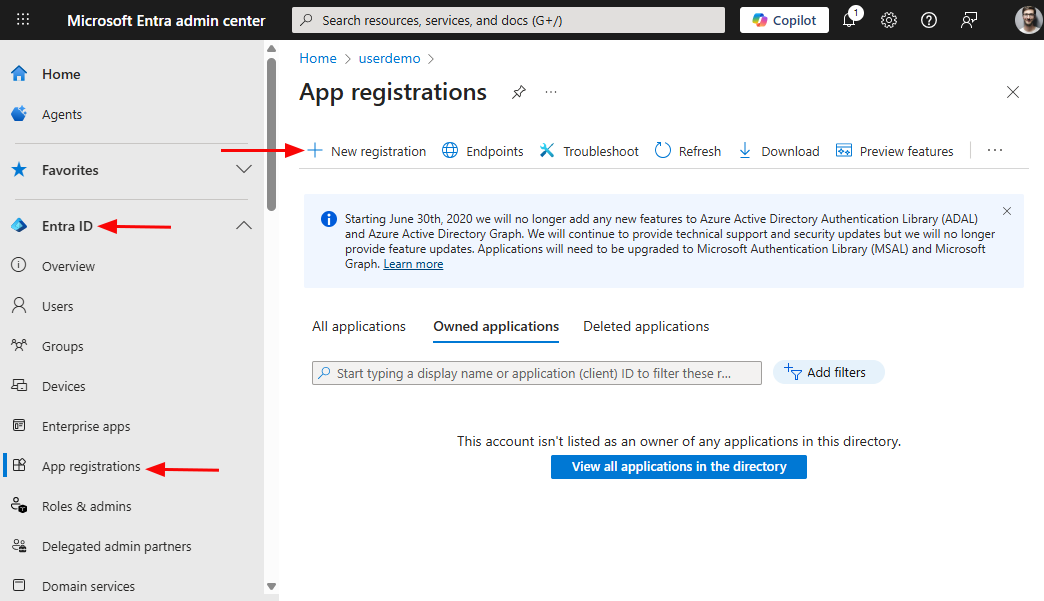
- In the left-hand menu, navigate to the Entra ID section, then to App registrations, and click + New registration.
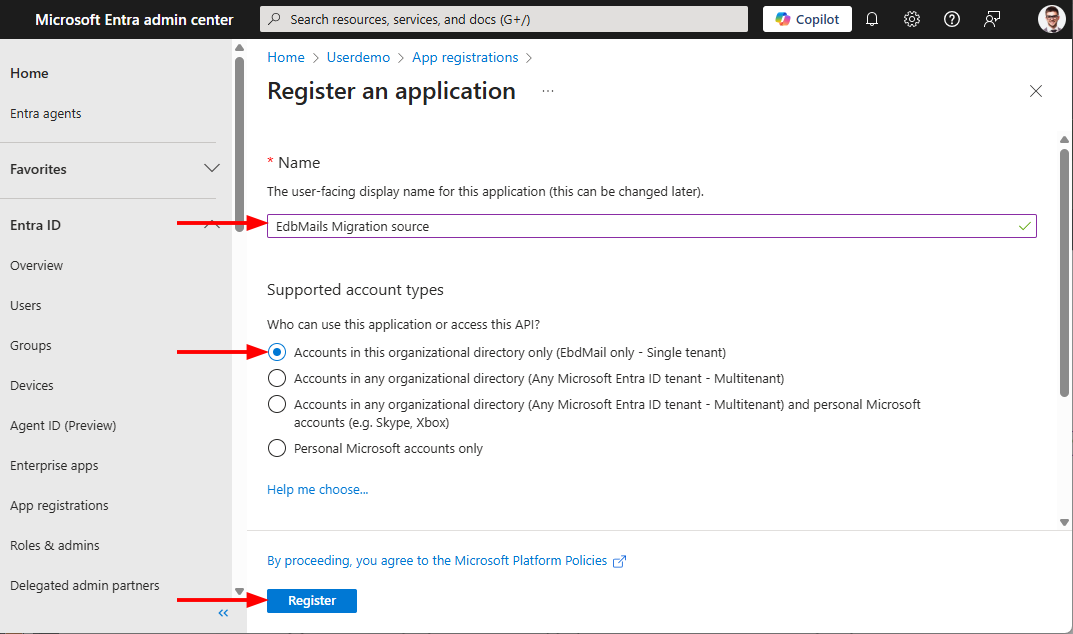
- Next, enter the display name for the application, and select the type of account to use. For example, for account type select Accounts in any organizational directory (Any Microsoft Entra ID tenant - Multitenant) on the registration window, and then click Register.
Configure the application permissions
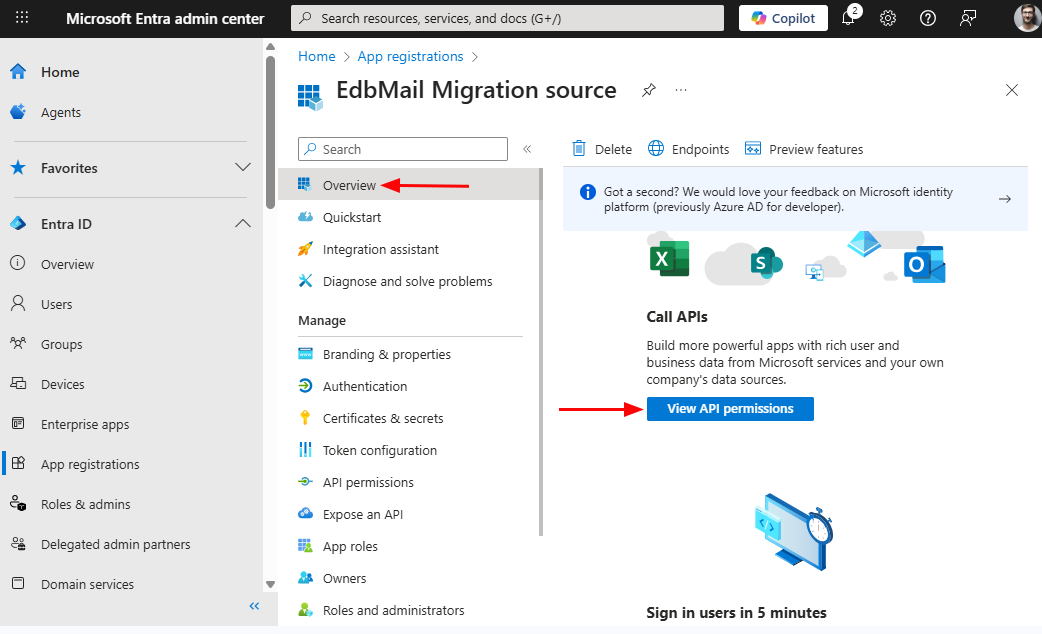
- On the application’s Overview page, click View API permissions to access and manage the app’s permission settings.
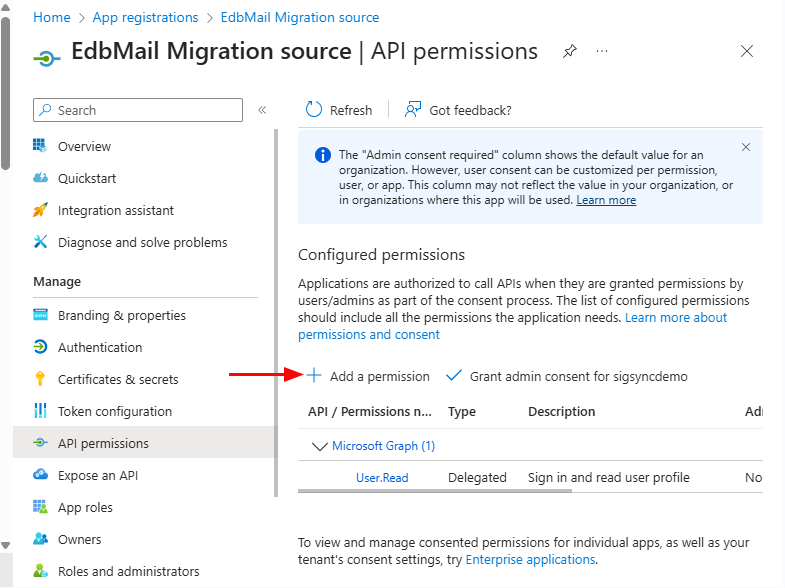
- Click the + Add a permission button in the API permissions page
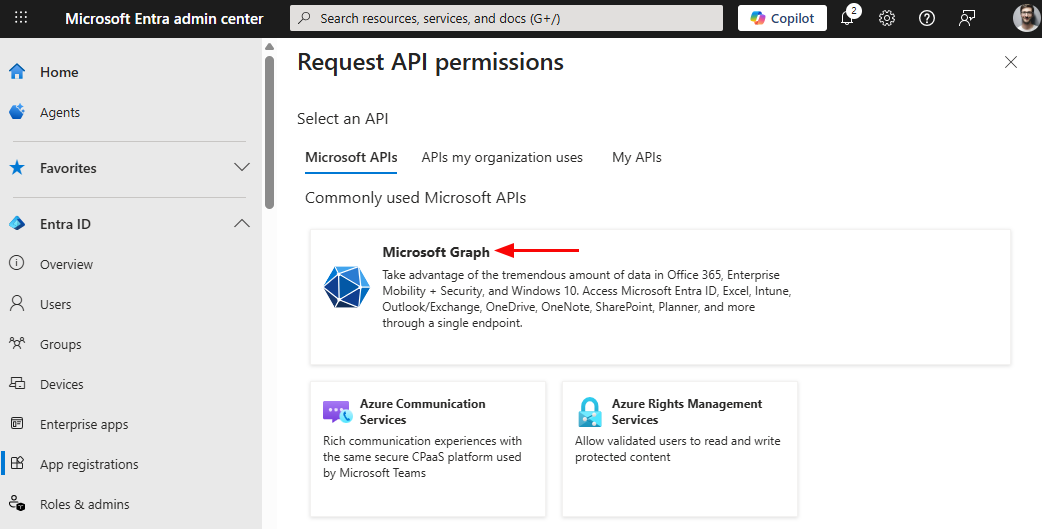
- Next, in the Request API permissions window, choose Microsoft Graph from the Microsoft APIs section.
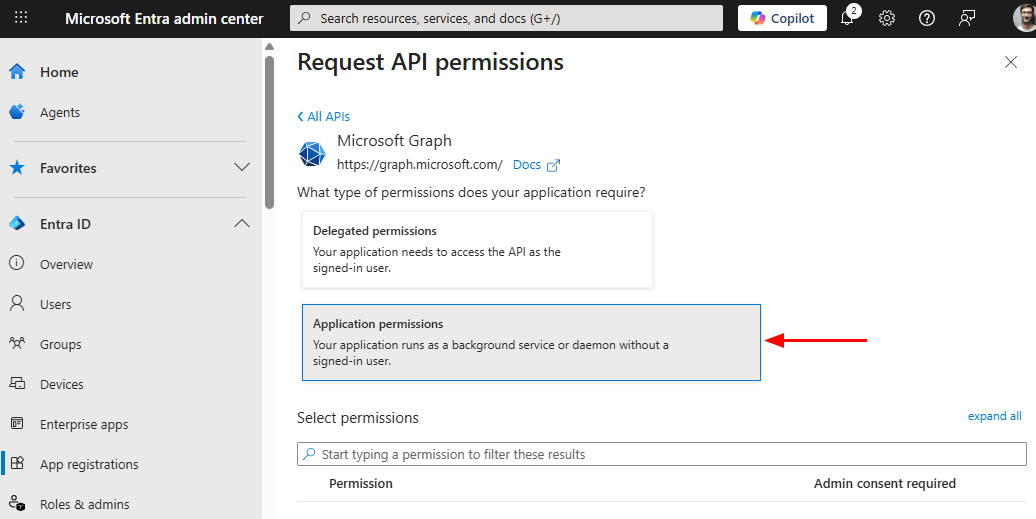
- Then, choose Application permissions from the available options.
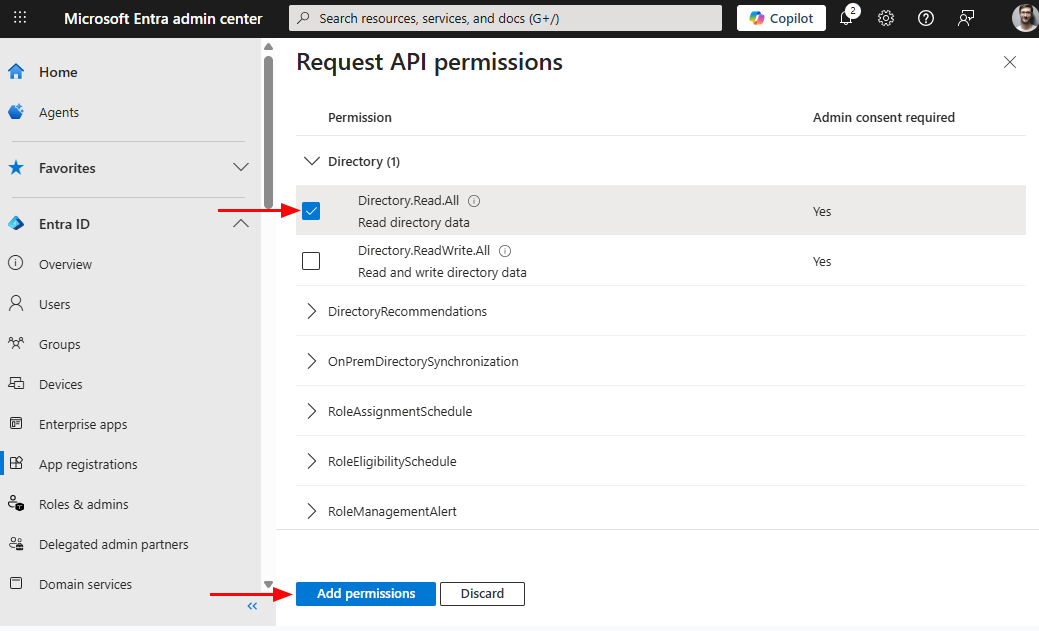
- Choose the following permissions from the list and click Add permissions to apply them.
Connection to Source Exchange Online (If the app registration is for source account)
- Directory.Read.All
- Group.Read.All
- MailboxSettings.ReadWrite
- User.Read.All
- Organization.Read.All
Connection to target Office 365 (If the app registration is for target account)
- MailboxSettings.ReadWrite
- Organization.Read.All
- User.Read.All
- User.ReadWrite.All
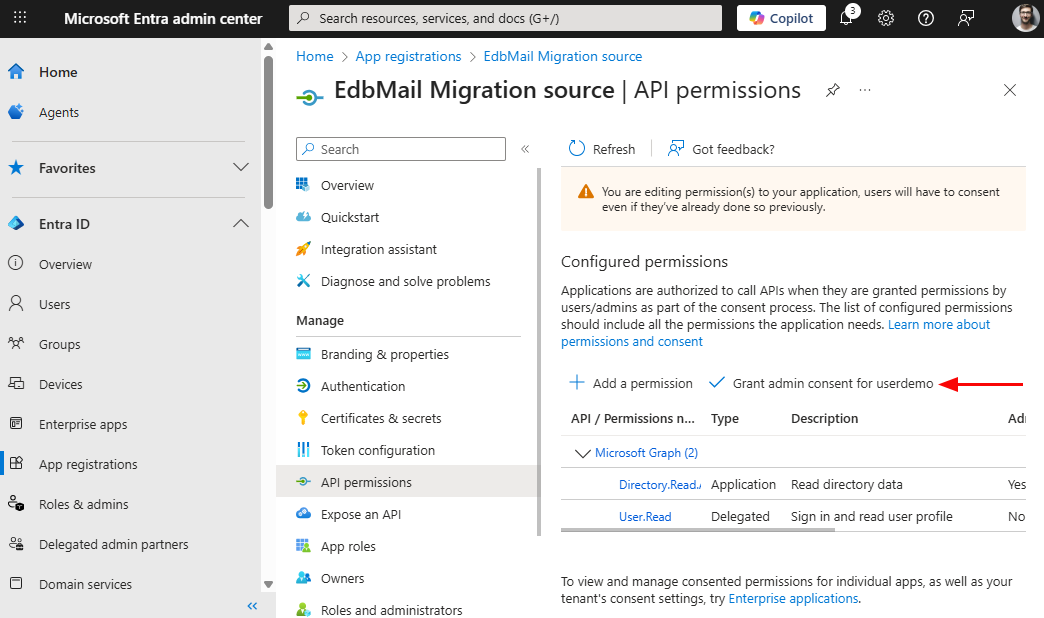
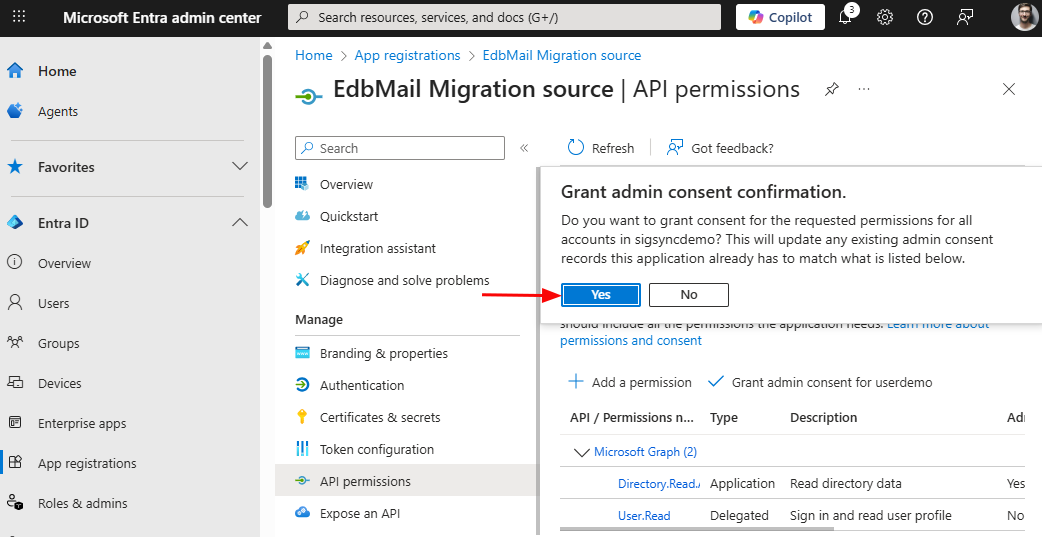
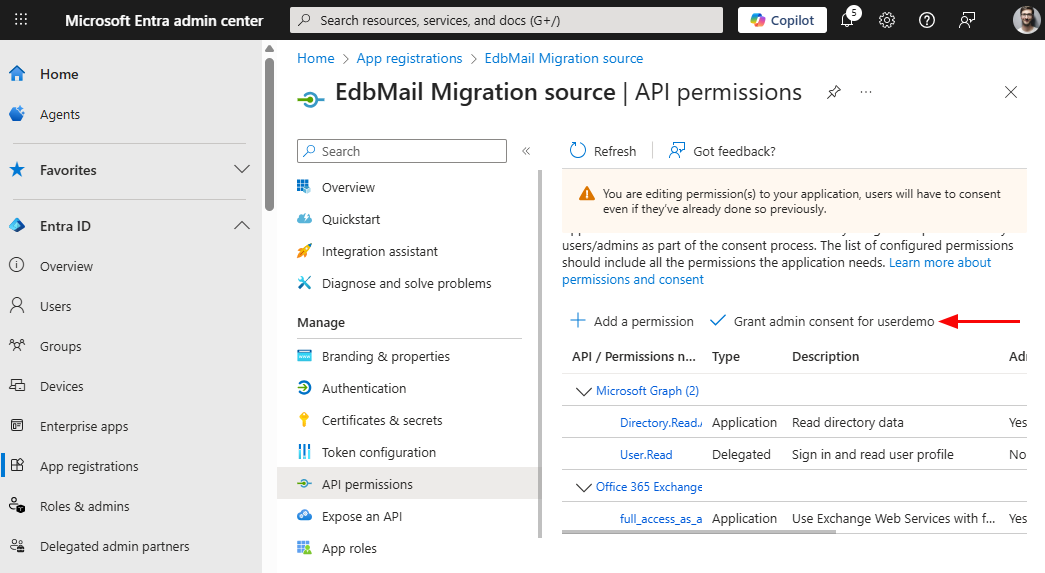
- On the API permissions page, click Grant admin consent for userdemo and confirm by selecting Yes.
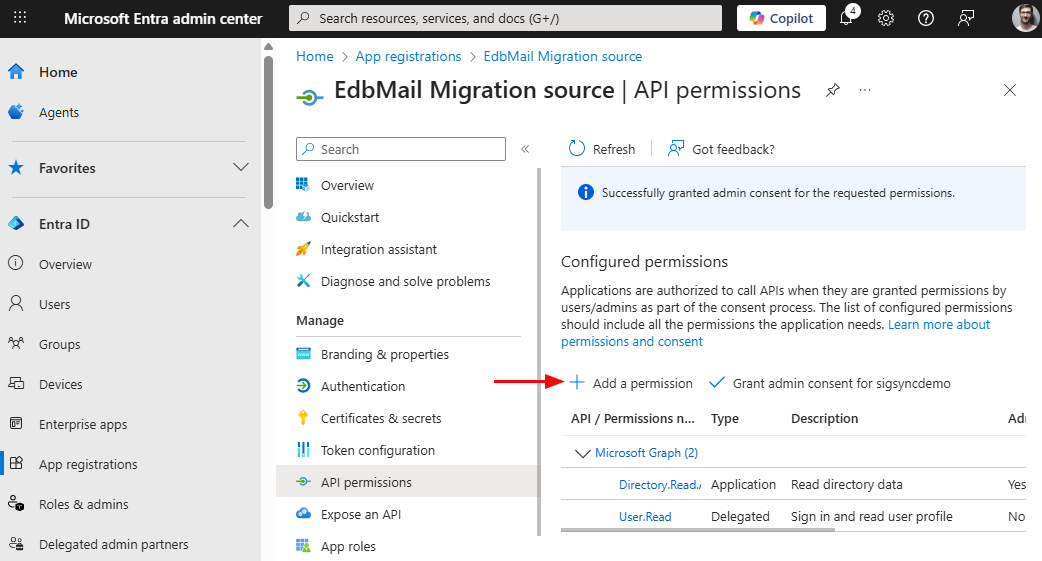
- Now Click the + Add a permission button
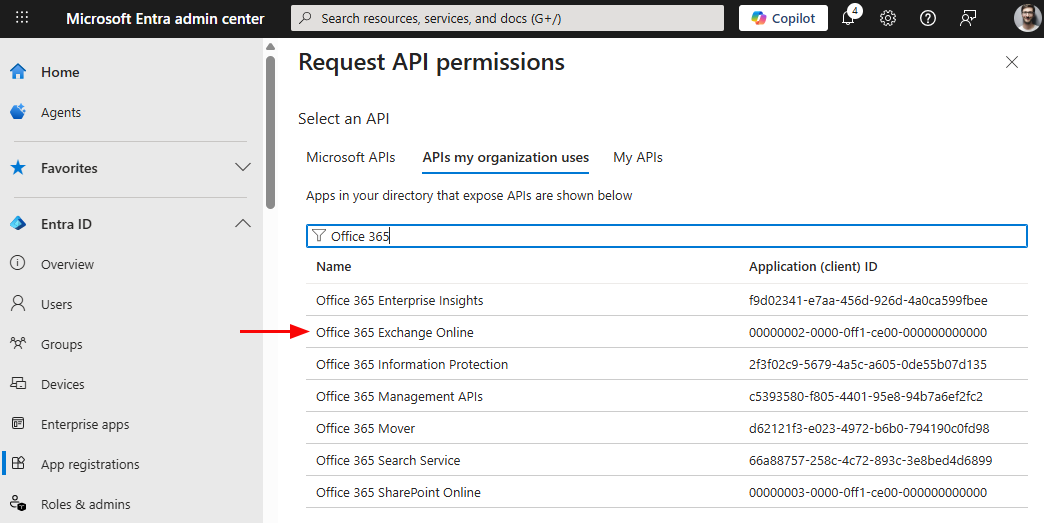
- Go to the APIs my organization uses tab, enter Office 365 in the search field, and select Office 365 Exchange Online from the results.
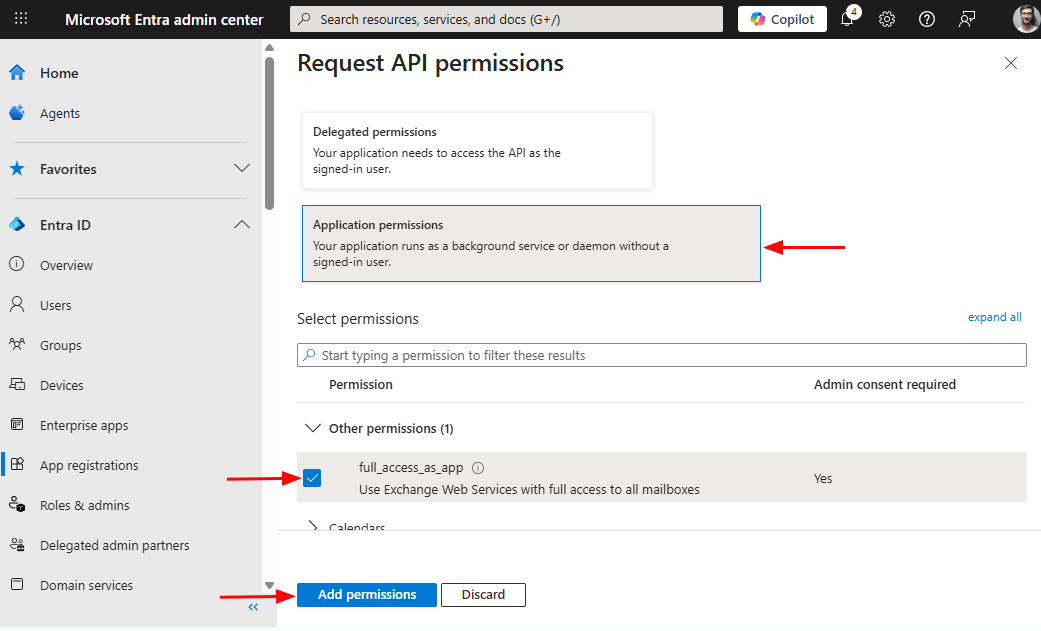
- Click on the Application permissions, expand Other permissions, select the below permissions and click the Add permissions button
Connection to Source Exchange Online (If the app registration is for source account)
- full_access_as_app
- User.Read.All
- Mail.Read
Connection to target Office 365 (If the app registration is for target account)
- full_access_as_app
- User.Read.All
- Mail.ReadWrite
- On the API permissions page, select Grant admin consent for usedemo, and when prompted, click Yes to approve the permissions.
Add client secrets to the application in Azure AD
It is necessary to add client secret to the newly created application. It allows the OAuth protocol to prove the apps existence. Follow the below steps to add a client secret to the EdbMails application which is registered in Azure AD.
- Go to Entra ID and then select App registrations. Now select the newly added application
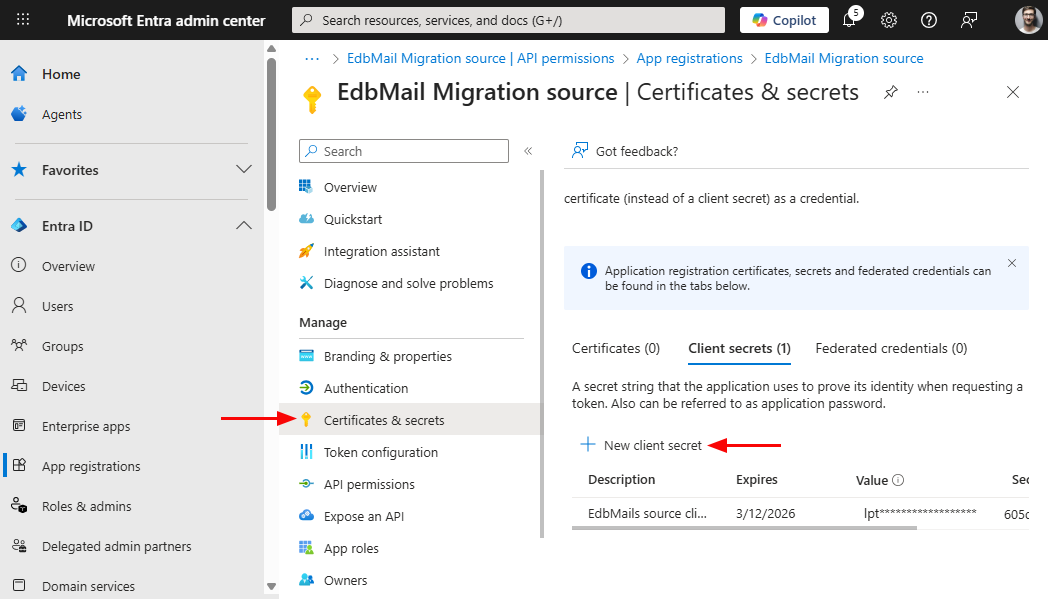
- Click on the Certificates & secrets and click on the + New client secret
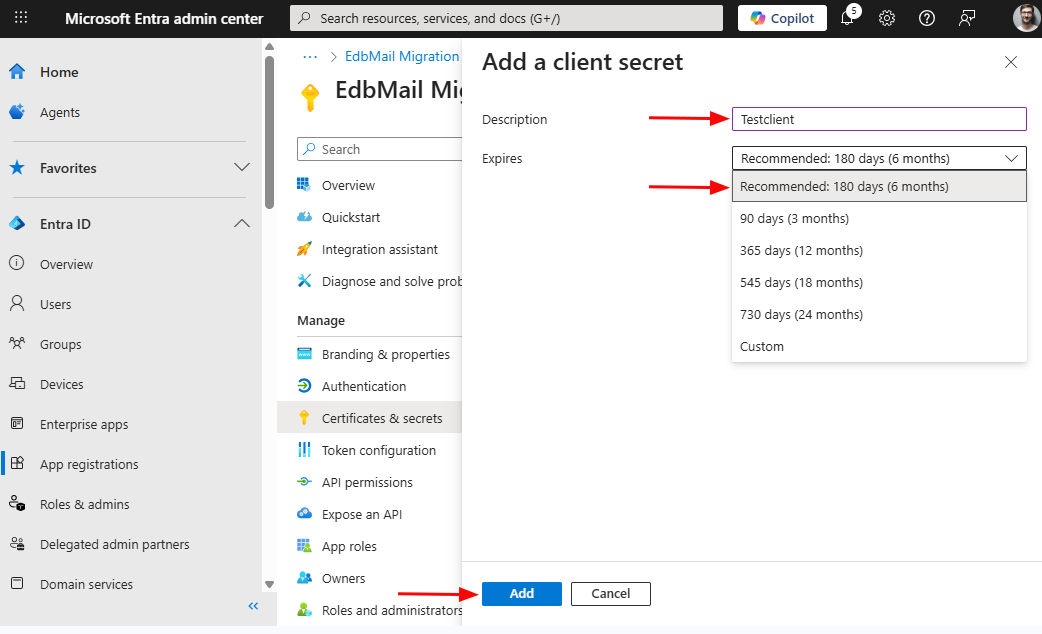
- Enter a brief description, choose the desired expiration duration, and then click Add to generate the secret.
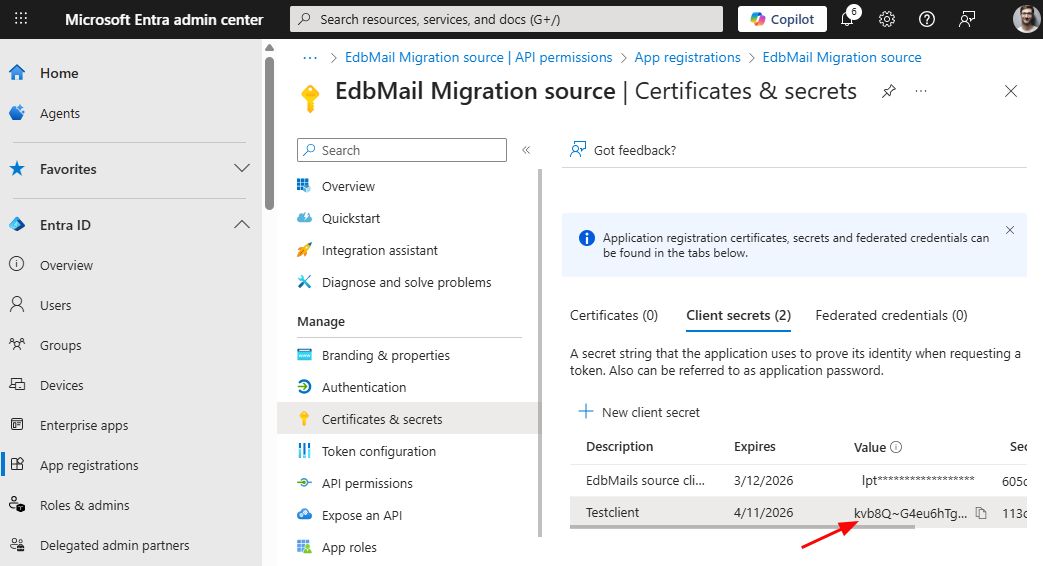
Note: Copy the client secret value to the clipboard or directly use it in the EdbMails application. Once you leave the page, the value will not be displayed again. Then you need to create another client secret.
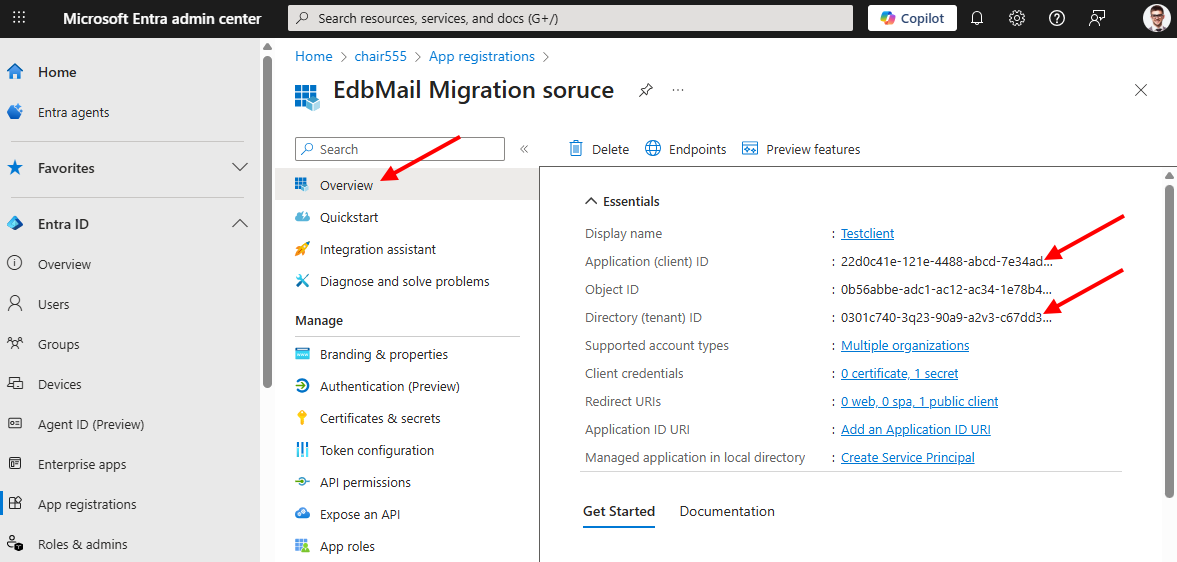
- Navigate to the 'Overview' section to copy the 'Application (Client) ID' and 'Directory (Tenant) ID', then paste them into the EdbMails application.
Step 2: Fill in the necessary registration details for Login in EdbMails
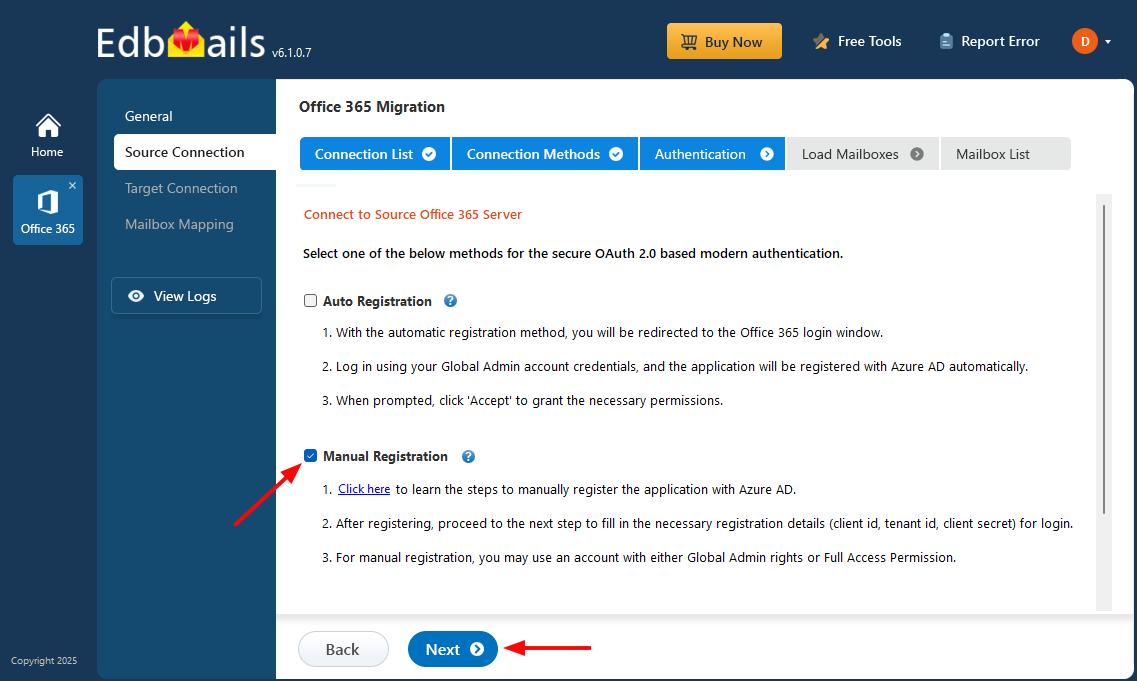
- Check the option 'Manual Registration' in the wizard and click the 'Next' button.
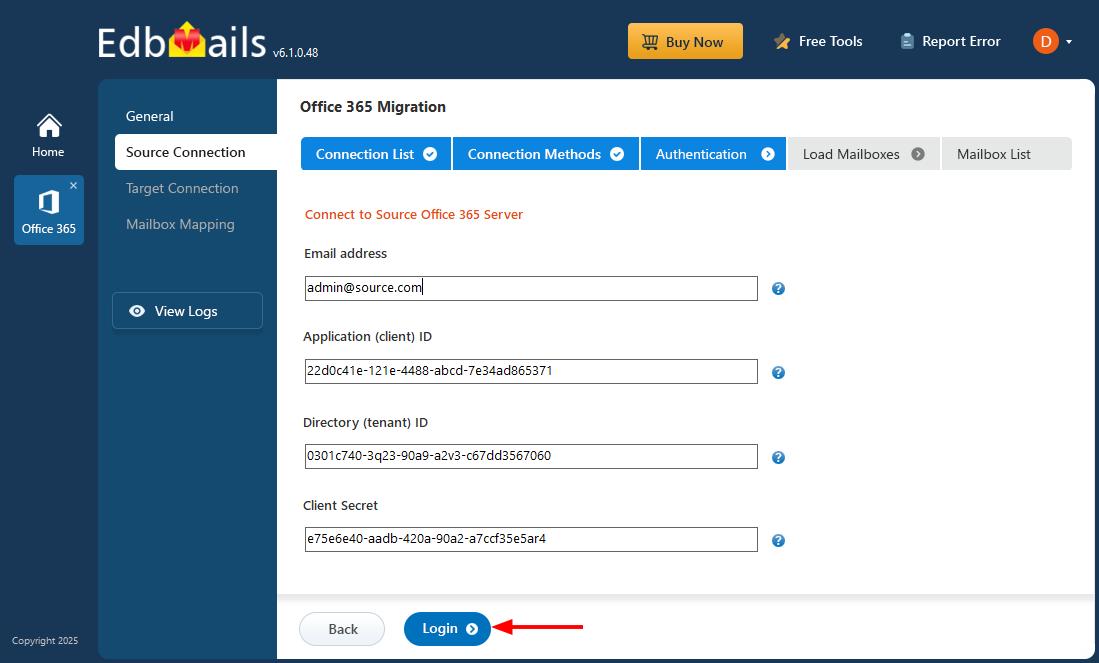
- Now enter the 'Email address', 'Application (client) ID', 'Directory (tenant) ID' and 'Client Secret' and click on the 'Login' button
Note: Follow the above steps for the Source and Target Office 365 servers separately.