Hybrid Exchange Migration
A hybrid migration is suitable for organizations that run both on-premises Exchange and Exchange Online with synchronized Active Directory. It allows mailboxes to migrate between local servers and the cloud while keeping mail flow active and user access uninterrupted. Unlike cutover or staged approaches, hybrid environments require additional setup because directory synchronization and connections must be maintained across both systems. This model provides the flexibility to migrate mailboxes gradually, but it can also introduce challenges such as maintaining data consistency, ensuring compatibility, meeting compliance requirements, and completing the migration with zero downtime. Proper planning and the right migration tools are therefore important for a smooth and reliable process.

EdbMails Exchange Migration Software makes hybrid Exchange migration simple with a secure and efficient approach. The incremental migration feature ensures that after the initial synchronization, only newly added or updated items are migrated, which prevents duplication and helps maintain zero downtime so users can continue their work while mailboxes are updated in the background. The application also includes automatic throttling management that follows Microsoft Exchange Online throttling policies, helping avoid delays and maintain consistent performance during migration. EdbMails handles cross-version compatibility smoothly, enabling reliable migration between different Exchange Server versions. With TLS-encrypted connections and GDPR compliance aligned with industry standards, EdbMails protects mailbox data throughout the process, providing IT teams with a smooth and dependable hybrid Exchange migration experience.
Top Reasons for Hybrid Migration
- Granular Control over Data Residency
EdbMails allows selective placement of mailboxes between on-premises Exchange and Exchange Online. This ensures compliance with data sovereignty regulations while enabling efficient management of sensitive information.
- Security Protocol Customization
Organizations can maintain existing on-premises security measures, such as encryption and Data Loss Prevention, while leveraging Exchange Online’s security features. This dual-layered approach mitigates risks and protects data during and after migration.
- Enhanced Security
With customizable security protocols, EdbMails strengthens protection against breaches, ensuring mailbox data remains safe throughout the migration process.
- Scalability
Hybrid migration with EdbMails allows gradual mailbox transfers to Exchange Online, supporting business growth without overhauling existing infrastructure. It optimizes resource use and manages costs effectively.
- Cross-Platform Synchronization
EdbMails keeps data consistent across on-premises and cloud environments. Real-time updates to mailboxes, calendars, and contacts ensure a unified user experience and seamless collaboration.
- Granular Control over Data Residency
Hybrid Exchange Migration Prerequisites
Before starting a hybrid Exchange migration with EdbMails, organizations should ensure their on-premises Active Directory and Exchange environment are properly configured. This includes having a compatible Exchange version, valid licenses, and stable network connectivity. Proper preparation ensures a smooth migration process. For detailed setup instructions, click here.
Step-by-Step guide to enable Hybrid Exchange Migration
Step 1: Download and install the EdbMails application
- To start the migration process, download and install the EdbMails application on any computer running Windows operating system.
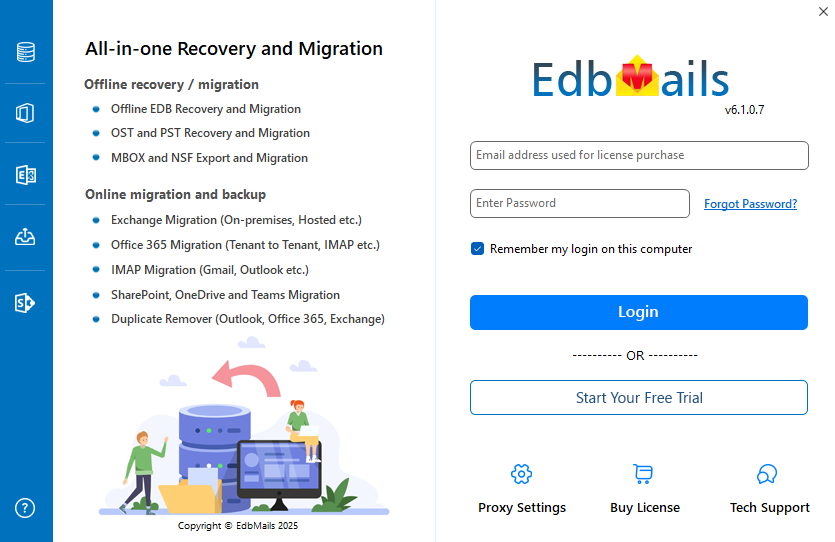
- Launch the EdbMails application on your computer.
- Enter your registered email ID and password, then click ‘Login’. If you are using EdbMails for the first time, choose ‘Start Your Free Trial’ to continue with the trial version.Note: The trial version provides access to all main features and allows migration of up to 30 items per folder. For unlimited migration, purchase an Exchange Migration license from the EdbMails website.Once the license is purchased, close the application and open it again. Then sign in with the same email ID and password used during the purchase to activate the license successfully.
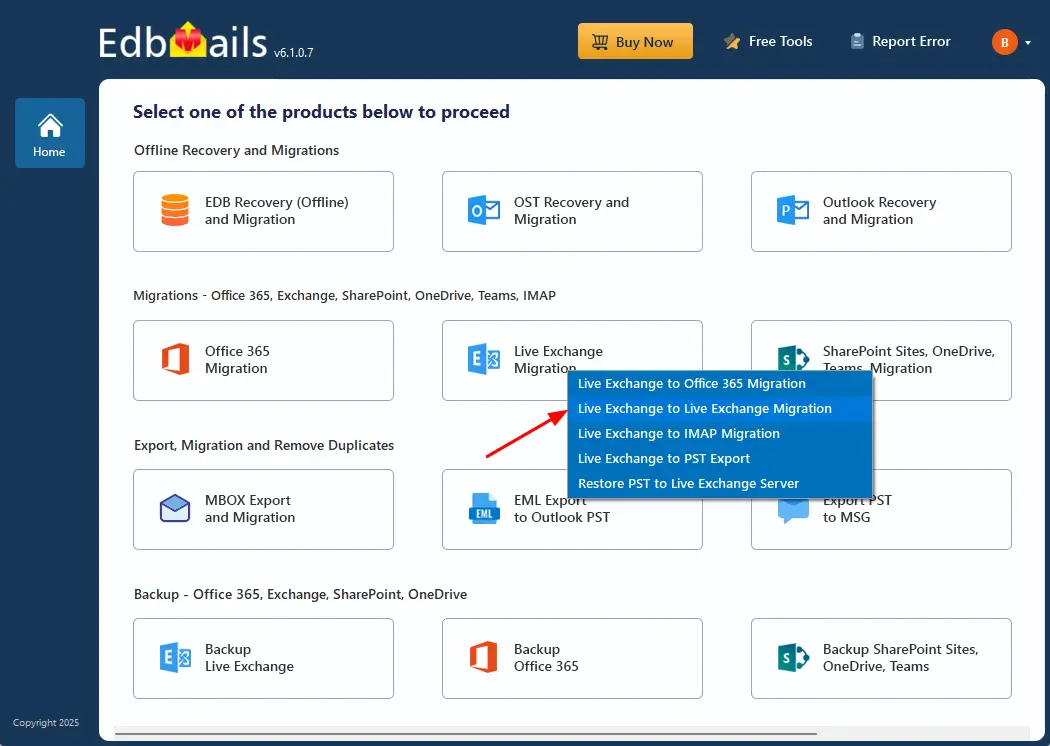
- Select ‘Live Exchange Migration’ > ‘Live Exchange to Live Exchange Migration’.
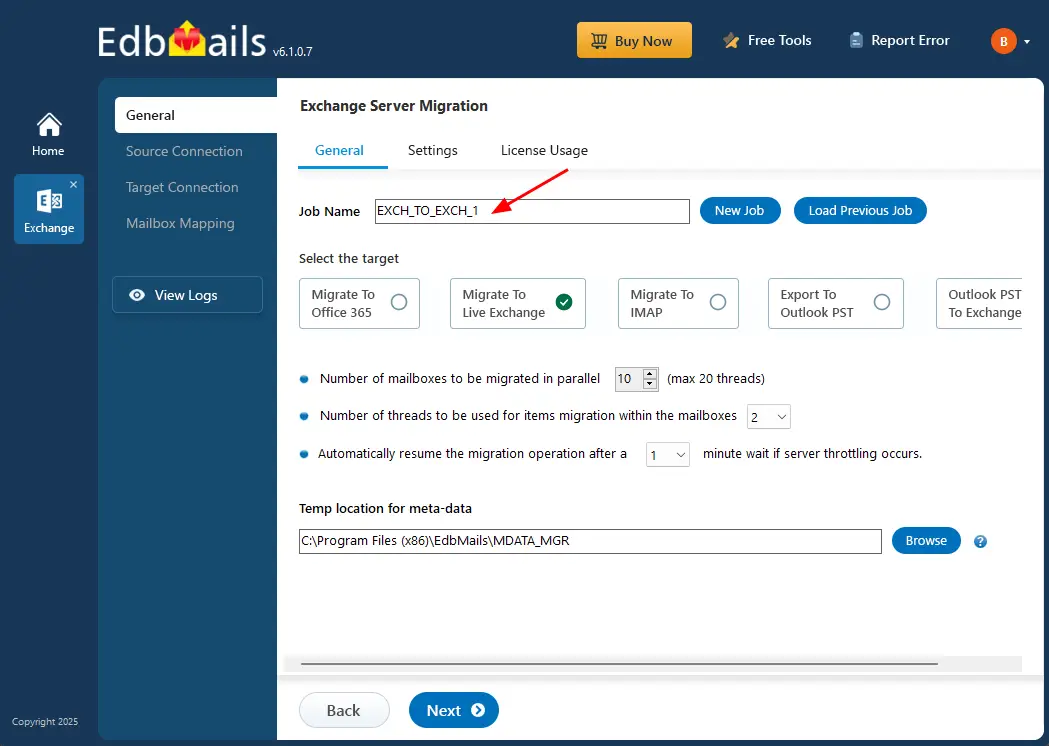
- Keep the default job name or click ‘New Job’ to rename it.
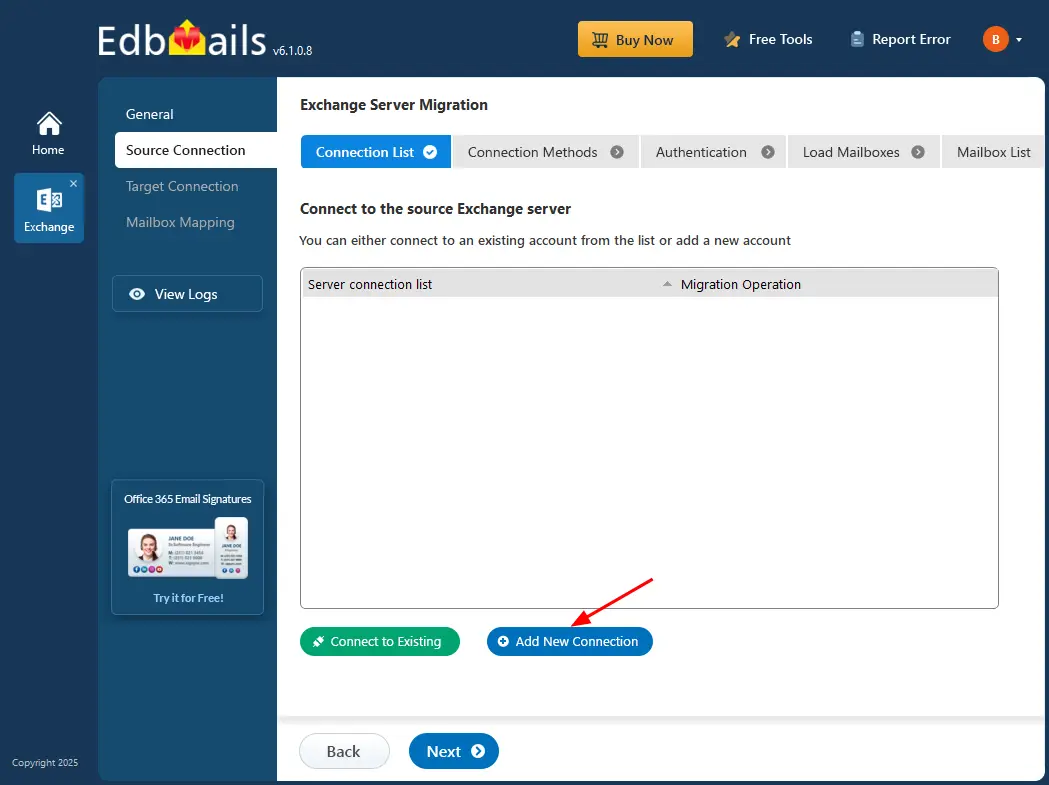
Step 2: Connect to source Exchange server
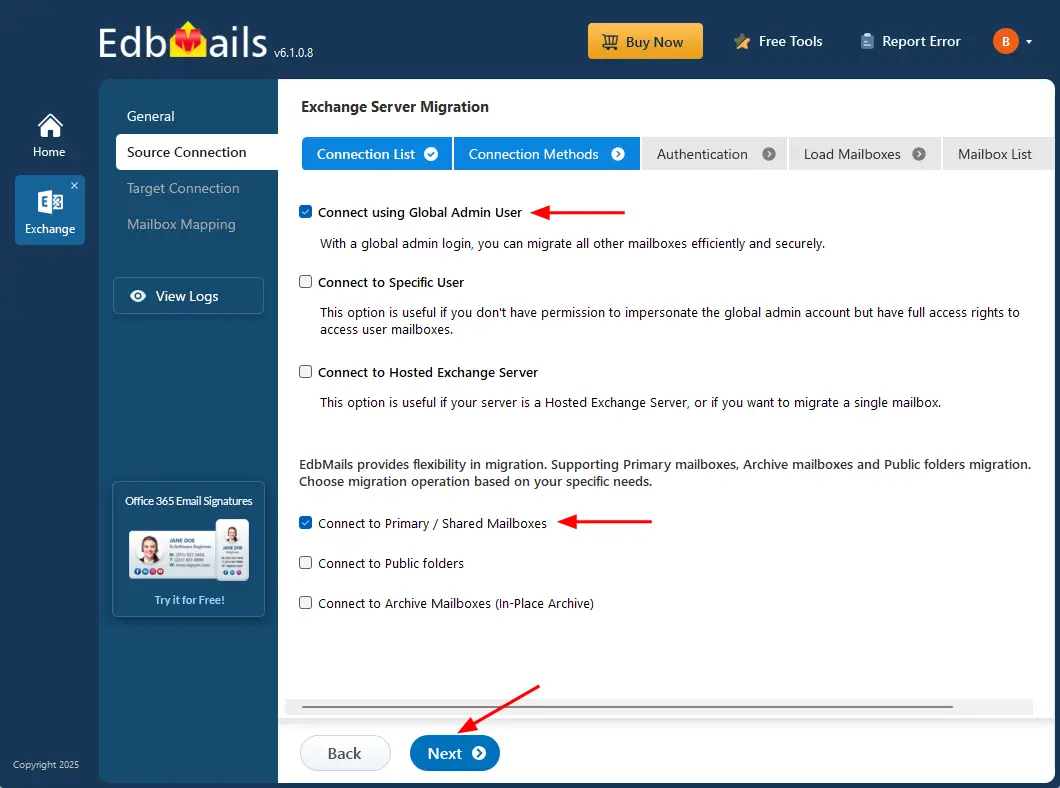
- Click the ‘Add New Connection’ button to establish a new connection to the source Exchange server. To use a previous connection, select it from the connection list and click the ‘Connect to Existing’ button to proceed.
- Select the required connection options and click the ‘Next’ button.
- Follow one of the links below to connect source mailboxes.
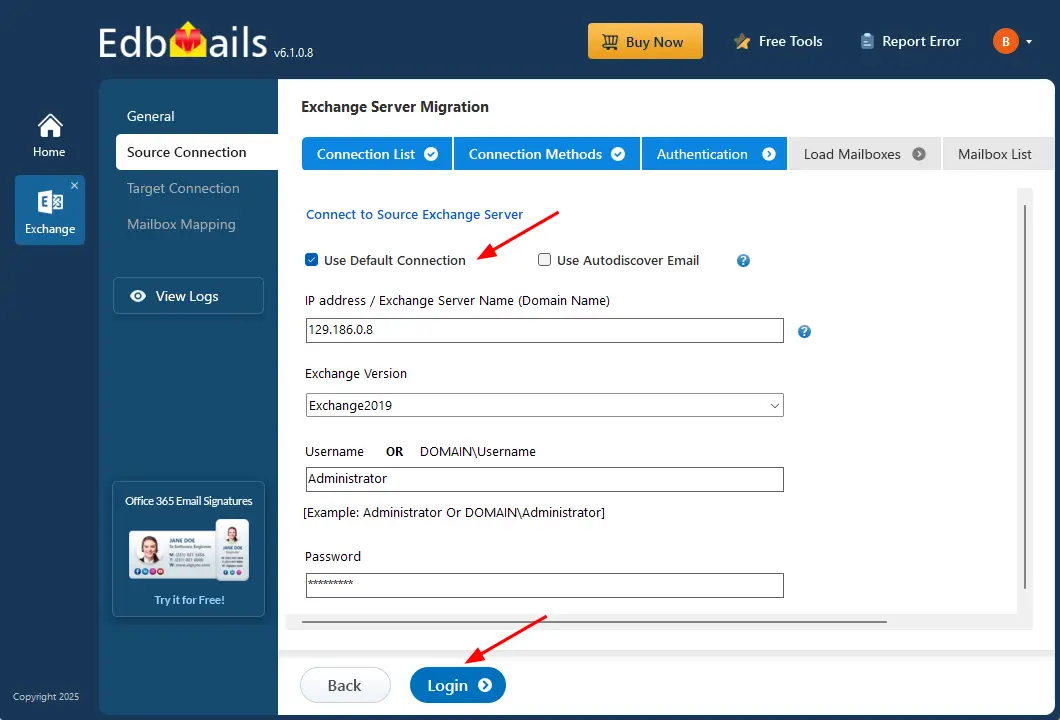
Connect to source Exchange server
- Enter the source Exchange server details and click the ‘Login’ button
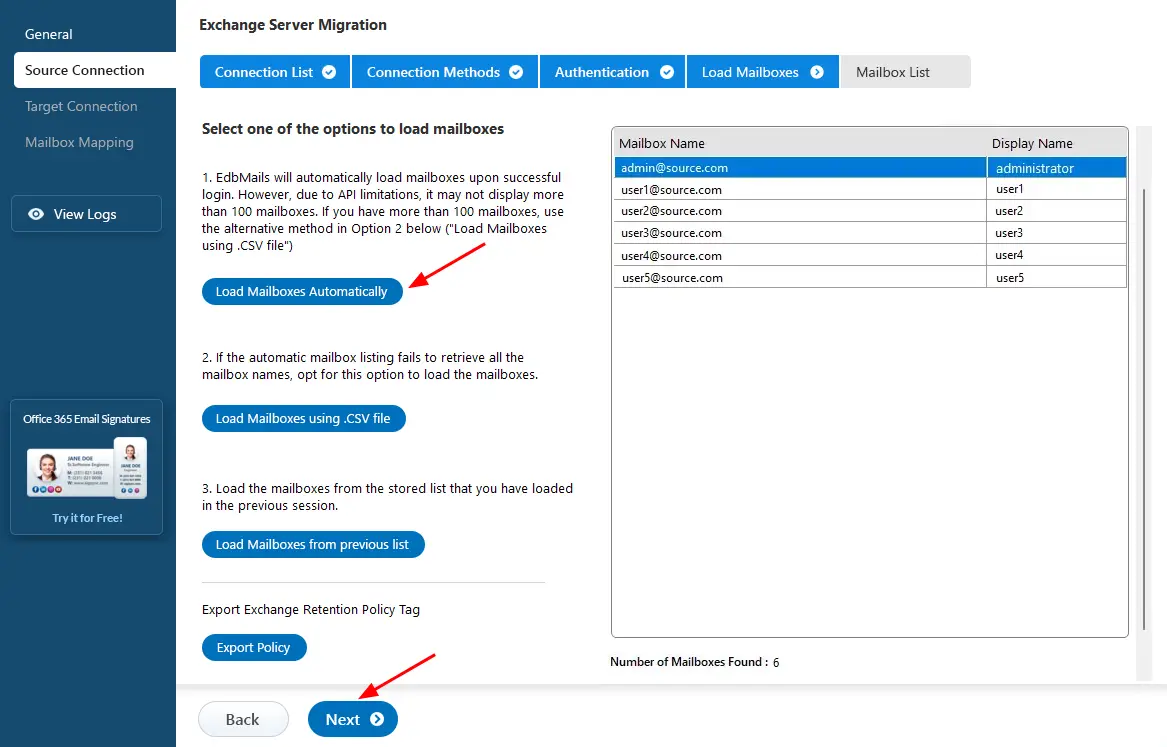
- Select one of the methods to load the mailboxes. You can also load mailboxes using CSV files.
- Click the ‘Add New Connection’ button to establish a new connection to the source Exchange server. To use a previous connection, select it from the connection list and click the ‘Connect to Existing’ button to proceed.
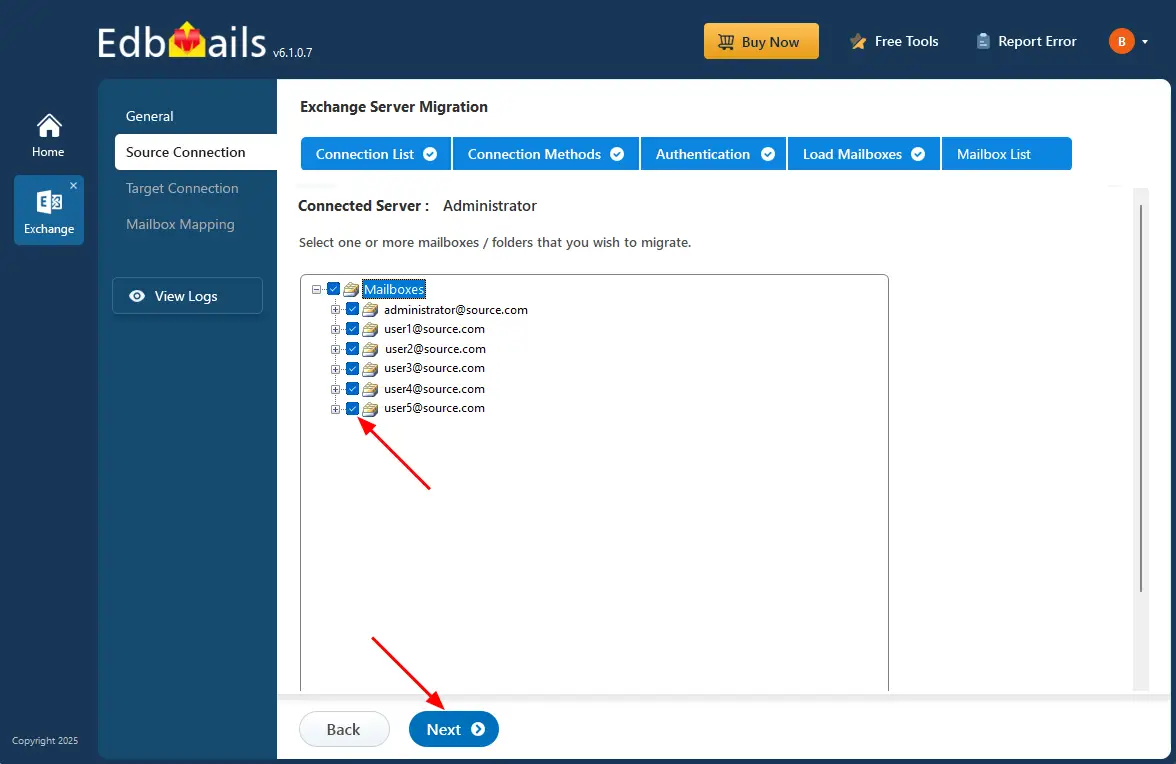
Step 3: Select the mailboxes you want to migrate
- Select the mailboxes/folders you want to migrate from the source Exchange server.
- Click the ‘Next’ button.
Step 4: Connect to target Exchange server
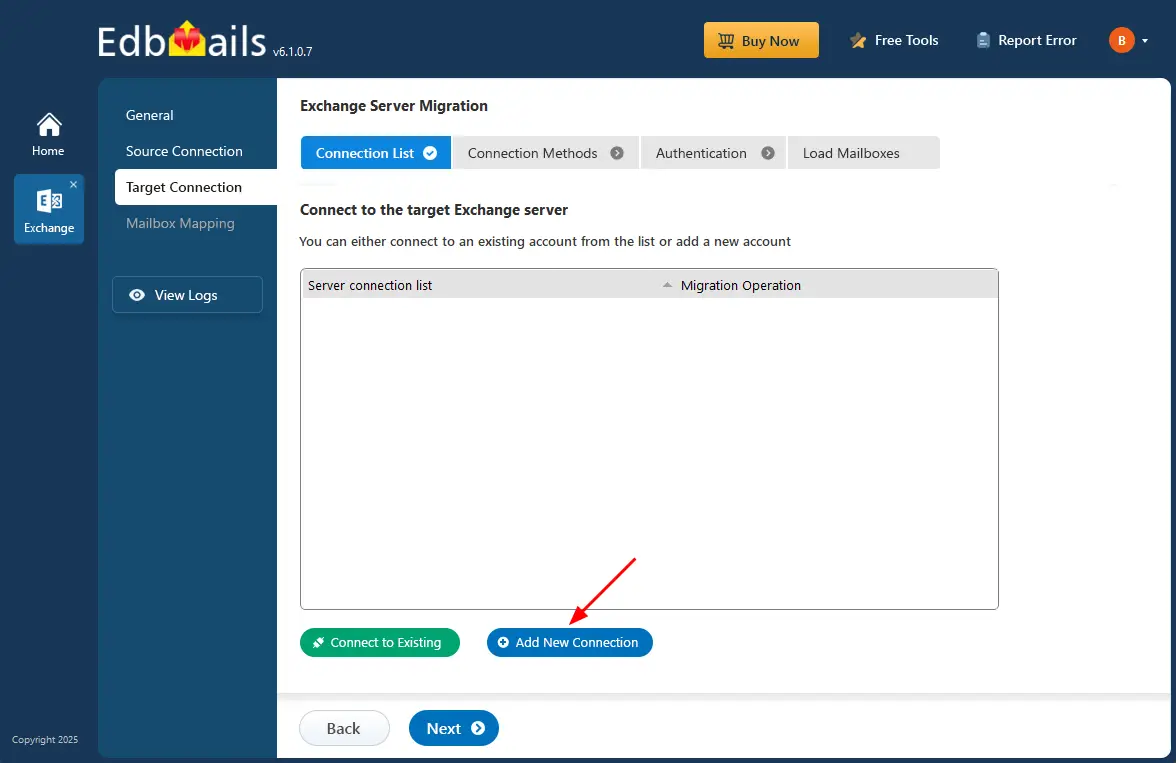
- Click the ‘Add New Connection’ button to set up a new connection. If you’ve already connected before, simply choose the existing connection from the list and click ‘Connect to Existing’ to continue.
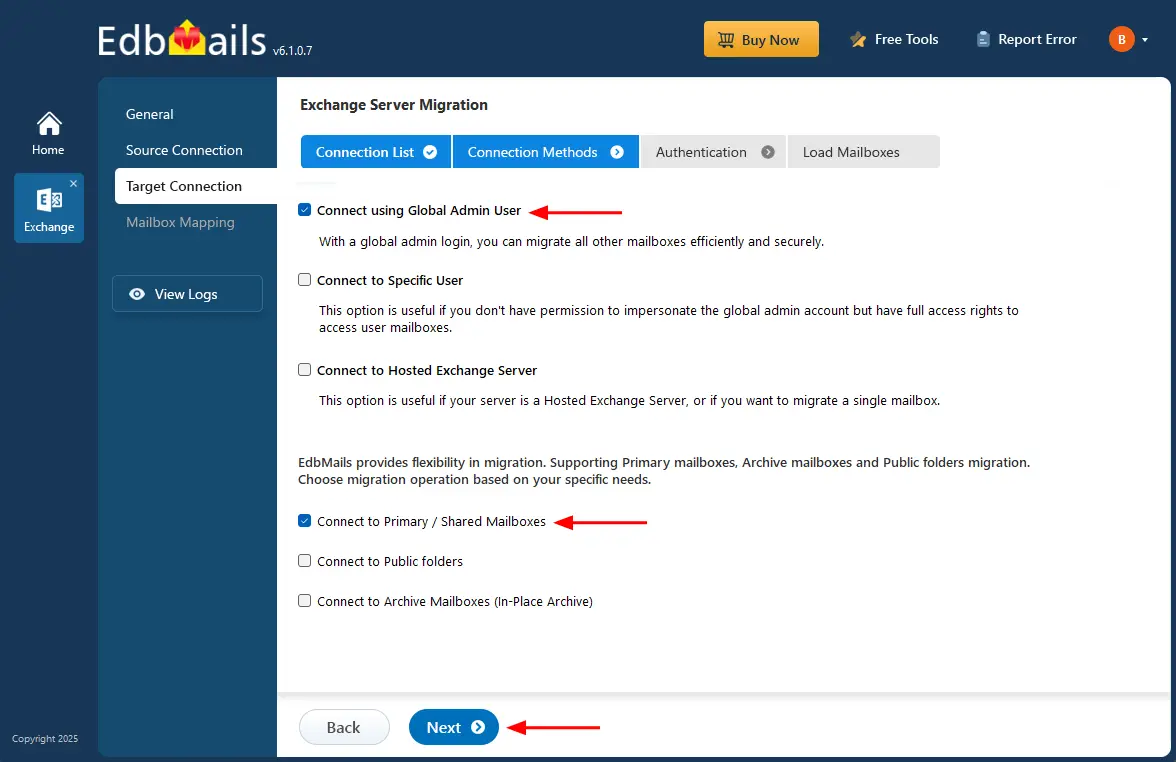
- Choose the required options to connect to your target Exchange server and click the ‘Next’ button.
- Follow one of the links below to connect destination mailboxes.
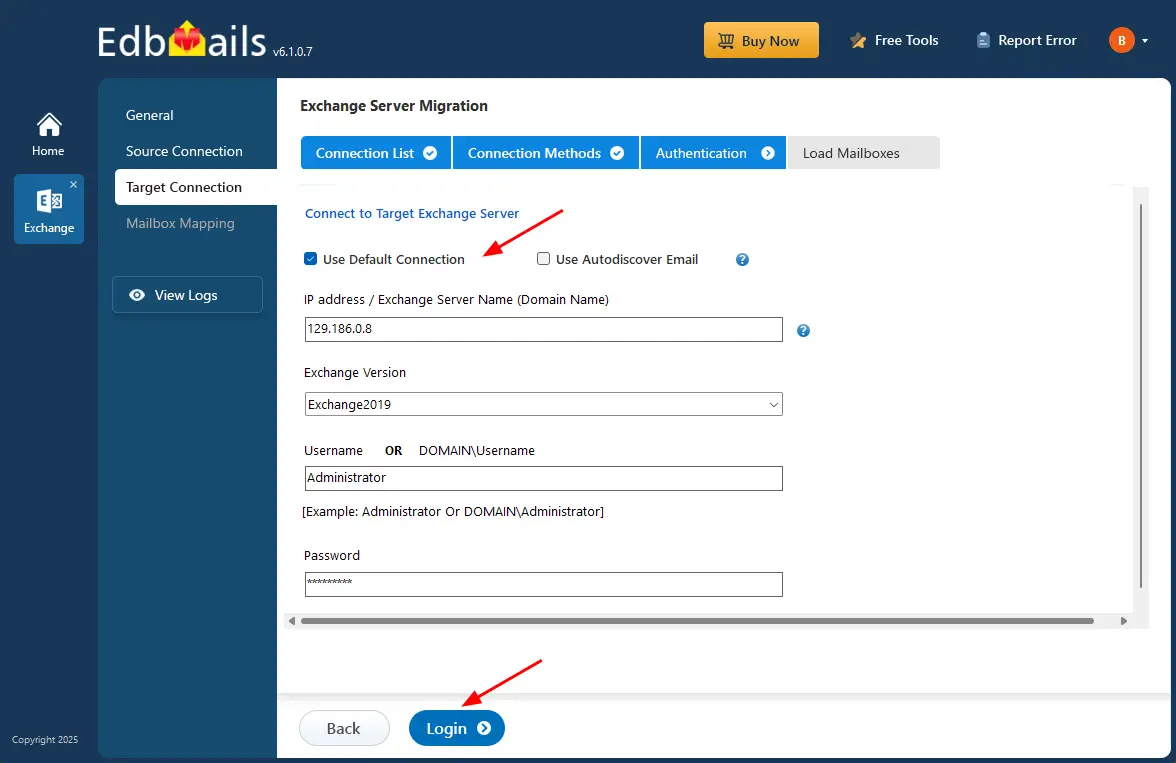
Connect to target Exchange server.
- Enter the target Exchange server details and click the ‘Login’ button
- Select one of the methods to load the mailboxes.

- Click the ‘Add New Connection’ button to set up a new connection. If you’ve already connected before, simply choose the existing connection from the list and click ‘Connect to Existing’ to continue.
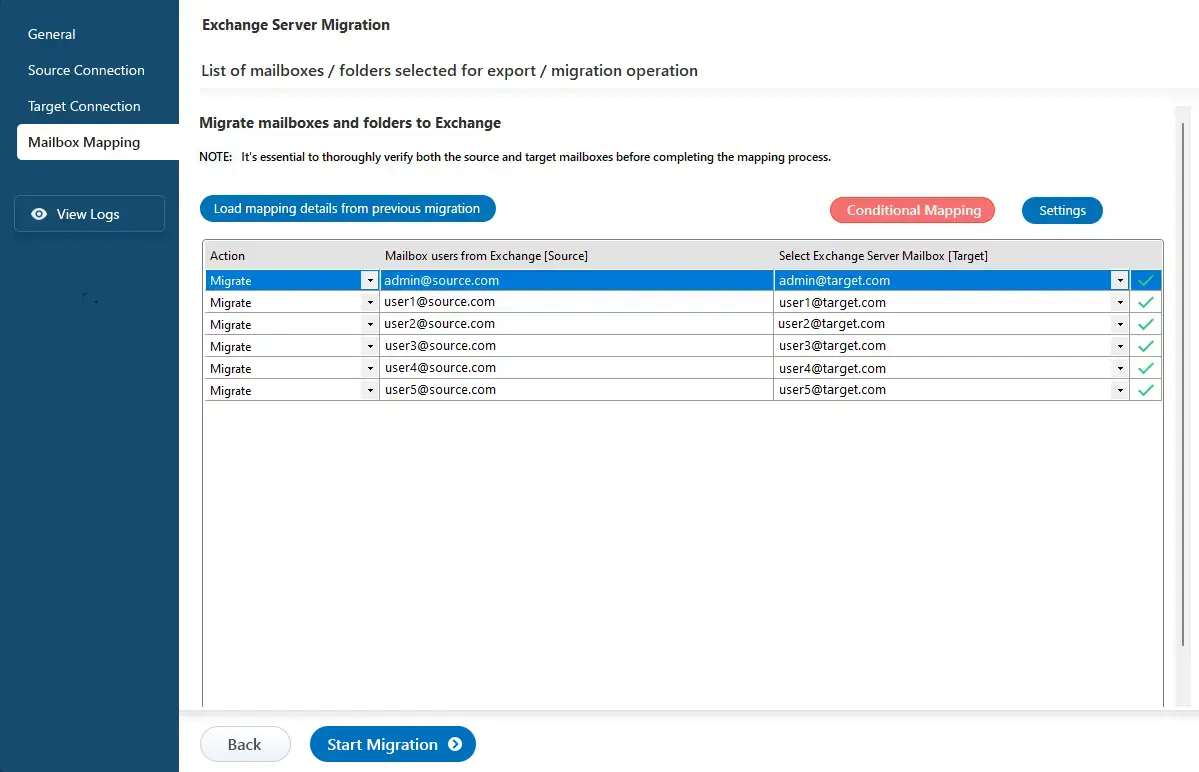
Step 5: Map source and target mailboxes
- Choose the required mapping option.
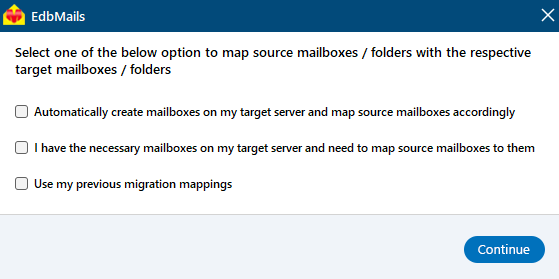
- EdbMails automatically maps mailboxes between the source and target Exchange servers. This feature helps save time and effort, especially during large migrations, by reducing the need to manually match each mailbox.
- Choose the required mapping option.
Step 6: Start the migration operation
- Click the ‘Start Migration’ button to initiate the migration process.
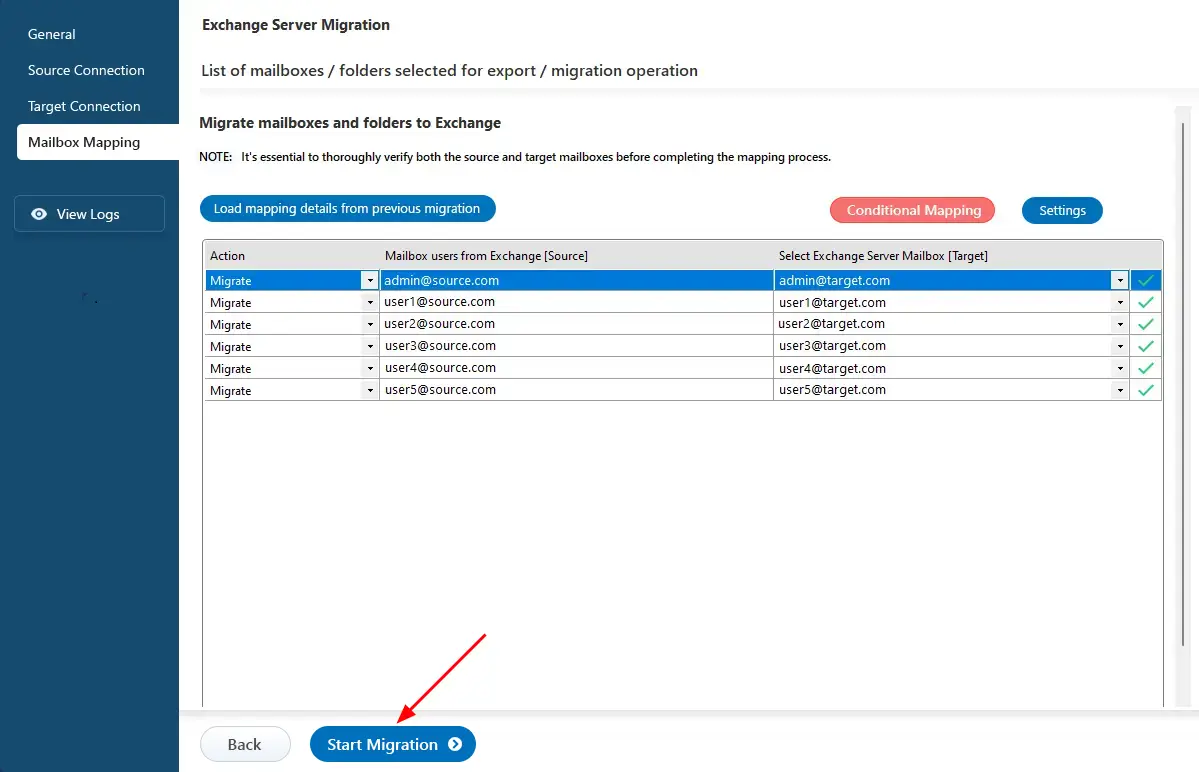
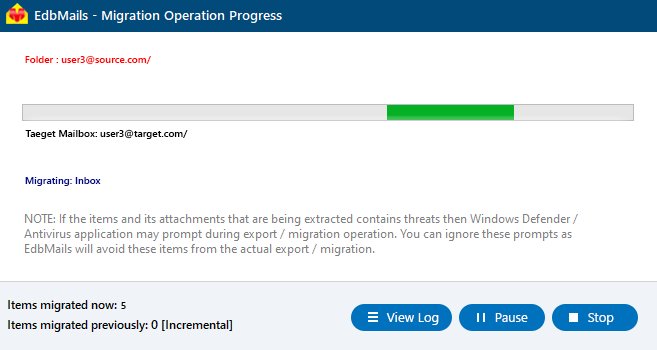
- Thus, the migration has been initiated, you can see the migration status in the progress bar. Once the migration is complete, EdbMails will prompt you to review the migration status with logs.
- Click the ‘Start Migration’ button to initiate the migration process.
Hybrid Exchange to Office 365 Post-Migration Tasks
Step 1: Update MX and Autodiscover Records
Modify your DNS MX records to direct incoming emails to Office 365. This ensures smooth mail delivery after migration. Also, configure the Autodiscover record to enable Outlook to connect automatically to the migrated mailboxes.
Step 2: Create or Refresh Outlook Profiles
If users experience connectivity issues in Outlook, create new outlook profiles or refresh existing ones for each domain user. This helps establish proper connections to the migrated mailboxes.
Troubleshooting guide for Hybrid Exchange Migration
For assistance with migration errors, refer to the Exchange Migration Troubleshooting Guide. For additional details on EdbMails hybrid Exchange migration, visit our Frequently Asked Questions section.
Advantages of Using EdbMails for Hybrid Exchange Migration
- Intuitive User Experience:
EdbMails offers a user-friendly interface with step-by-step guidance, making hybrid migration simple for IT teams of all technical levels.
- Incremental (Delta) Migration:
Only new or modified items are migrated after the initial sync, reducing data duplication and allowing users to work uninterrupted. Learn more
- Precision Filtering:
Advanced filter options enable selective migration based on criteria like date range, folder, or item type, ensuring only relevant data is transferred.
- Downtime-Free Migration:
Mail flow remains uninterrupted during migration, allowing users to continue accessing emails and services without disruption. Learn more
- Automated Mailbox Mapping:
Source mailboxes are automatically mapped to target mailboxes in Office 365, reducing manual effort and minimizing errors.
- Multi-Mailbox Migration:
Multiple mailboxes can be migrated simultaneously, speeding up large-scale migrations and optimizing resource use. Learn more