


Office 365 to Exchange 2019 migration
Migrating from Office 365 to Exchange 2016 or Exchange 2019 might appear contradictory since most businesses opt for the cloud service for all their needs. But there are various reasons behind such a migration. Organizations desire increased data control, regulatory compliance, or certain customization features available through on-premises Exchange. Moving back to Exchange would provide businesses with more secure handling of confidential data, prevent outages that may be occurring with the other service, and allow them to customize the environment to their specific requirements.
EdbMails Office 365 migration software simplifies the migration from Office 365 to Exchange 2019. EdbMails ensures a smooth transfer of entire mailbox items like E-mails, contacts, tasks, calendar and etc without compromising any of its part and security over the transfer. EdbMails possesses a high level of performance by delivering ultra-fast migration speed to fulfill users need of quick migration of massive volume of data.
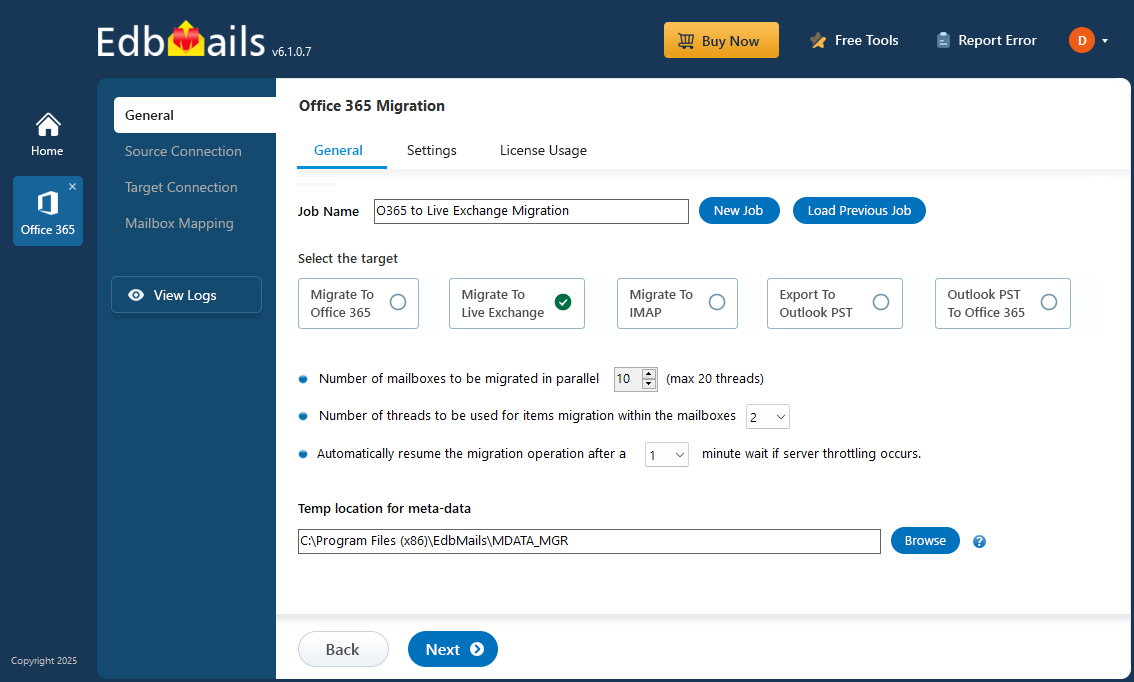
EdbMails Office 365 migration tools contain automatic throttling management which manages the migration speed by itself, so it will never cross Office 365 throttling limits. This functionality enables an organization to run its system efficiently and without interruption ensuring smooth migrations. Apart from these features, EdbMails also allows concurrent mailbox migration, which means that various mailboxes can be migrated in parallel which saves a lot of migration time and organizations can get the mailbox migration completed.
With an easy to use interface, EdbMails offers the user step by step instructions on performing a migration and it can be easily operated by users without extensive technical expertise. The detailed reporting features available with this software enable the organizations to have a track of the migration progress at real time and quickly fix any problems faced. EdbMails enable the user and organizations to reduce their overall downtime, carry out a perfect migration from Office 365 to Exchange 2016 or 2019 and concentrate more on their organization's business.
Office 365 to on premise Exchange migration planning
- Evaluate your current Office 365 environment
Before migrating Office 365 to on premise Exchange 2019 assess your Office 365 environment, including an inventory users, email domains, distribution lists, any customizations. Be aware of any problems you might encounter such as throttling, ensure your network capacity and bandwidth are sufficient to migrate.
- Prepare your Exchange 2019 environment
Prepare your Exchange 2019 environment with the required infrastructure like the active directory domain, the exchange server. Configure any customized policies or settings that you may have used in the office 365 environment.
- Configure Exchange 2019 for Hybrid Deployment
Set up your Exchange 2019 for hybrid deployment where you will have a hybrid migration between Office 365 and your on-premises Exchange server. Exchange hybrid deployment is achieved by setting up Exchange hybrid agent, Exchange online connector, and Hybrid mail flow.
- Test and perform a pilot migration
Before migrating any mailboxes, make sure that your Exchange 2019 environment is functional. Test mail flow, mailbox access, URL and custom configurations/policies.
- Migrate mailboxes and data to Exchange 2019
Once your Exchange 2019 environment is tested, proceed to migrating mailboxes and data from Office 365 to Exchange 2019 using EdbMails.
- Verify and test the migration
Once you are done with the mailbox migration, test and verify the migration. Test the mail flow and mailbox access and the customized configurations/policies. Setup the Outlook profile for your organization's users and prompt them for changing their password.
- Decommission Office 365 and remove any licenses
Decommission your Office 365 environment after performing and testing the migration. Remove the Office 365 licenses assigned, delete the Office 365 tenant and disable the Exchange Online connectors.
- Evaluate your current Office 365 environment
Pre-migration activities for Office 365 to Exchange 2019 migration
Before you proceed to perform any migration, ensure that both your source Office 365 as well as target Exchange environments are ready. Take into consideration to analyze your Office 365 current environment which may include taking an inventory of your users, your e-mail domains, your distribution groups, any particular configuration you might have had before. List also any issue that could arise during the migration process.
Step 1: Check that you meet the following requirements on Office 365
- Ensure that you have a global admin account with a mailbox for Auto Registration of EdbMails application on your Entra ID (Azure Active Directory). However, you can use either a global admin account or any user account with full access rights in the Manual Registration method.
- Ensure that your network and bandwidth meet the requirements for the migration.
- Refer to the following links for network and migration planning, performance factors and best practices.
- To migrate source Public folders, ensure that you assign the necessary admin permissions.
- To migrate In-Place archives, make sure that the archive mailbox is enabled.
- See the steps to enable online archive in Office 365.
Step 2: Check that your system meets the Exchange server setup requirements
- After you've evaluated your current Office 365 environment, it's time to prepare your Exchange 2019 environment. This task includes setting up the necessary infrastructure, such as the Active Directory domain and the Exchange Server itself. You'll also want to configure any custom settings or policies that you had in your Office 365 environment.
- The following links will help you set up your target Exchange 2019 environment. Learn more about the network, hardware and operating system requirements for installing Exchange 2019 server.
Step 3: Prepare your target system with the following prerequisites
- Complete the following prerequisites for Active Directory, Windows Mailbox server, and Windows Edge Transport servers before installing the Exchange server.
Step 4: Set up Exchange Server for migration
Given below is a list of key points for installing and preparing the Exchange server for migration.
- Prepare AD and domains Before installing Exchange Server you need to prepare your Active Directory forest and its domains for the new version of Exchange. If you have a separate team to manage the Active Directory schema, you need to first extend the active directory schema, else proceed to the next step to prepare the Active Directory. If you have multiple domains you need to additionally prepare the Active Directory domains.
- Install Exchange server on your computer
Before installing the Exchange server, ensure that you meet the server system requirements and prerequisites as outlined previously. Next, follow the link to install Exchange 2016 or install Exchange 2019 from the setup wizard.
Prepare a clean Exchange target environment
- Create and configure a Send connector to send mail outside the Exchange organization.
- By default, Exchange automatically creates receive connectors for inbound mail flow when the mailbox server is installed. If you need to configure receive connectors, follow the steps in the link.
- Add accepted domains to allow recipients to send and receive email from another domain.
- Configure the default email address policy to add the accepted domain to every recipient in the organization.
- Configure external URLs (domains) on the virtual directories in the Client Access (frontend) services on the Mailbox server to allow clients to connect to your server from the internet (outside the organization’s network).
- Configure internal URLs on the virtual directories in the Client Access (frontend) services on the Mailbox server to allow clients to connect to your server from the internal network.
- Configure SSL certificates from a third-party certificate authority for services such as Outlook Anywhere and Exchange ActiveSync.
- Verify the Exchange server installation by running the command Get-ExchangeServer on the Exchange Management Shell (EMS).
Create mailboxes and Public folders on the Exchange server
- Ensure that you create mailboxes on the target Exchange server and assign suitable licenses to them.
- Create Public folders and assign admin permissions to all the public folders if you are planning public folder migration from Office 365 to Exchange server.
Steps to create Public folder and assign admin permissions on Exchange server
- Assign management roles to the admin account
Set the following permissions to the admin account on the Exchange server.
- ApplicationImpersonation
- View-Only Recipients
- View-Only Configuration
- Verify the mailbox of the admin account
Check to see if the admin account that has been assigned management roles has a valid and non-hidden mailbox on the Exchange server.
- Configure the throttling and message-size limits
Set the custom policies for EWS throttling and configure message size limits on the Exchange server by following the steps in the links below.
Steps to migrate from Office 365 to on-premise Exchange server
Step 1: Download and install EdbMails software
- Download and install the EdbMails application on your computer running on Windows OS. Ensure you can connect to the target Exchange server computer.
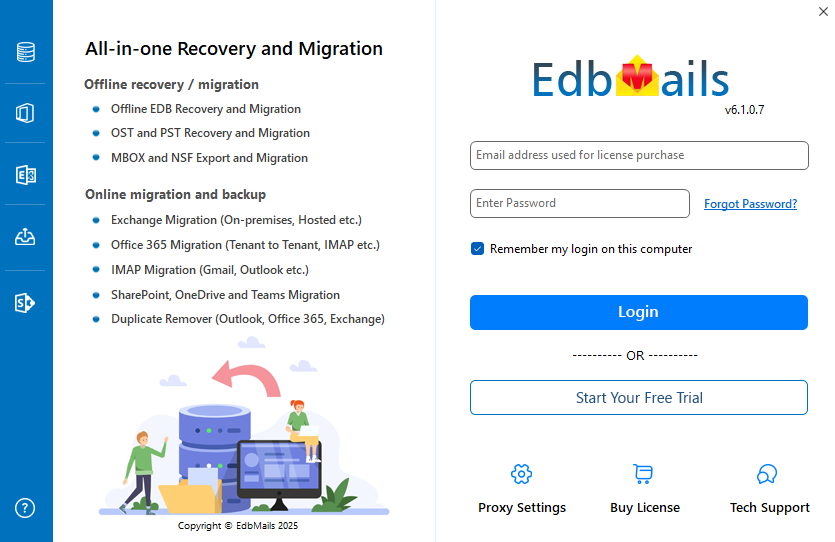
- Start the application and enter the required details and click the ‘Login’ button or click the ‘Start Your Free Trial’ button to continue.
Know more details on System requirements for Office 365 to Exchange migration.
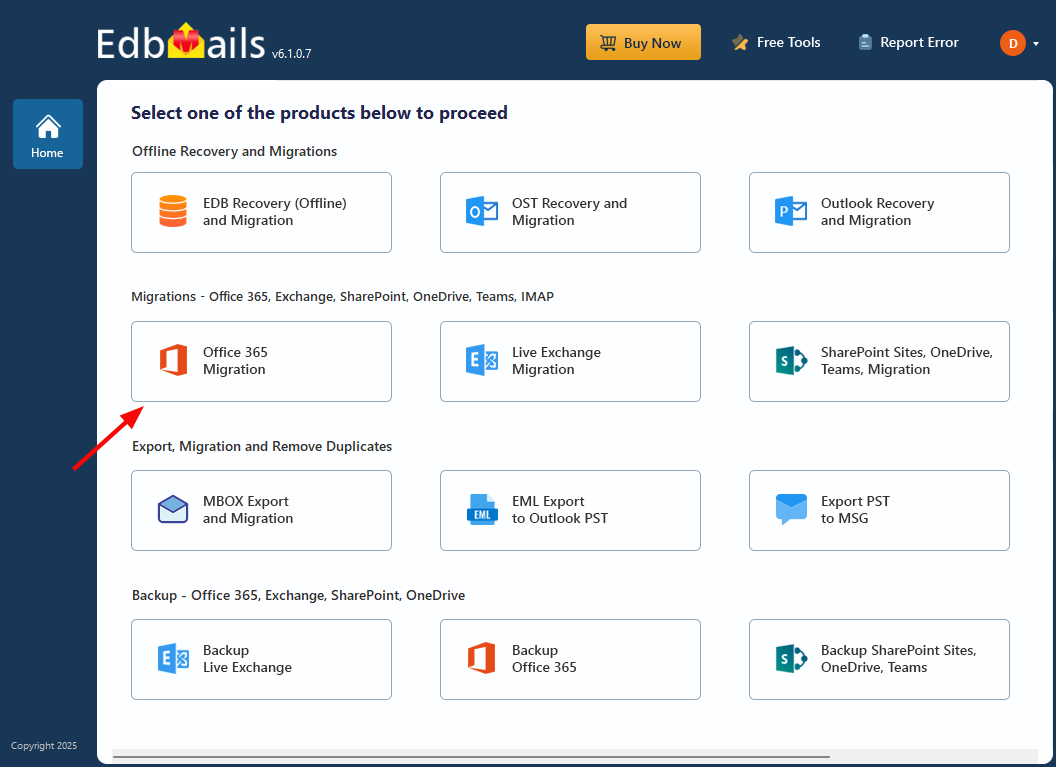
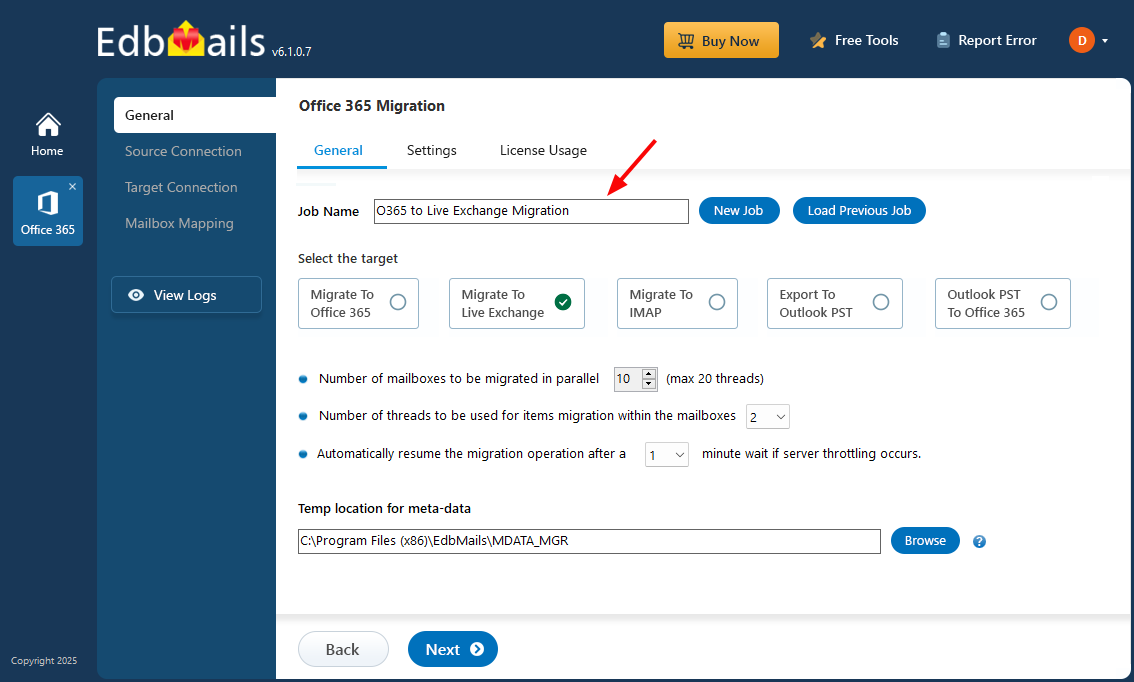
- Select the ‘Office 365 Migration’ option from the products list.
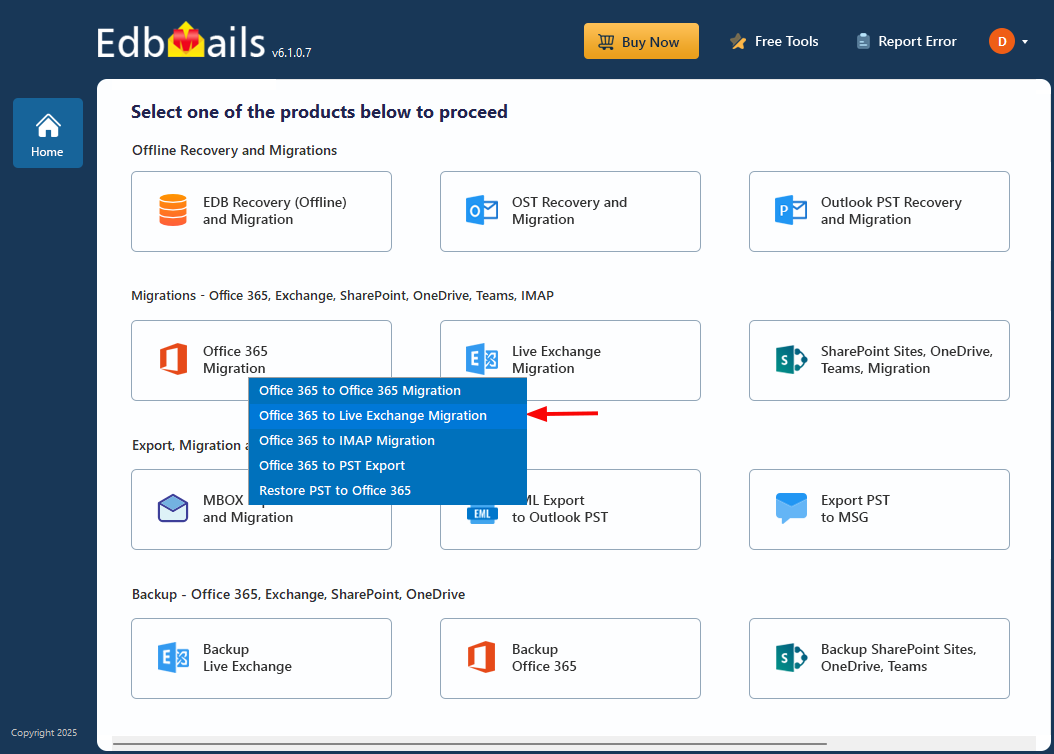
- Choose ‘Office 365 to Live Exchange Migration’.
- Keep the default job name, or click ‘New Job’ to enter a name you prefer.
Step 2: Connect to source Office 365 server
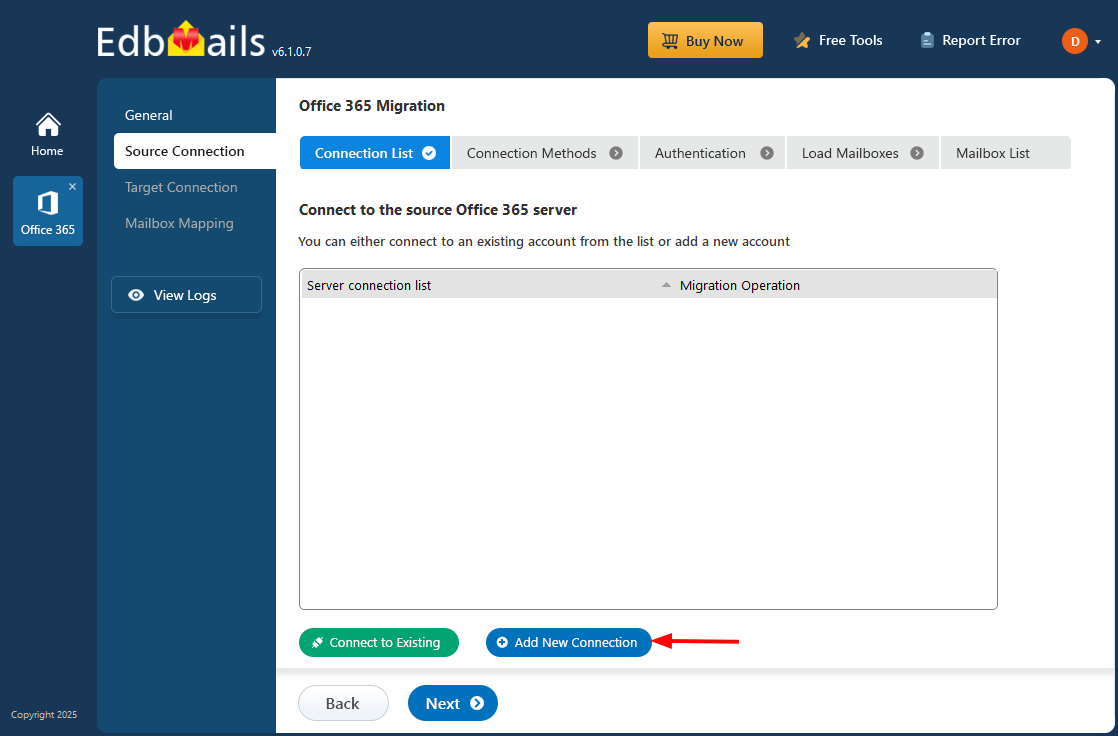
- Click ‘Add New Connection’ to set up a new Office 365 connection. If it’s already added, select it from the list and click ‘Connect to Existing’ to continue.
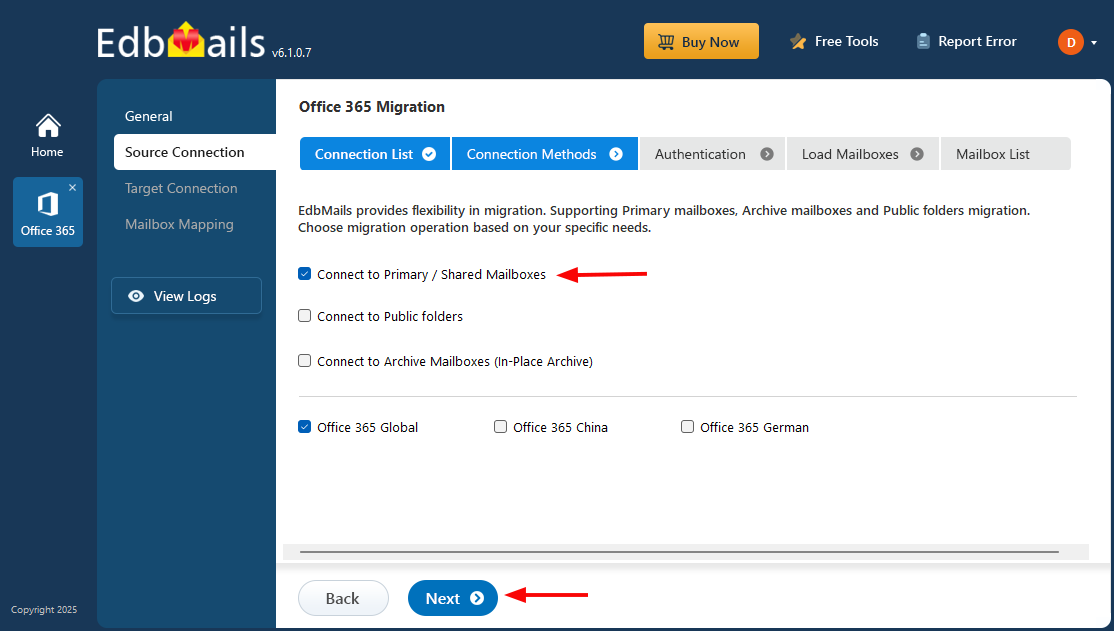
- Select the required connection options and click ‘Next’ to continue.
- Select one of the authentication methods and sign in through the Microsoft login page.
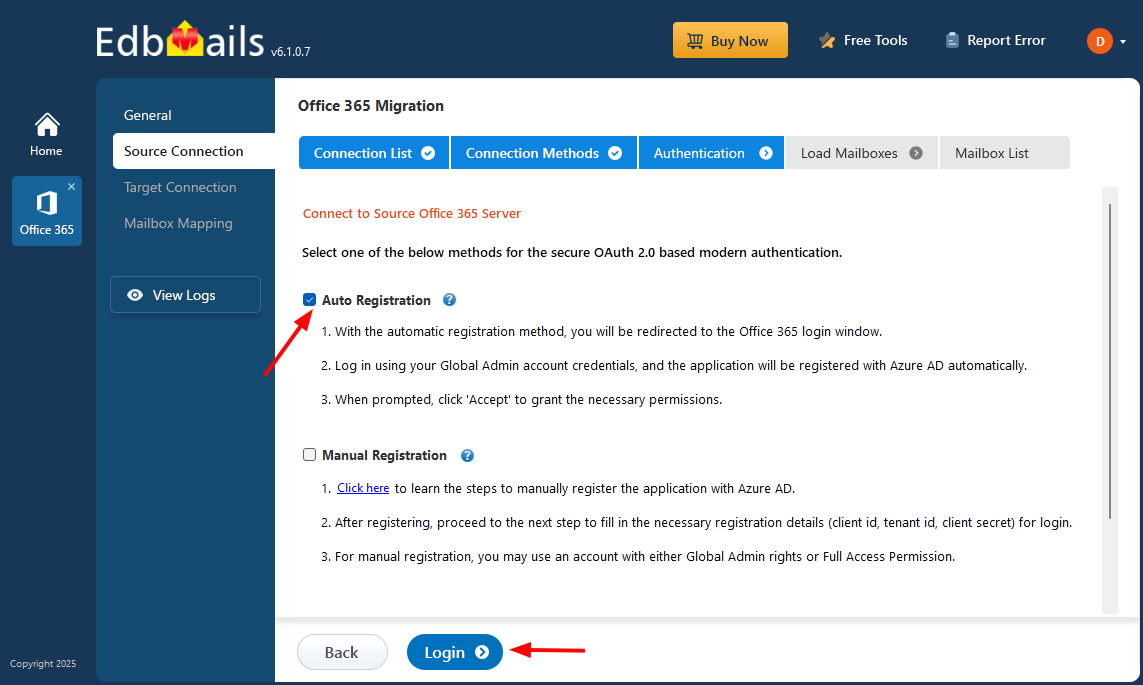
Connect to Office 365 server using secure modern authentication.
- After successfully connecting to your Office 365 server, select an option to load the mailboxes. Alternatively, you can also load the mailboxes using a CSV file.
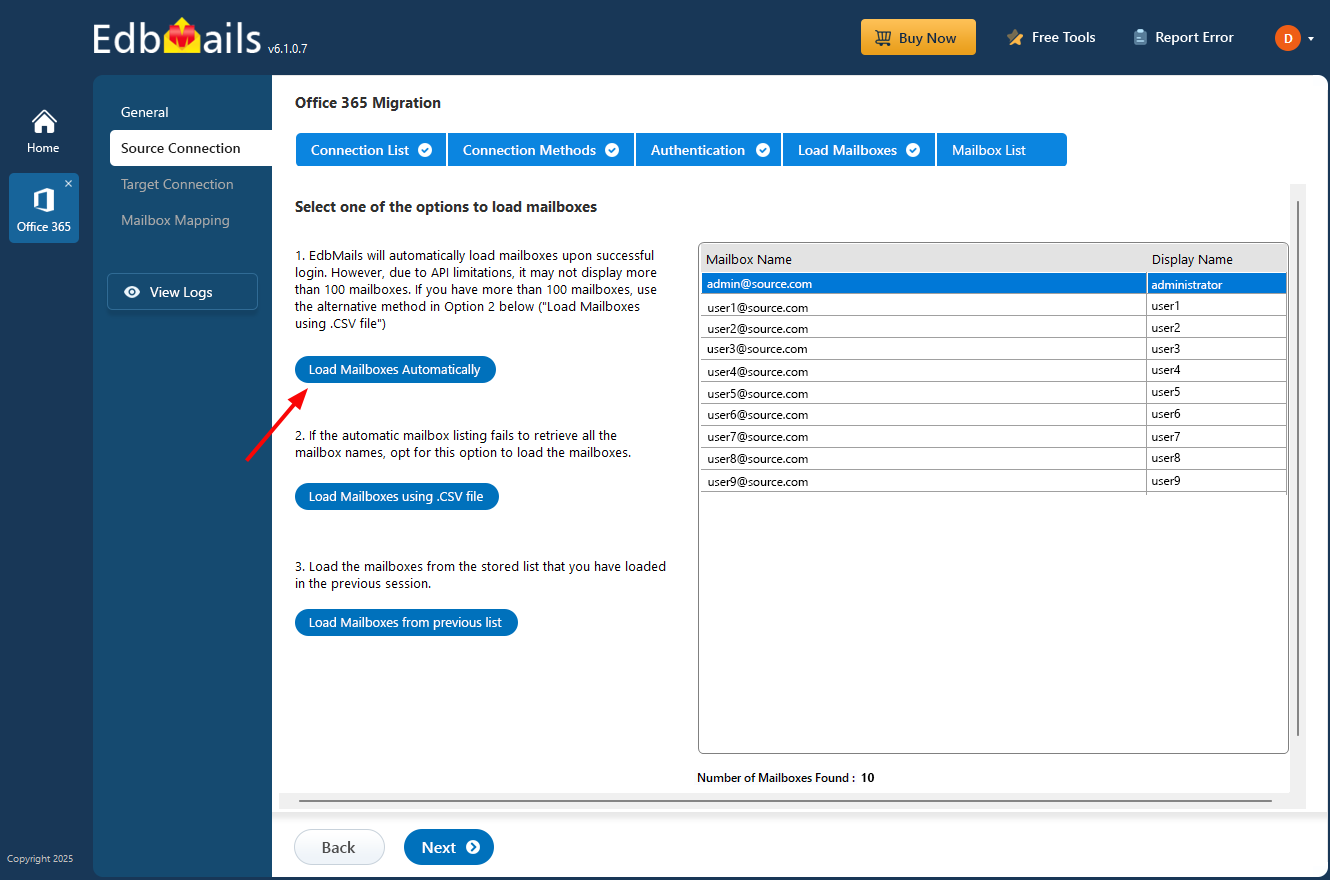
- Click ‘Add New Connection’ to set up a new Office 365 connection. If it’s already added, select it from the list and click ‘Connect to Existing’ to continue.
Step 3: Select the Office 365 mailboxes
- EdbMails displays your Office 365 mailboxes in a tree structure on the left side of the migration window. Simply select the mailboxes you want to migrate from the list and click 'Next' to proceed
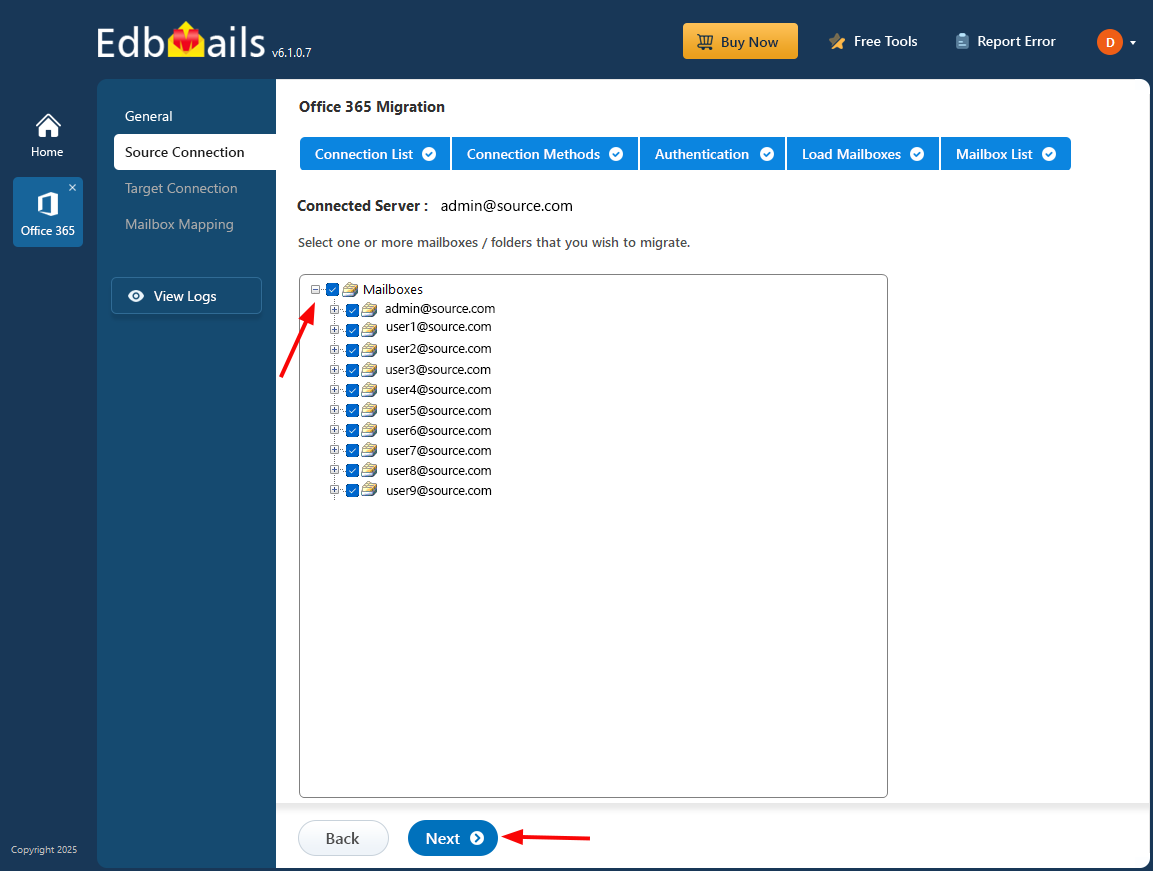
- EdbMails displays your Office 365 mailboxes in a tree structure on the left side of the migration window. Simply select the mailboxes you want to migrate from the list and click 'Next' to proceed
Step 4: Connect to target Exchange 2019 server
- Click ‘Add New Connection’ to establish a new connection to the target Exchange 2019 server, or select an existing connection from the list and click ‘Connect to Existing’ to proceed.
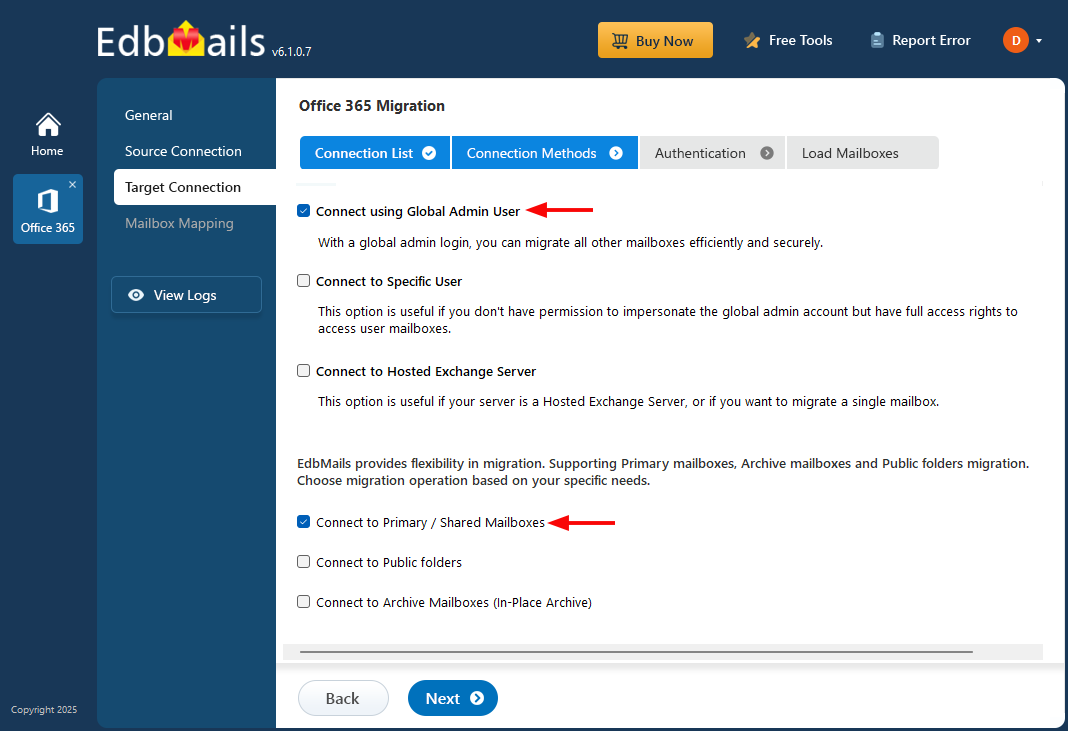
- Choose the required connection options and click ‘Next’ to proceed.
Different options to connect to Exchange server in EdbMails.
Using EdbMails, you can migrate mailboxes, public folders, and archive mailboxes from Microsoft 365 to target Exchange 2019 server.
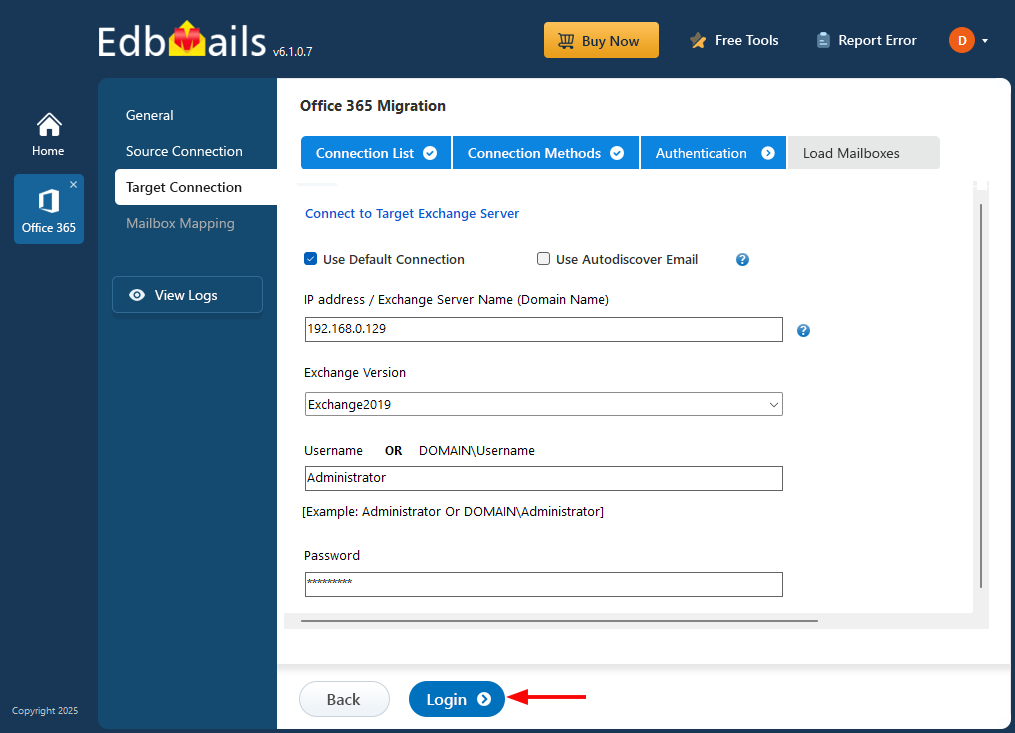
- Enter your target Exchange 2019 server details and then click the ‘Login’ button to proceed.
- Once you've successfully logged in to your , select the required option for loading the target Exchange 2019 server mailboxes.
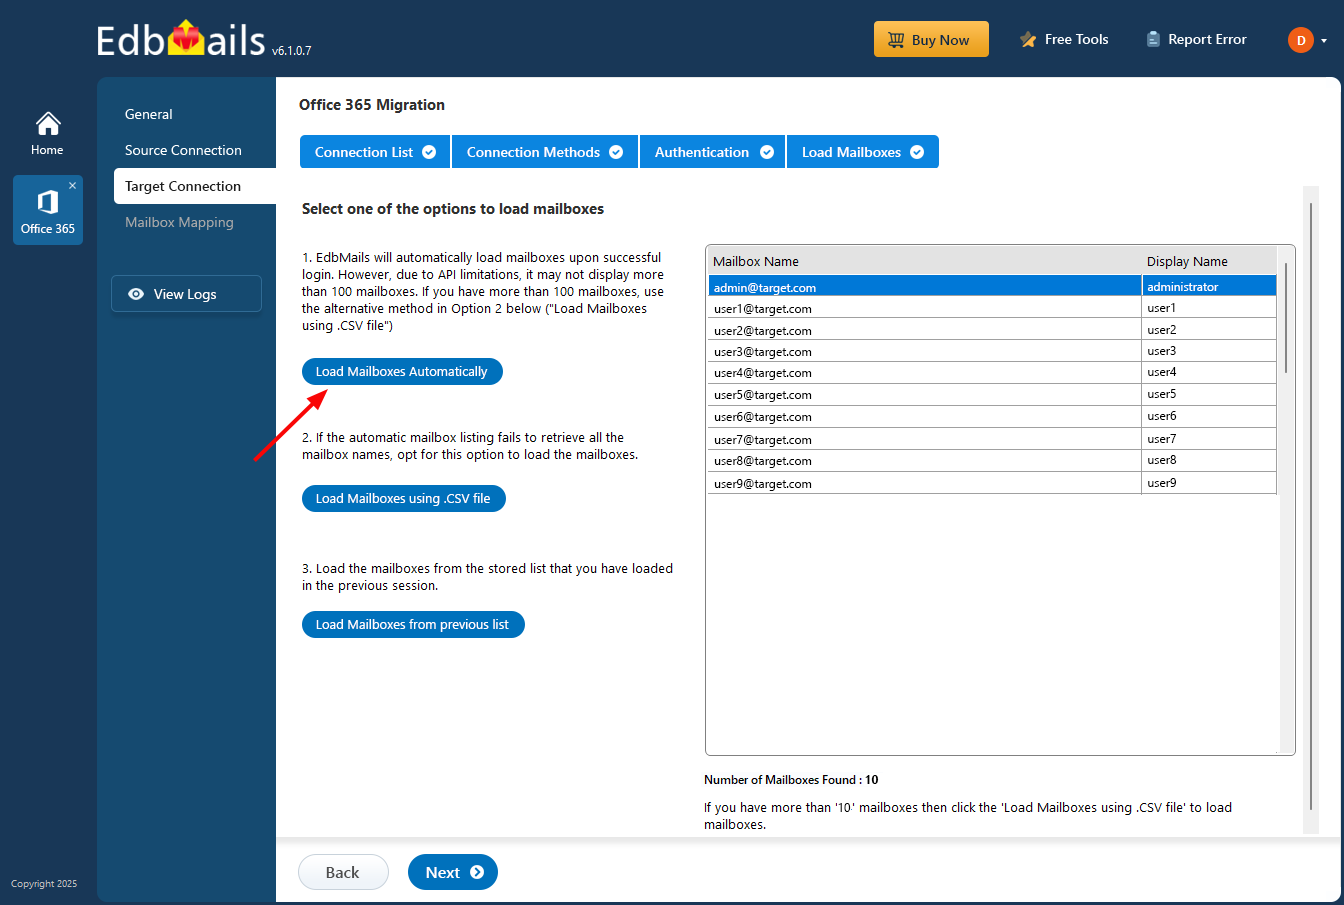
Step 5: Office 365 to Exchange 2019 mailboxes mapping
- Select the appropriate option for mapping your mailboxes.
- If you install EdbMails on your target Exchange 2019 server, you can choose to automatically create mailboxes on the target Exchange 2019 server.
Explore more about automatic mailbox creation.
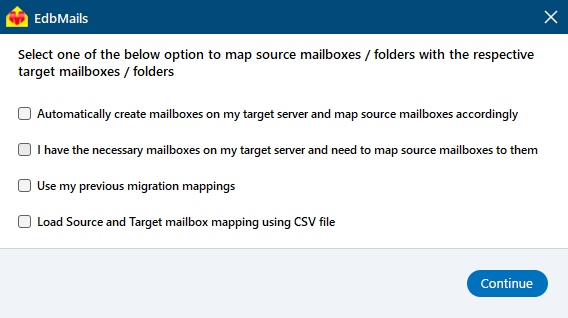
- EdbMails automatically maps mailboxes between the source and target Exchange 2019 servers. This feature is particularly helpful when migrating numerous mailboxes, as it reduces manual effort and saves time during the overall migration process.
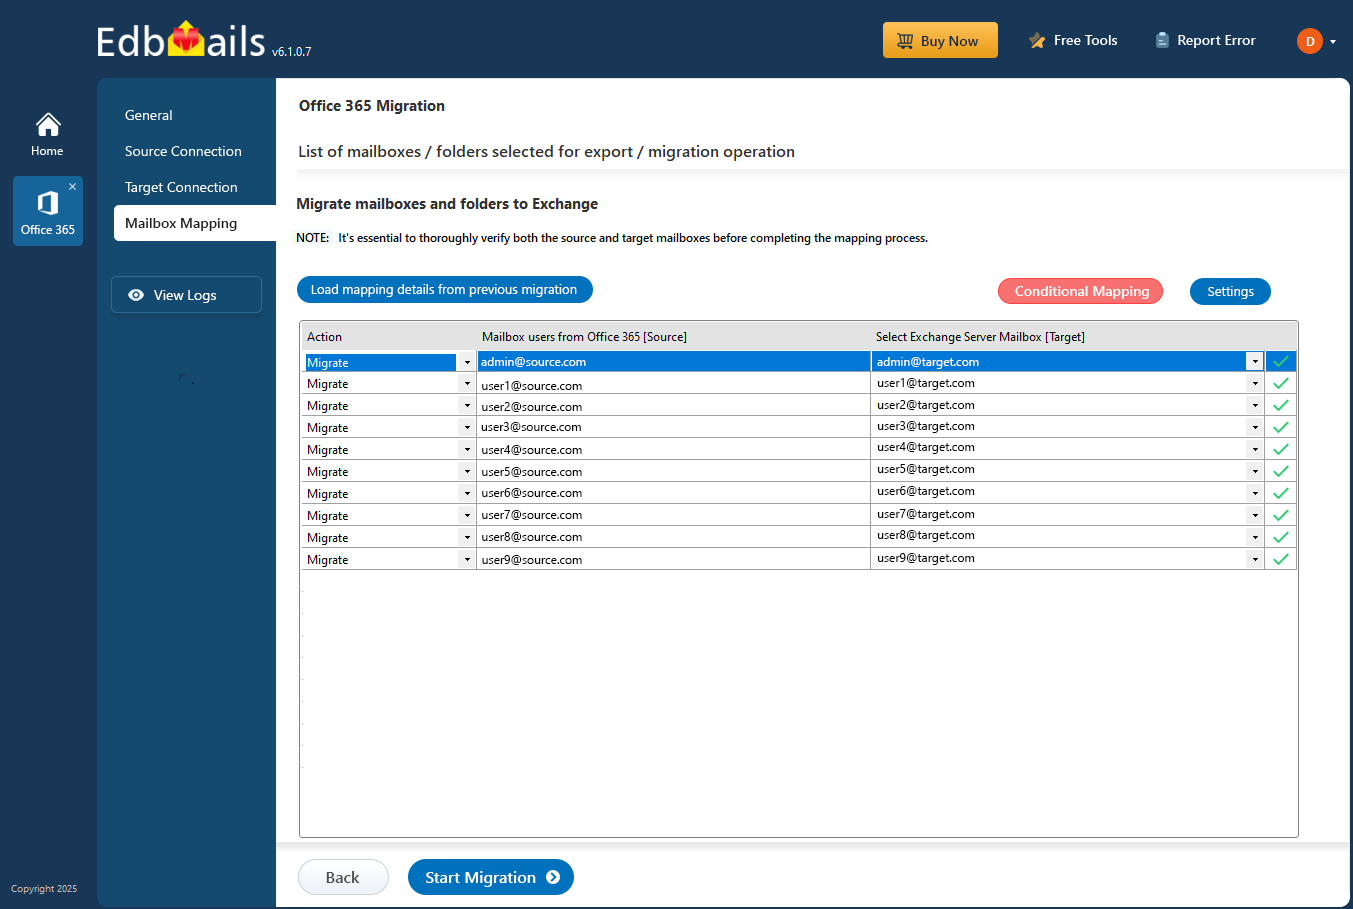
Step 6: Start Office 365 to Exchange 2019 migration
- Once mailbox mapping is complete, click ‘Start Migration’ to begin the process.
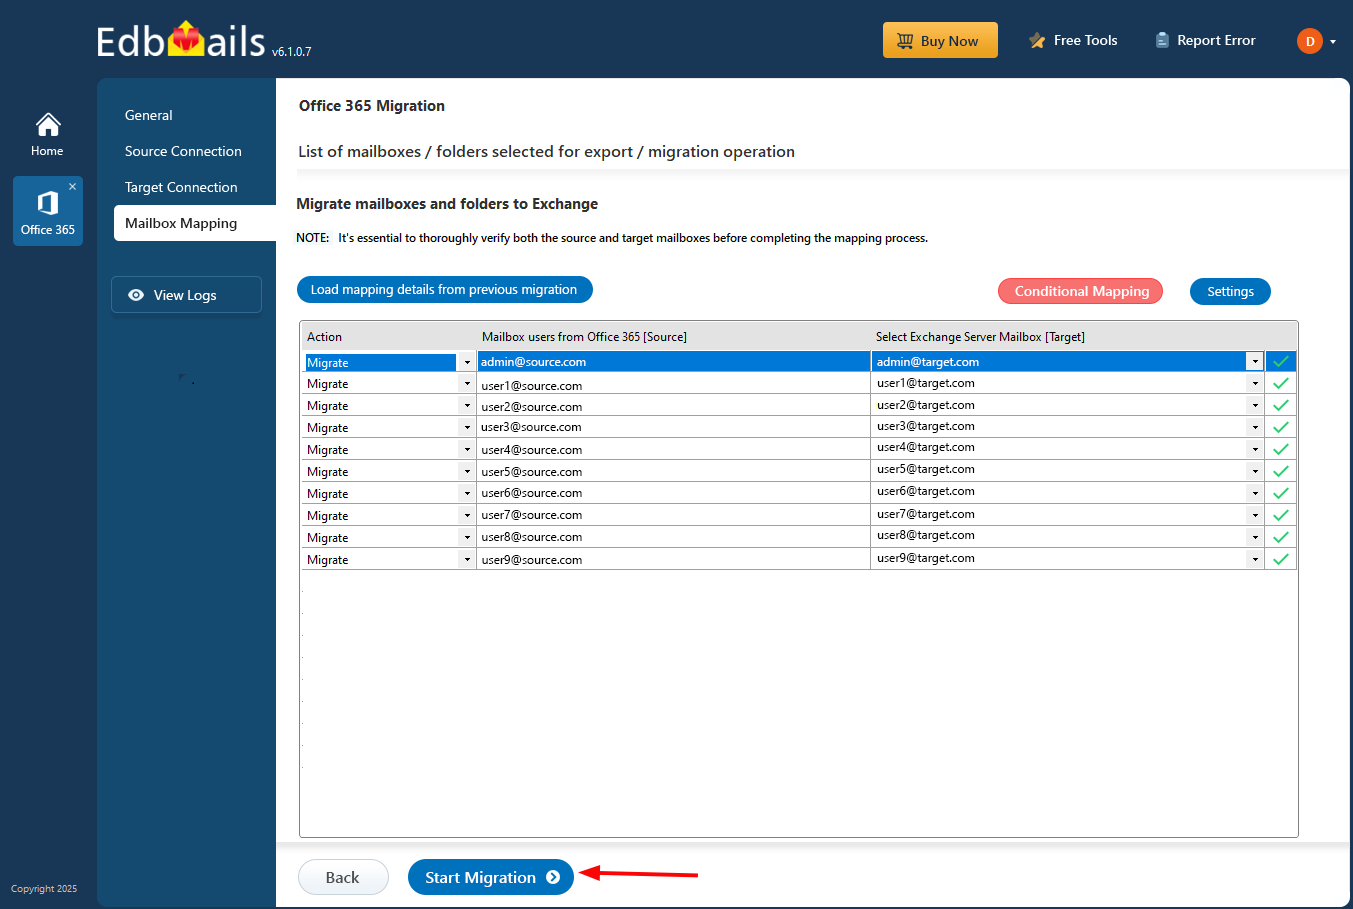
- Track migration progress in real-time. Once finished, a confirmation message will appear. Click ‘View Log’ to access the migration report, and log in to the target Exchange 2019 server to verify the migrated items.
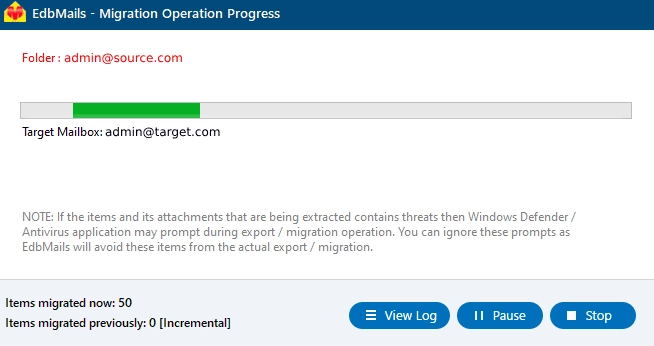
- Once mailbox mapping is complete, click ‘Start Migration’ to begin the process.
Office 365 to Exchange 2019 post-migration tasks
The following steps apply only if you no longer wish to use Office 365 and want to switch back to on-premises Exchange permanently.
Step 1: Update the MX records to point to the Exchange server
In order to receive emails to Exchange update your MX records to allow mail flow to reach your migrated exchange server and also configure your autodiscover record to allow outlook to access your migrated mailbox.
Step 2: Create a new Outlook profile for users in the new domain
- Make sure you have the latest version of the outlook client, in order to prevent compatibility issues.
- Make the outlook profile for each of the users in your domain if the outlook fails to connect to Office 365 mailboxes.
- Make new server settings, server address, login and password for outlook.
- Test sending e-mails to ensure that your users are able to send and receive emails.
Step 3: Remove the old Office 365 subscription plan
Once the migration is completed successfully and the data has been checked, delete the Office 365 subscription plan on source and domains that were connected to it if you do not intend to use it anymore.
Office 365 to On-Premises Exchange migration troubleshooting
Explore troubleshooting solutions for Office 365 and Exchange migration. For additional information regarding EdbMails Office 365 migration, refer to the frequently asked questions section.
Benefits of EdbMails for Office 365 to Exchange 2019 migration
- EdbMails facilitates effortless migration of Office 365 mailboxes to Exchange server migration 2019, 2016, 2013, 2010, 2007.
- The software comes with different migration approaches like cutover, staged, hybrid, tenant to tenant migration, and importing bulk PST files into Exchange server as well.
- Achieve a zero downtime and zero data loss migration with EdbMails.
- Forget the requirement for PowerShell script and import PST method, as you can use EdbMails to migrate from Office 365 to Exchange in a GUI manner and without having any technical skills to manage migration process.
- In addition to primary mailboxes, EdbMails also supports the migration of public folders, In-Place archives, and Shared mailboxes.
- EdbMails guarantees secure migration with complete data consistency throughout the entire process.