


How to migrate Shared mailbox to User mailbox
Office 365 offers two types of email accounts organizations rely on for their day-to-day communications, regular mailboxes and shared mailboxes.
A regular mailbox ties directly to a single user. That user can send and receive emails, keep up with their contacts, and schedule appointments all from one place.
A shared mailbox gives several users access to one email account inside an organization. Teams use it to divide and manage incoming messages between themselves. Customer support is where this comes up most - agents don't need individual accounts when they can all work directly from a shared one.
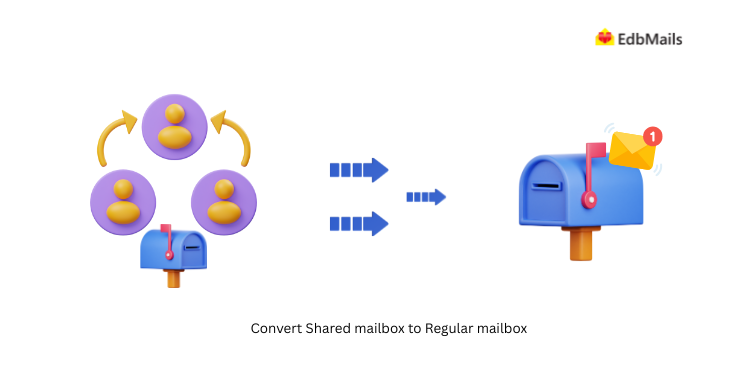
Departments that need a central email address for external communication, or teams managing a specific set of emails together, get a lot of mileage out of shared mailboxes. Calendars and contacts shared across a team or department run through them as well.
A mailbox converted to a Shared mailbox loses nothing in the process; mail items, calendar events, and contacts all carry over unchanged. Once converted, adding members to the Shared Mailbox opens up access to that data for the whole group. Multiple users pull from the same mailbox items rather than one person managing everything. Any member can reach those items in Outlook by adding the Shared mailbox directly to their Outlook profile.
Here are the benefits of a Shared mailbox:
- You can send mails on the behalf of the group's common mail address.
- Possible to have shared calendars without contacts, tasks.
- The Group members of the shared mailbox can choose their inbox notifications settings.
- You can receive mail from inside and outside of the company in a single mailbox. Learn more about the Shared mailboxes in Office 365.
Some of the key points about shared and regular mailboxes
- A Regular mailbox needs a license before you convert it to a Shared mailbox. Otherwise you don't get an option to convert the mailbox to a shared one. After converting to a Shared mailbox, you can remove the mailbox license because a Shared mailbox does not require a license except in a few cases.
- A Shared mailbox can hold up to 50 GB of data without a license. Storing more than that requires a license assigned to it.
- Existing rules stay in place even after the mailbox is converted to a Shared mailbox.
Steps to convert Regular mailbox to Shared mailbox in Office 365
You can convert a User mailbox to a Shared mailbox and convert back a Shared mailbox to Regular mailbox in the Office 365 admin center. The following steps describe the conversion.
Step 1: Log in to the Office 365 Admin center
- Login to Office 365 account and click on ‘Admin’ to open Office 365 Admin center.
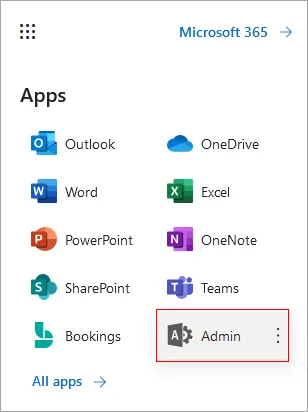
- Login to Office 365 account and click on ‘Admin’ to open Office 365 Admin center.
Step 2: Select Active users under Users
- In the Office 365 admin center, expand ‘Users’ and choose ‘Active users’.
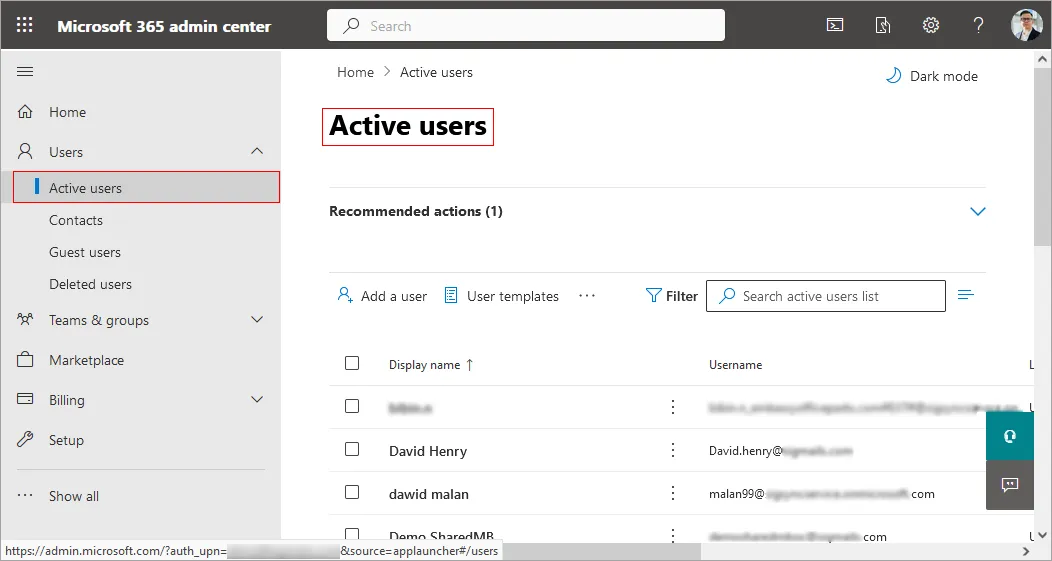
- In the Office 365 admin center, expand ‘Users’ and choose ‘Active users’.
Step 3: Convert the Regular mailbox to a Shared mailbox
- Select the user whose mailbox you want to convert to a Shared mailbox, then go to ‘Mail’ and under ‘More Actions’, select ‘Convert to shared mailbox’.
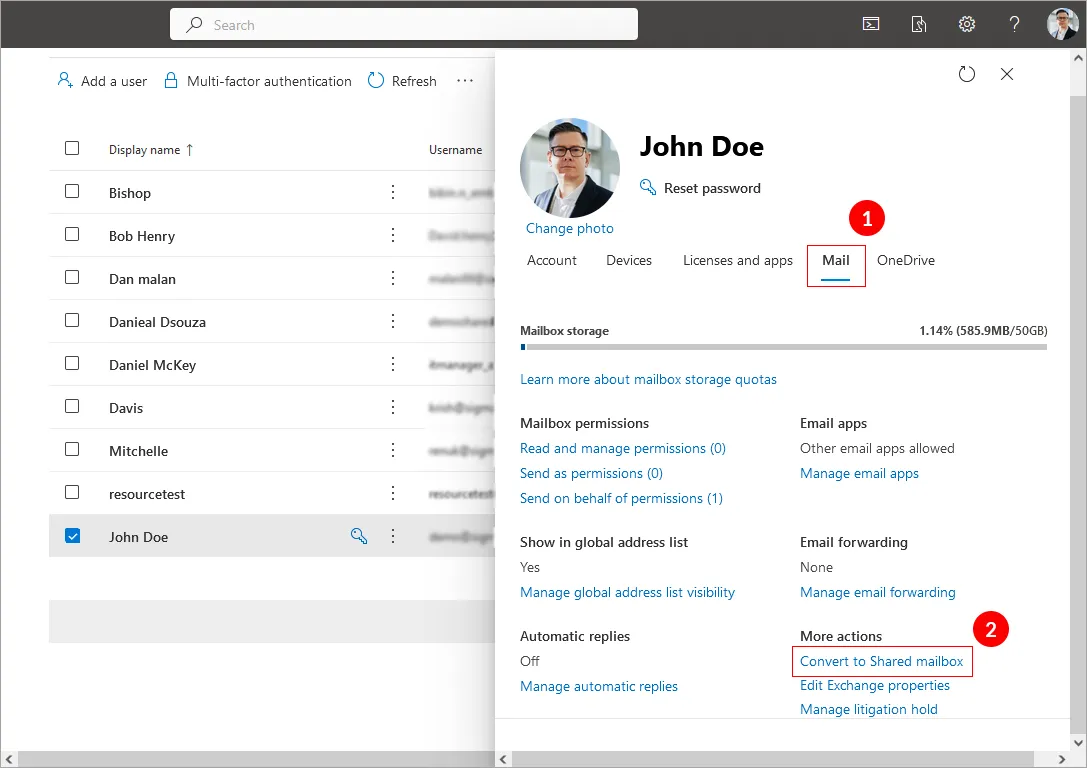
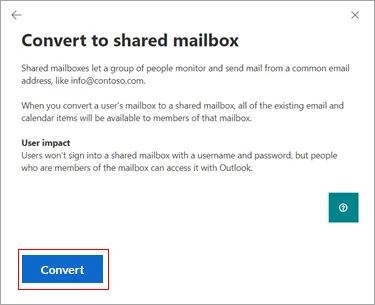
- Now click the ‘Convert’ button.
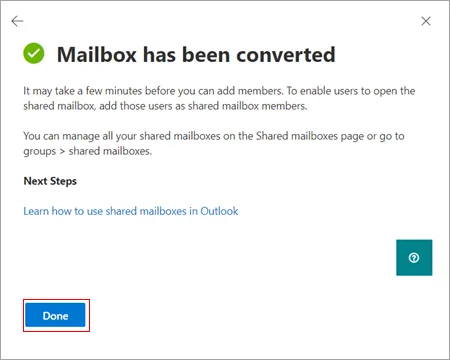
- A success message will be displayed showing ‘Mailbox has been converted’. Click ‘Done’ to finish the conversion operation.
- Select the user whose mailbox you want to convert to a Shared mailbox, then go to ‘Mail’ and under ‘More Actions’, select ‘Convert to shared mailbox’.
Steps to convert Shared mailbox to Regular mailbox using PowerShell
Here are the instructions to convert an Office 365 shared mailbox to a regular mailbox using PowerShell:
- Step 1: Open PowerShell on your computer
Open PowerShell with administrator privileges.
- Step 2: Connect to Office 365 tenant account
Connect to your Office 365 account by running the following command:
Command: CopyConnect-ExchangeOnline -UserPrincipalName admin@contoso.com
Replace admin@contoso.com with your Office 365 administrator account's UPN.
- Step 3: Retrieve the shared Office 365 mailbox
Run the following command to retrieve the shared mailbox you want to convert:
Command: Copy$SharedMailbox = Get-Mailbox sharedmailbox@contoso.com
Replace the sharedmailbox@contoso.com with the email address of the shared mailbox you want to convert.
- Step 4: Remove any shared mailbox permissions
Run the following command to remove any permissions assigned to the shared mailbox:
Command: CopyRemove-MailboxPermission -Identity $SharedMailbox -User "NT AUTHORITY\SELF" -AccessRights FullAccess -InheritanceType All
- Step 5: Convert the shared mailbox to a regular mailbox
Run the following command to convert the shared mailbox to a regular mailbox:
Command: CopySet-Mailbox -Identity $SharedMailbox.Identity -Type Regular
- Step 6: Verify the conversion
Run the following command to verify that the shared mailbox has been converted to a regular mailbox:
Command: CopyGet-Mailbox -Identity $SharedMailbox.Identity | Select-Object Name, RecipientType
This should return the name of the mailbox and its recipient type, which should now be ‘UserMailbox’.
- Step 1: Open PowerShell on your computer
Steps to convert Shared mailbox back to a Regular mailbox
Step 1: Go to the Office 365 Admin center
- Login to Office 365 admin account and click the ‘Admin’ gear icon.
- Login to Office 365 admin account and click the ‘Admin’ gear icon.
Step 2: Select Exchange to open the Exchange admin center
- In the Office 365 admin center, select ‘Exchange’ to open the Exchange admin center.
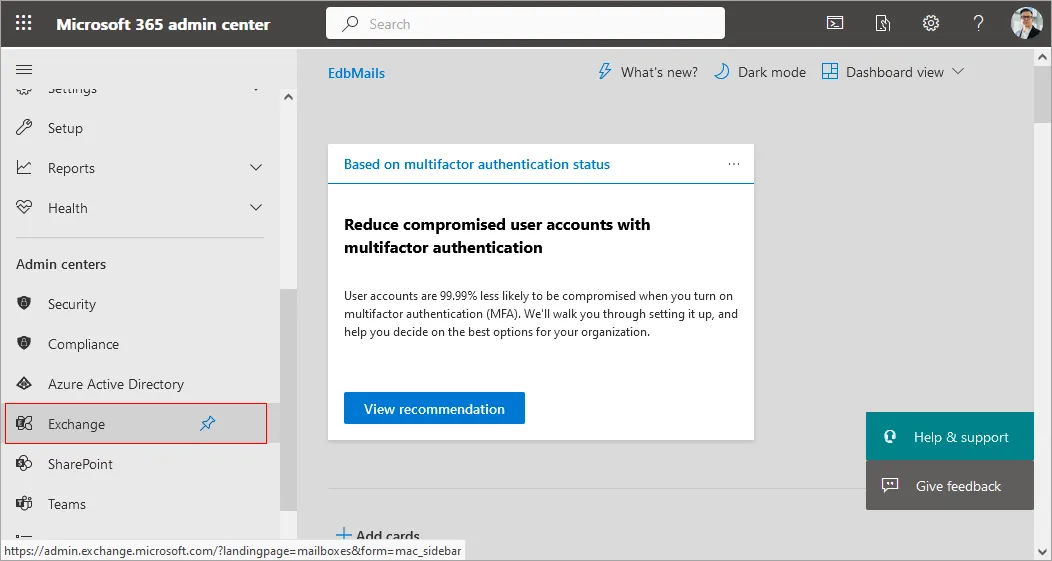
- In the Office 365 admin center, select ‘Exchange’ to open the Exchange admin center.
Step 3: Select the Mailbox which you want to convert
- In the Exchange admin center, select ‘Mailboxes’ under ‘Recipients’
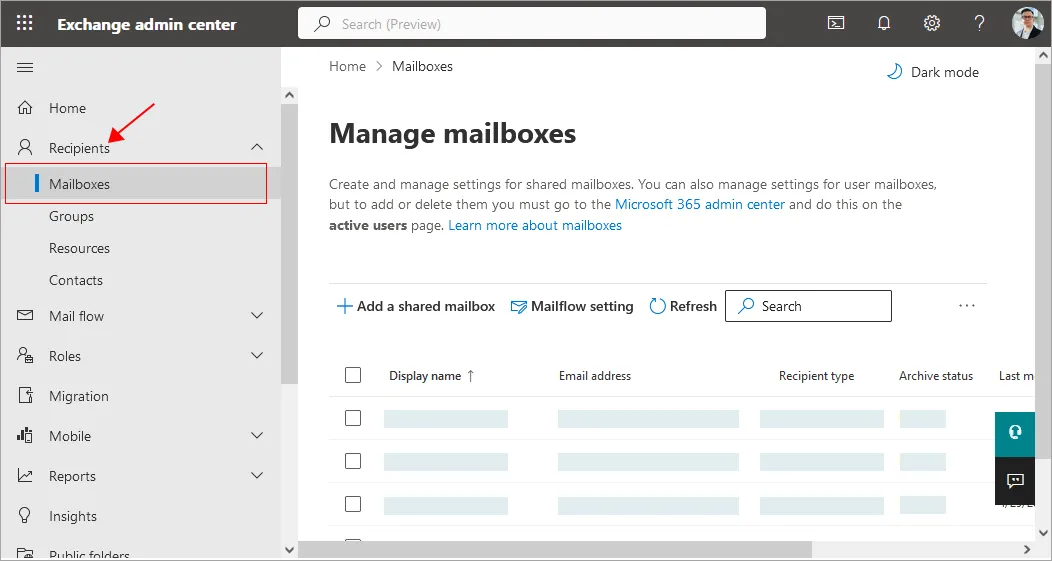
- In the Exchange admin center, select ‘Mailboxes’ under ‘Recipients’
Step 4: Convert the Shared mailbox to a regular mailbox
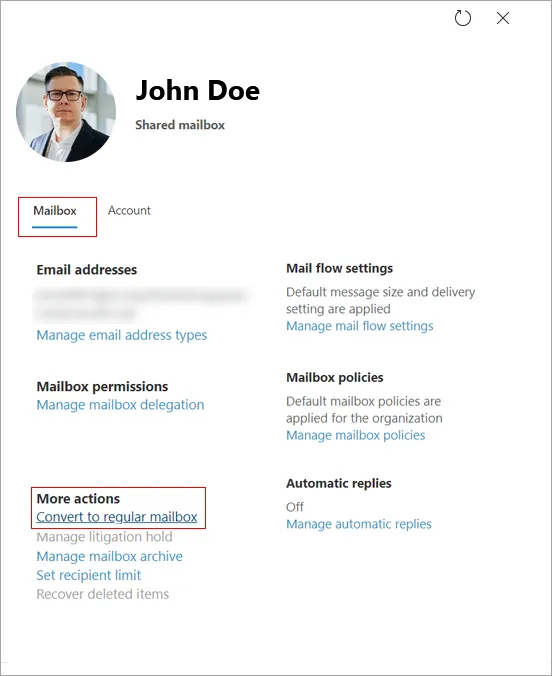
- Select the Shared mailbox that you wish to convert to a regular mailbox. Under ‘More Actions’ select the option ‘Convert to regular mailbox’.
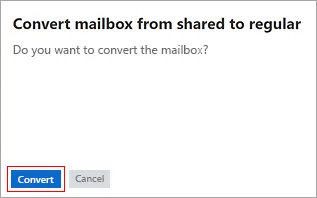
- Now click on ‘Confirm’ to convert from regular mailbox to shared mailbox.
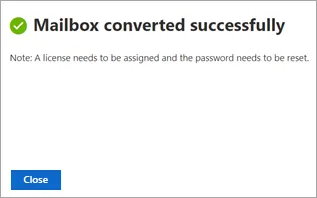
- A success message will be displayed showing ‘Mailbox converted successfully’. Click ‘Close’ to finish the conversion.
- Select the Shared mailbox that you wish to convert to a regular mailbox. Under ‘More Actions’ select the option ‘Convert to regular mailbox’.
Steps to migrate Shared mailbox to Regular mailbox using EdbMails
Step 1: Download and Install EdbMails software
- Download EdbMails and install it on your PC to get started.
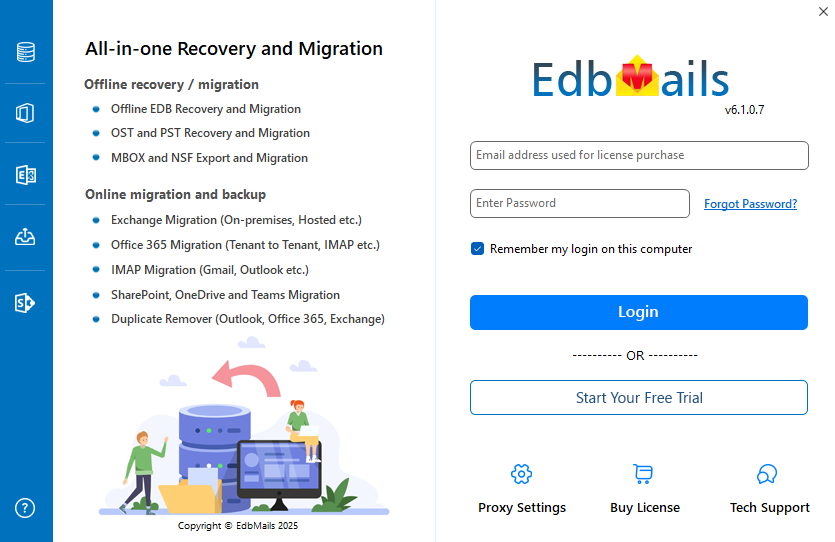
- Click on ‘Login’ or choose ‘Start Your Free Trial’ to open the application.
Check the EdbMails system requirements for Office 365 migration.
Step 2: Select Office 365 to Office 365 migration option
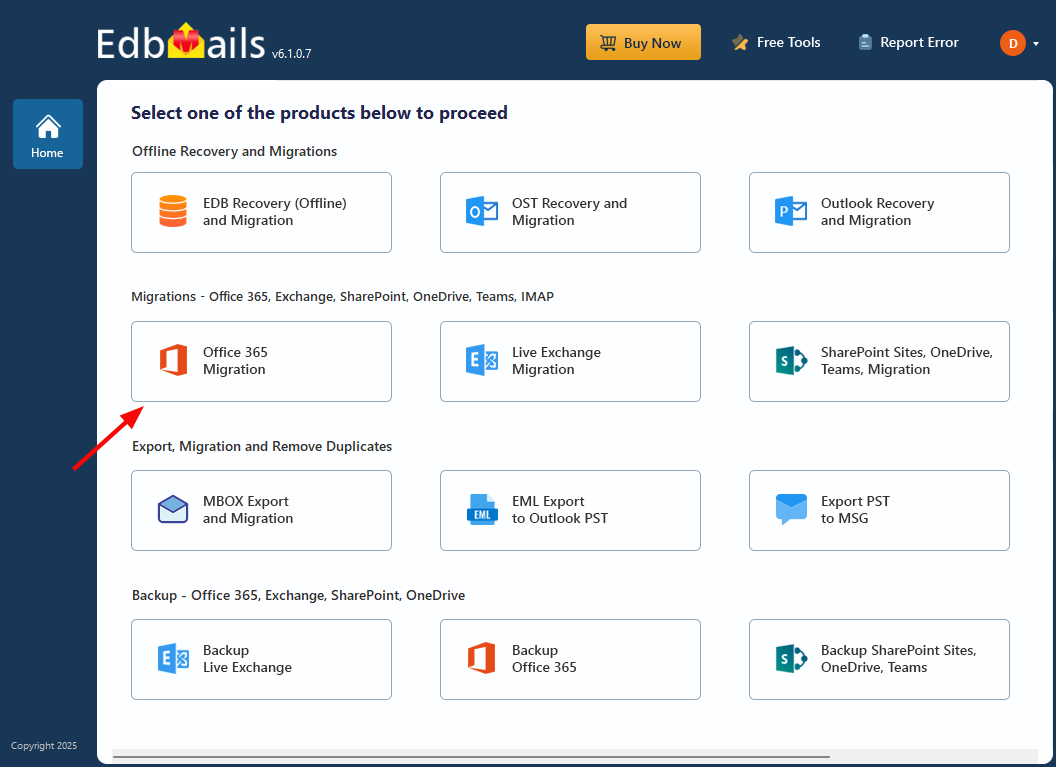
- Select 'Office 365 Migration' products from the dashboard.
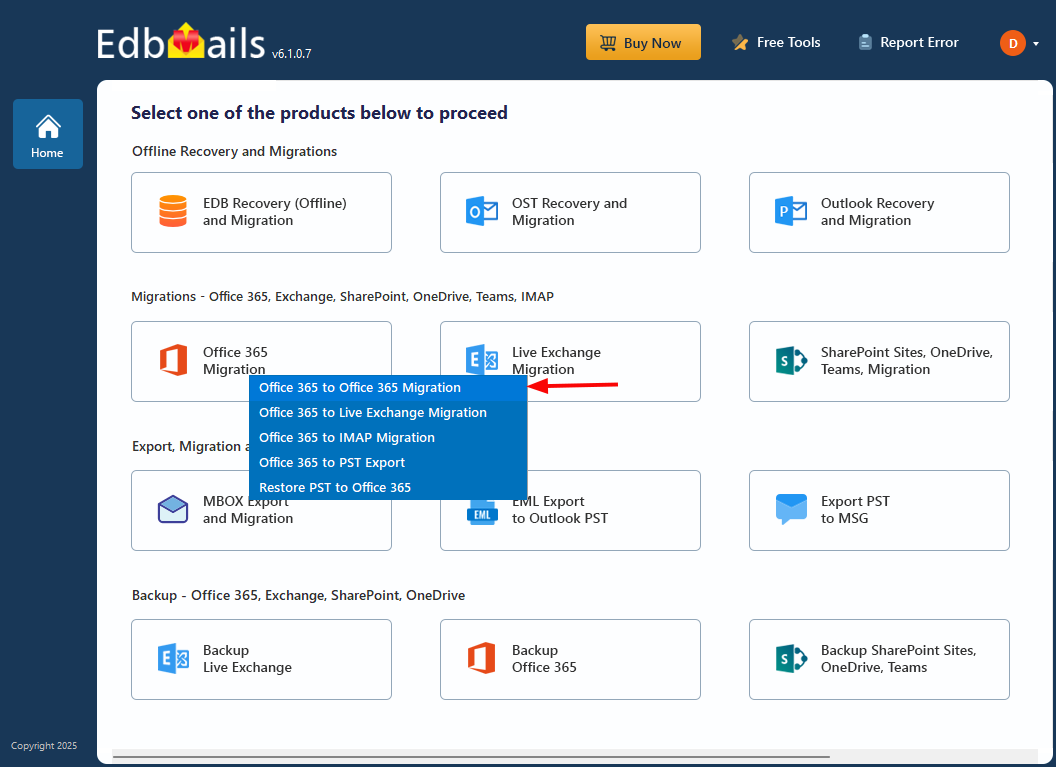
- Choose ‘Office 365 to Office 365 Migration’ option.
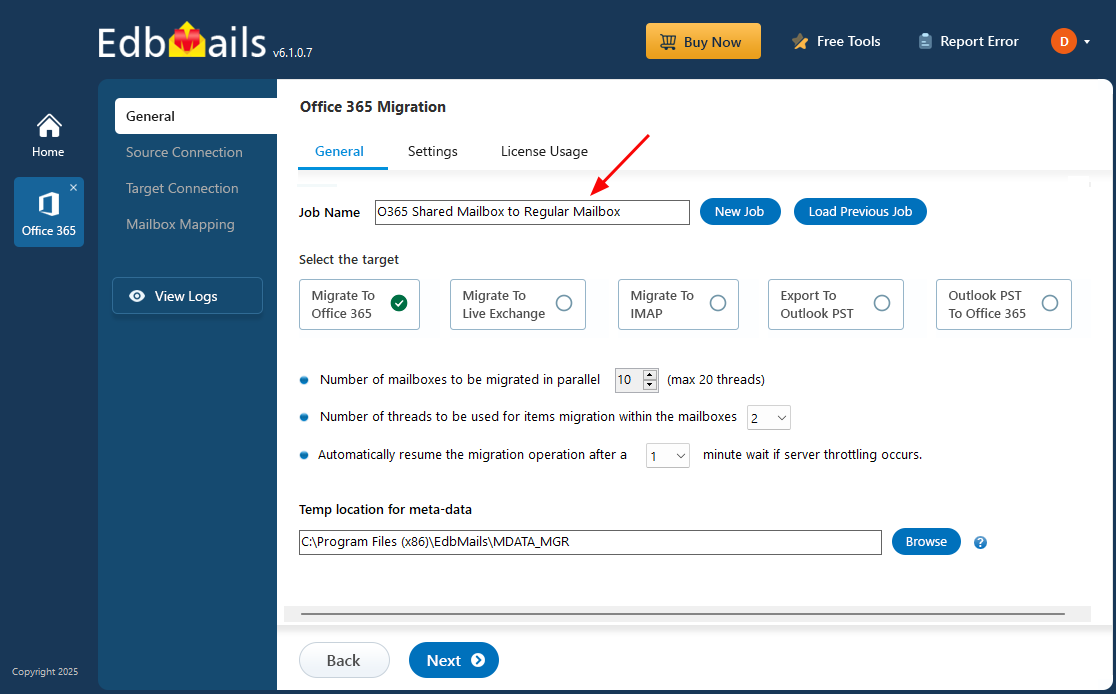
- Use the default job name or click ‘New Job’ to give it a different name.
- Select 'Office 365 Migration' products from the dashboard.
Step 3: Connect to source Microsoft 365 server
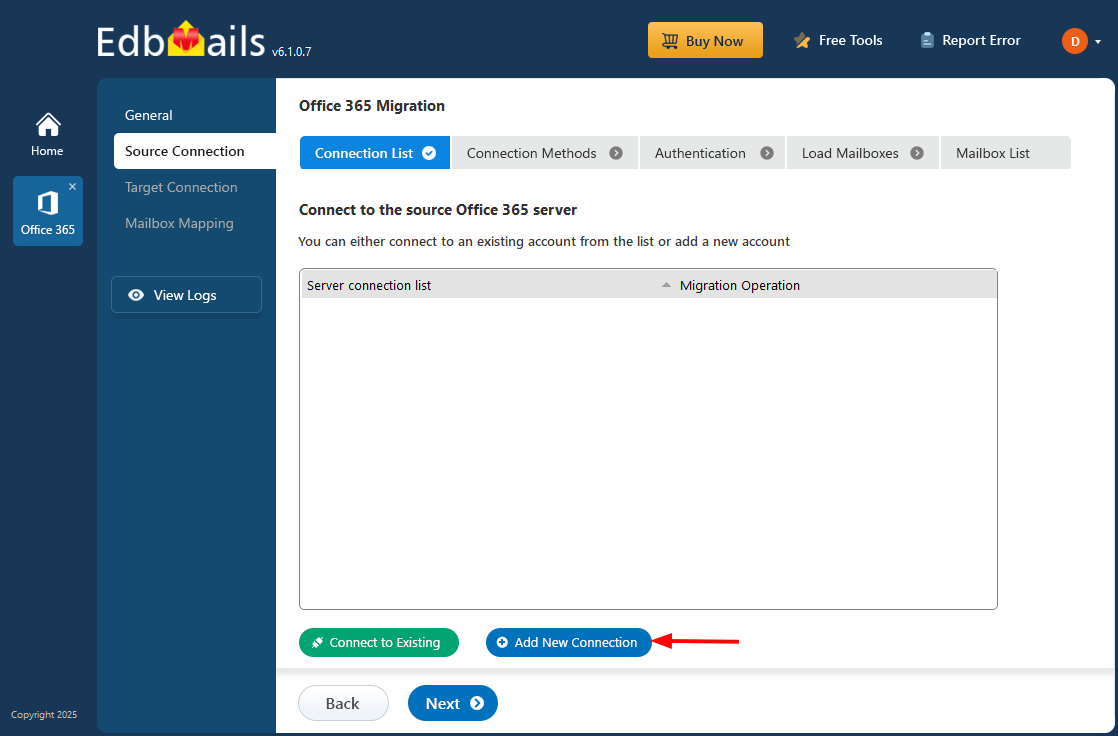
- Click ‘Add New Connection’ to set up a new source Office 365 connection. To reuse an existing one, pick it from the list and click ‘Connect to Existing’.
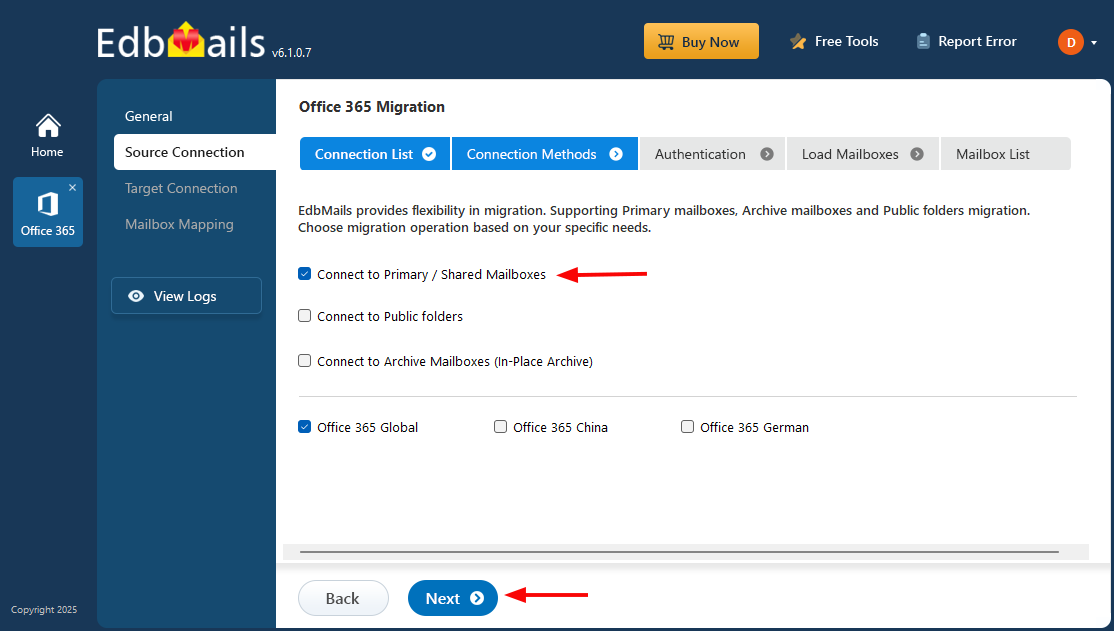
- Select the ‘Connect to Primary/Shared Mailboxes’ option and click ‘Next’ to continue.
- Choose a secure OAuth 2.0 authentication method and click ‘Login’ to proceed.
- Authenticate on Microsoft sign-in page.
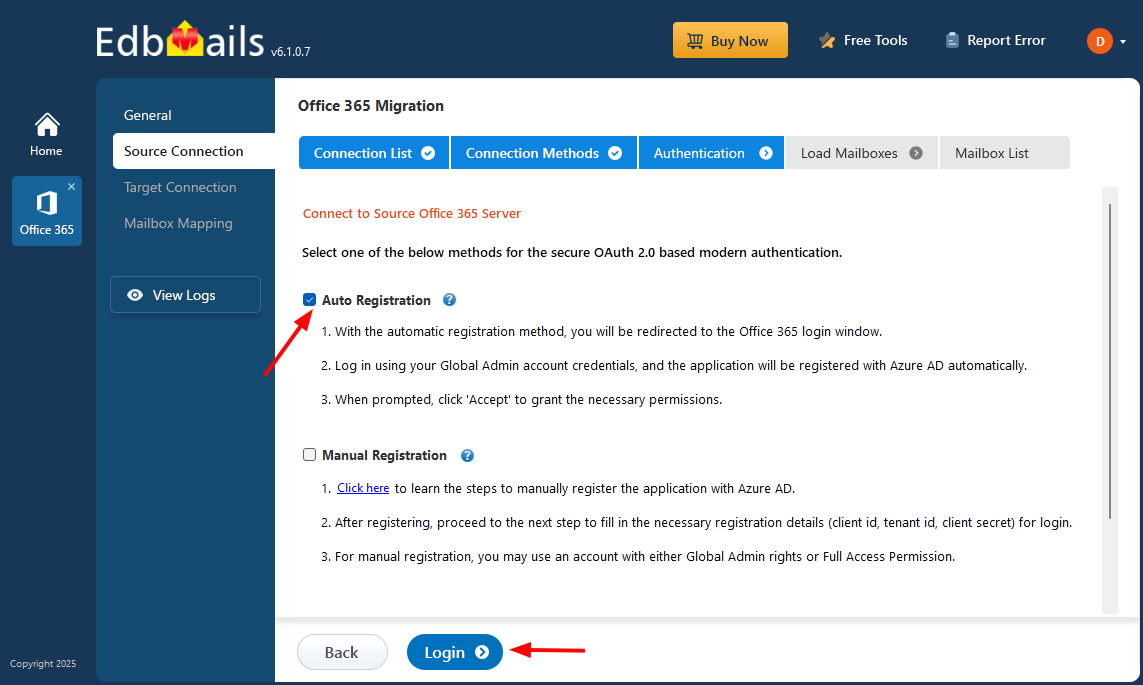
Connect to Office 365 server using secure modern authentication.
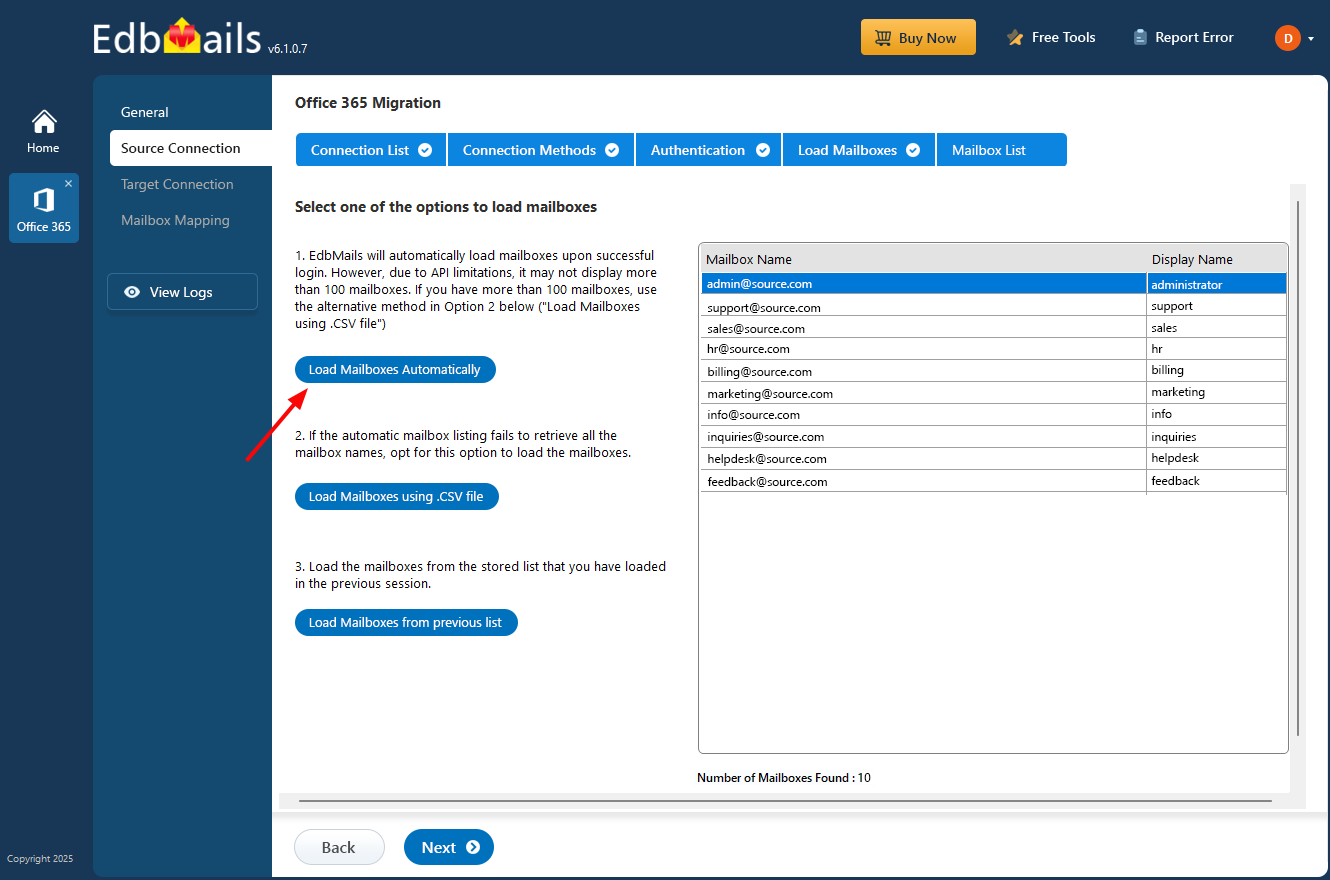
- Once authenticated, select a method to load the mailboxes. You can also use a CSV file to load and migrate them.
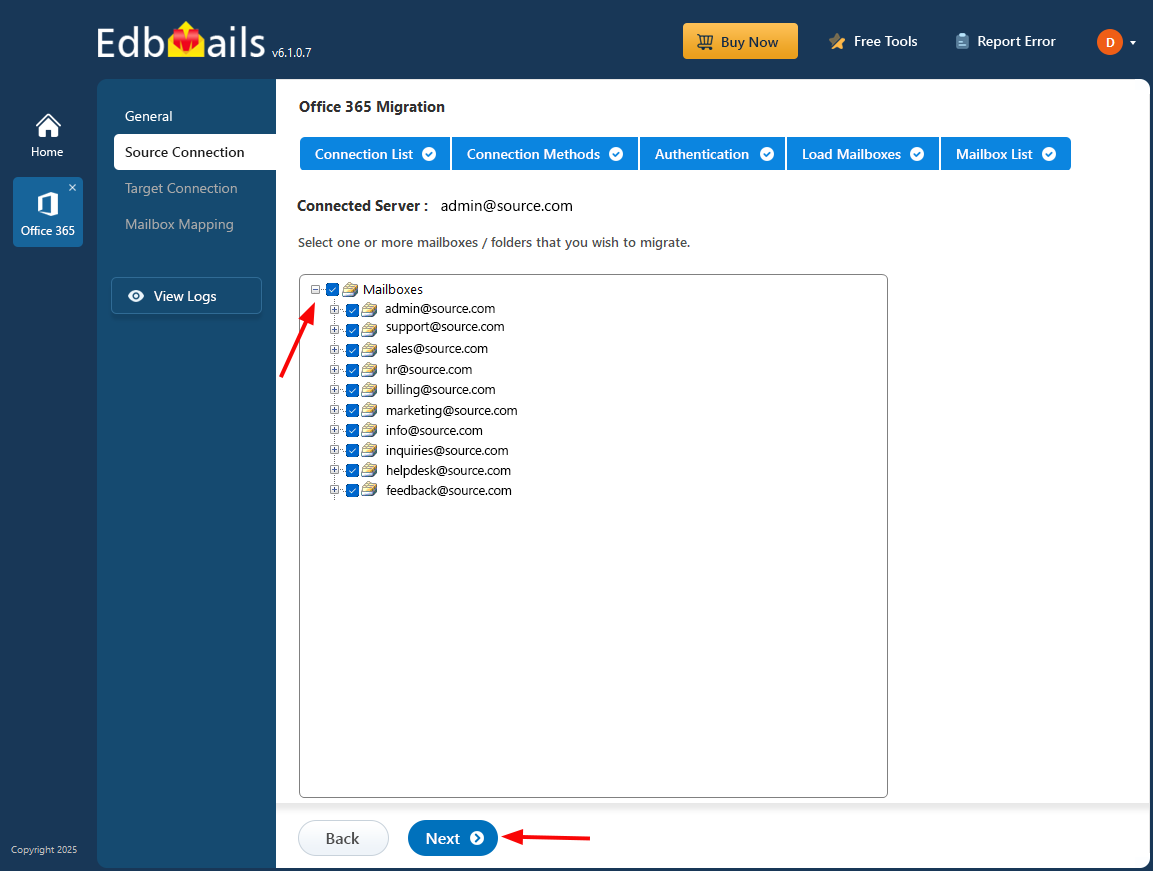
- Choose the Shared mailboxes to migrate from the source Office 365, then click ‘Next’ to continue.
- Click ‘Add New Connection’ to set up a new source Office 365 connection. To reuse an existing one, pick it from the list and click ‘Connect to Existing’.
Step 4: Connect to the target Office 365 server
- Click ‘Add New Connection’ to set up the target Office 365. To reuse an existing one, select it from the list and click ‘Connect to Existing’.
- Select the required connection options and click the ‘Next’ button.
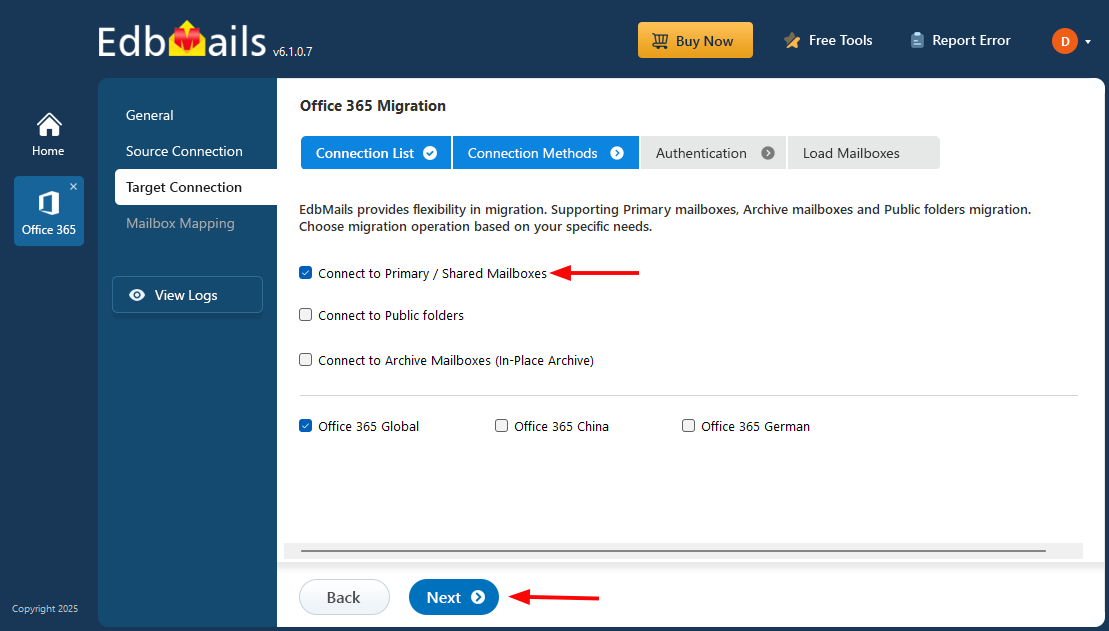
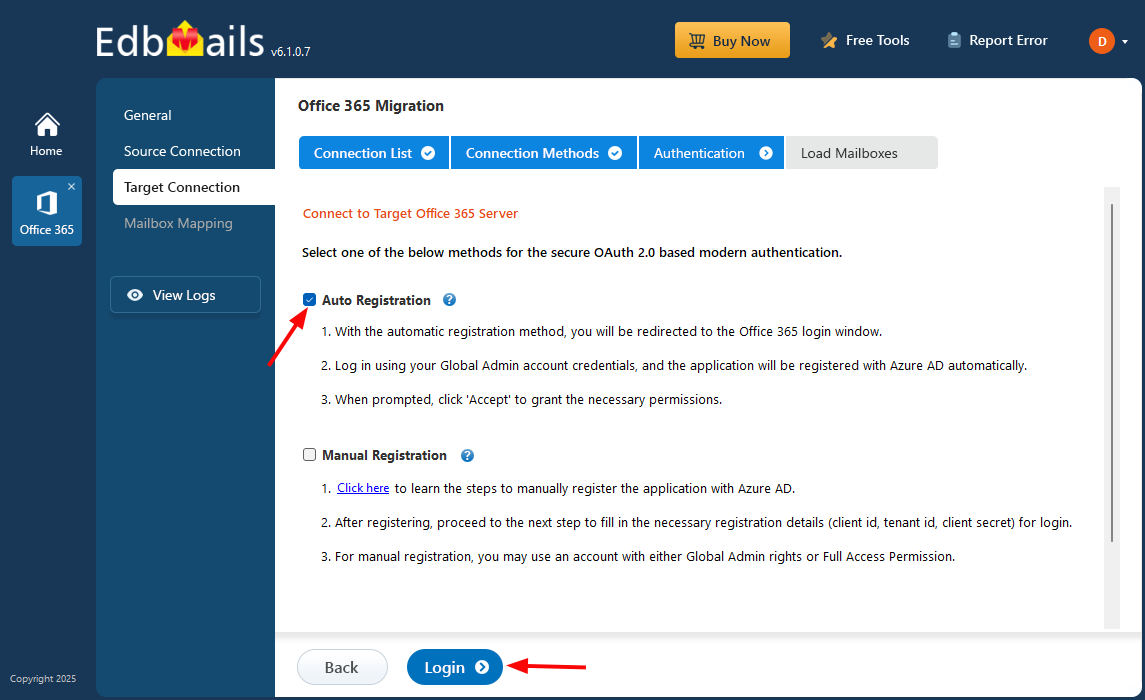
- Choose the required target connection method and click ‘Login’ to proceed.
- Authenticate on Microsoft login page.
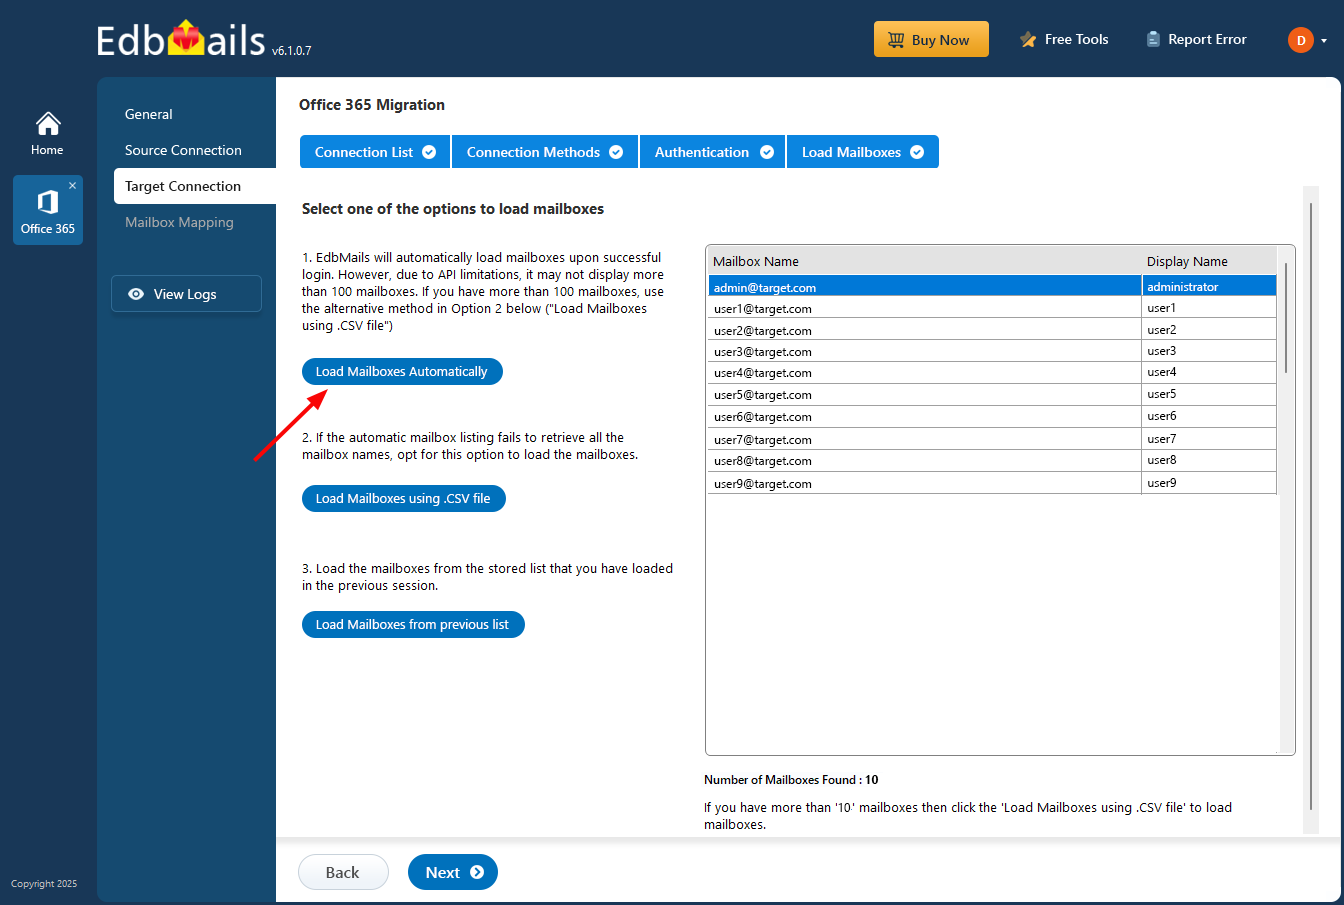
- Choose a method to load the mailboxes. You can also use a CSV file to load them.
Step 5: Map source and target mailboxes
- Select the mailbox mapping option you need.
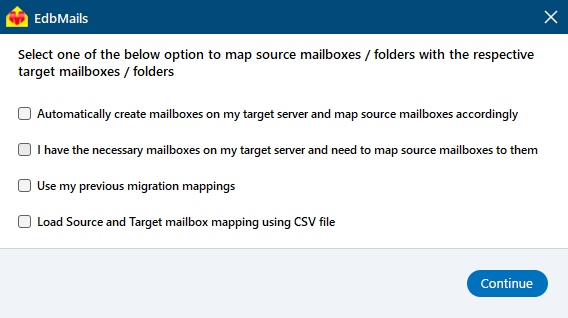
- Once mailboxes are created on the target server, EdbMails automatically maps mailboxes and folders between source and target servers. And, you can also map folders and subfolders manually.
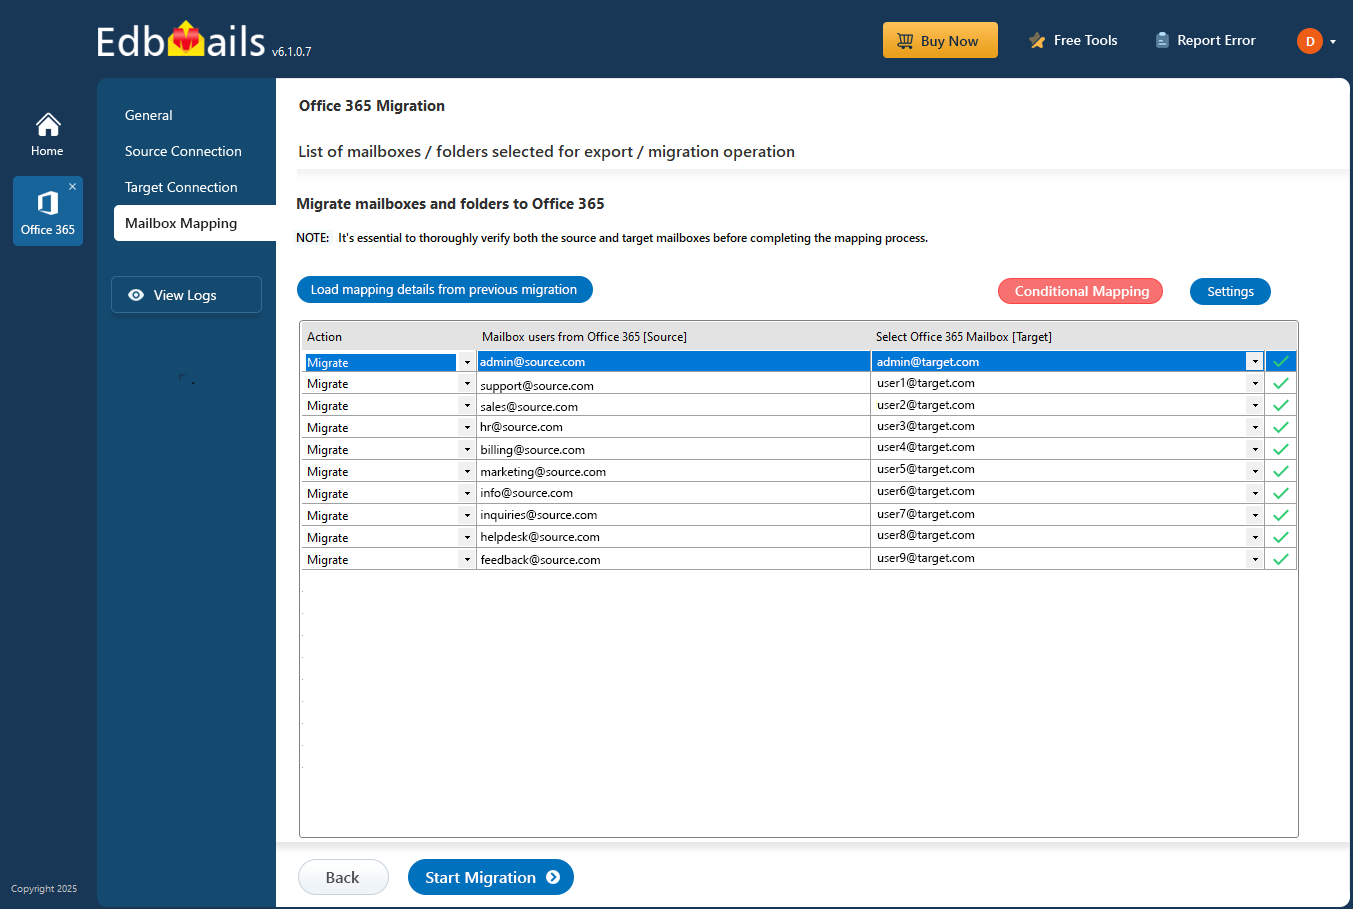
- Select the mailbox mapping option you need.
Step 6: Start Office 365 Shared mailbox to User mailbox migration
- Click ‘Start Migration’ to begin the process.
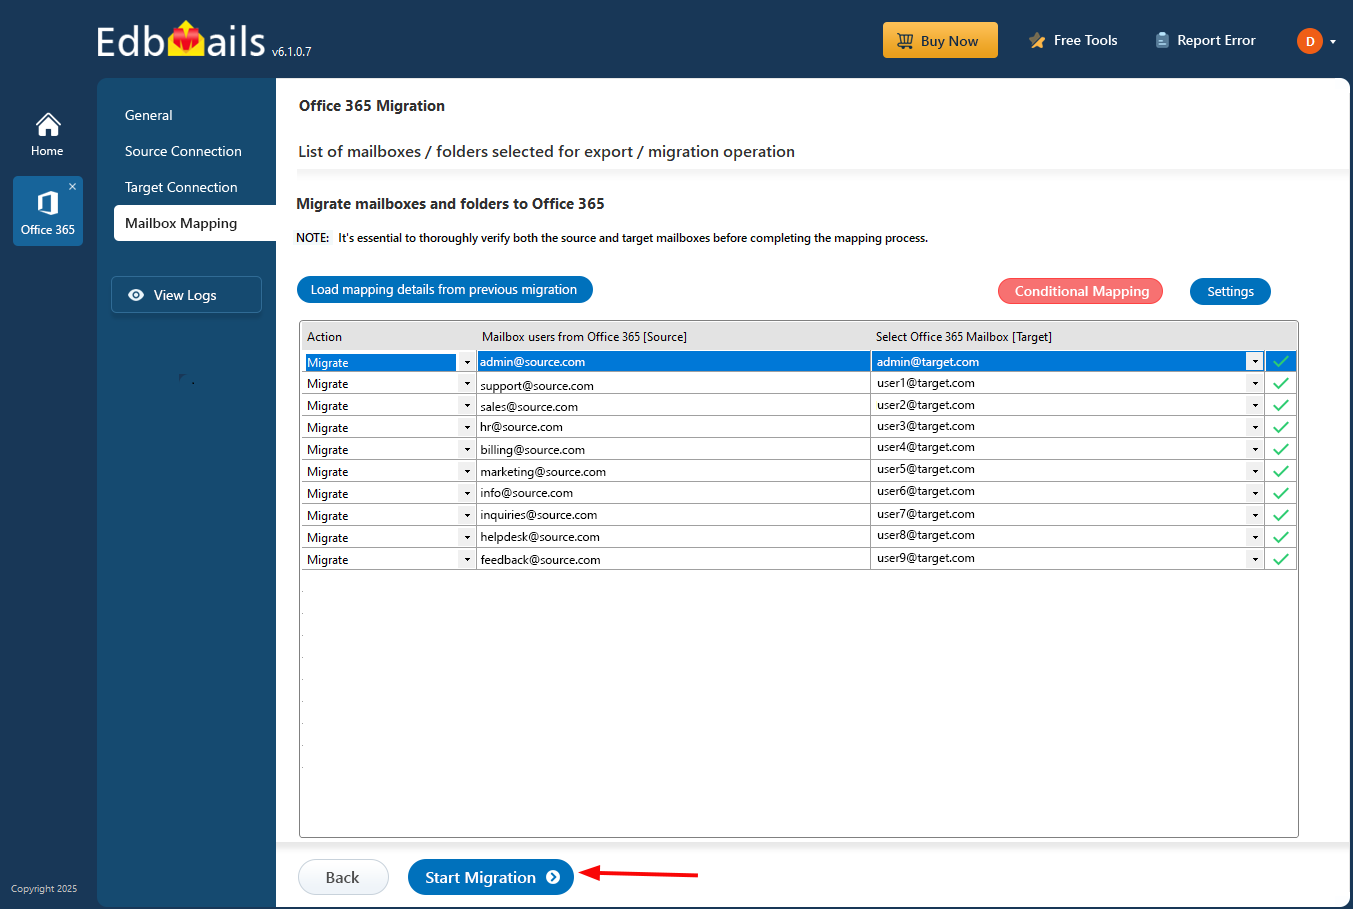
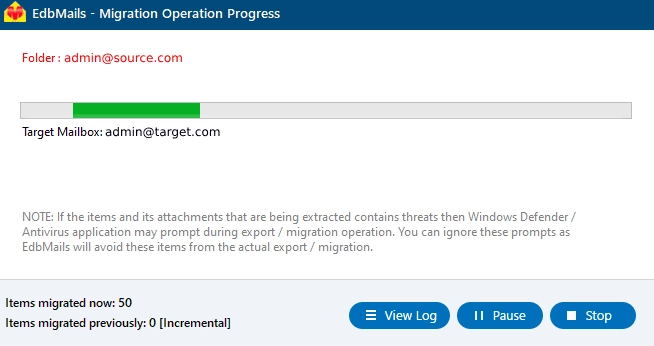
- EdbMails starts the migration automatically and alerts you when it’s done. Click ‘View Logs’ to see the migration report. You can also pause or resume the migration anytime.
- Click ‘Start Migration’ to begin the process.
Why do organizations prefer EdbMails for Microsoft 365 migration?
- Supports various mailbox migration scenarios: EdbMails covers a wide range of mailbox migration scenarios from Exchange on-premise to Office 365 migration, IMAP to Office 365 migration and PST to Office 365 migration.
- Supports migration of regular and shared mailboxes: EdbMails helps with migrating both regular and shared mailboxes to Office 365. This includes migrating different sizes of mailboxes and complexities.
- Hosted Exchange migration: EdbMails handles shared mailbox migration across various Hosted Exchange providers. That covers GoDaddy email to Microsoft 365, Rackspace to Office 365, Comcast, Bluehost, and several others.
- Incremental migration: With incremental mailbox migration, EdbMails picks up only new and updated items since the last run, saving time and bandwidth on every subsequent pass.
- Include and Exclude Filters: Migrating shared or regular mailboxes to Office 365 doesn't have to mean migrating everything. The advanced filter options let you target specific emails, contacts, calendars, and folders.
- Advanced mapping options: Advanced mailbox mapping in EdbMails connects source mailboxes to the right targets in Office 365; folder structures, permissions, and settings come through exactly as they were.
- Zero downtime migration: Every Exchange and Office 365 migration and backup operation runs with zero downtime. The migrated data is a one-to-one copy of the source.
- Completely safe and secure migration tool: EdbMails is highly secure, ISO compliant, and built on OAuth 2.0 authentication with TLS encryption.
- Support for all Exchange servers: EdbMails supports shared mailbox migration from every version in between Exchange 2019, 2016, 2013, 2010, and 2007.