


Staged Office 365 Migration
Thousands of mailboxes and no room for downtime? That's where staged migration comes in. EdbMails breaks the process into phases, so people keep working while the rest of the data transfers.
First phase: whatever data people actually need day to day, usually the recent stuff. Once that's across, MX records get updated and users start working in Office 365 right away. The older data keeps transferring until it's all caught up.
It's part of the Office 365 Migration tool EdbMails offers, and for organizations with a lot of data or no tolerance for a maintenance window, it's usually the safer bet than a one-time cutover.
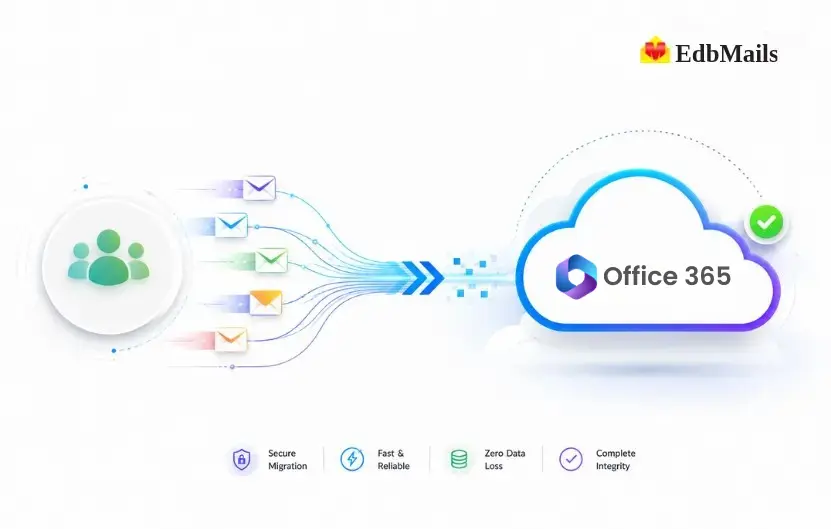
Staged vs. Cutover Migration
Office 365 migrations generally follow one of two approaches. Cutover migration moves all mailboxes in a single pass, over a short window, and works best for smaller organizations that can tolerate a brief migration event. Staged migration, covered on this page, splits the migration into multiple phases, moving the most important data first and the rest afterward, which suits organizations with larger data volumes or limited tolerance for downtime.
If your organization has a small number of mailboxes and can handle a short migration window, see Cutover Office 365 Migration. If you're dealing with large data volumes, slow connectivity, or an operation that can't pause, staged migration is the better fit, and the rest of this page covers exactly that.
First Migration Phase:
In the first phase, data older or newer than a given date is migrated first. This is usually run over a weekend or outside of regular working hours to minimize the impact on day-to-day operations. Once that data is across, the domain transfers to the target server and the MX records get updated — This ensures that the most critical data is quickly reached in the new environment right away.
Final Migration Phase:
Once the initial transfer is complete, the remaining data is transferred across. During this phase, the users can start working in the new environment and they have the up to date information available while the older data is still migrating across in the background. This guarantees zero disruption to the users while they can get straight to work with all the information that is required.
- Is Staged Migration Right for You?
Not every migration needs to be split into phases. Staged migration makes the most sense when data volume, downtime tolerance, or connectivity constraints make a single-pass migration impractical. The table below offers a quick way to check if your situation matches, before reading through the full scenarios that follow.
Your situation Why staged migration fits Operating continuously with a large volume of data Lets recent data migrate first so daily operations aren't disrupted Merging with another company's Office 365 environment Both organizations can keep working independently while the bulk of data moves ahead of the final cutover Working with slow or unreliable internet connectivity Splits the transfer into manageable phases instead of one long, fragile migration window - Staged Migration Scenarios
- Swift Transition:
The company runs round the clock and is currently using Office 365 for its operations. To improve performance, it is extremely essential that mailboxes get migrated to Office 365. As there is a lot of data, minimum downtime is extremely critical. EdbMails enables users to select particular mailboxes or folders that are to be migrated. The tool even allows migrating only a set of data within particular date ranges, data from last month only, apart from allowing to include/exclude normal and custom folders as per choice.
The first phase tackles the last two months of data, so employees land in the new environment with immediate access to everything relevant to ongoing work. Once that's done, updating the MX records points email traffic to Office 365 and facilitates a smooth transition to the second phase. From there, the remaining data migrates gradually, and users get their older data back over time — no hard cutover, no disruption.
- Company Merger Data Integration:
Two companies heading into a merger are each running their own Office 365 environment and need to consolidate onto a single platform. Throughout the transition, both sides keep operating independently — nothing stops. The strategy is to move the bulk of the data before the merger date, starting with items older than one month and leaving out non-email folder types. EdbMails handles this without forcing a maintenance window — migration runs during business hours without interrupting either organization's day-to-day work. The first phase clears the majority of the data. The second phase runs just before the merger goes live, catching everything that's left and pulling in any updated items — so both companies arrive on the unified platform fully current. Once the MX records are updated, date filters keep the final sync focused on the most recent and relevant data, making the cutover to a shared Office 365 environment clean and controlled.
- Mitigating Slow Internet Connectivity:
As they are under an inadequate IT setup, the company decided to do a swift migration by moving data to Office 365. Even though they had minimal mailboxes, the lack of network speeds would require a staged migration. They would initially move data from the previous two weeks, so that they can work immediately from the new place with Office 365. The first stage contains all data types set up with filters. After initial migration, they would update MX records and initiate the second phase. EdbMails help with targeted migration, supported with fine-grained filtering, maintaining operations during transition, and ensuring a second migration.
- Swift Transition:
- Steps to perform staged migration using EdbMails
Step 1: Download and Install EdbMails
- DownloadEdbMailsSetup.exe and complete the installation.
- Launch the application and click ‘Login’ or ‘Start Your Free Trial’.
- Ensure your EdbMails system requirements for Office 365 migration.
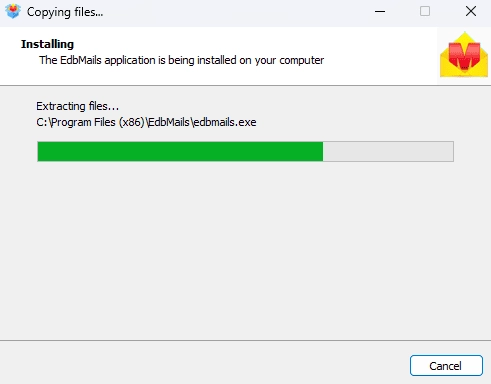
Step 2: Select migration option
- Select ‘Office 365 Migration’ from the dashboard.
- Choose ‘Office 365 to Office 365 Migration’.
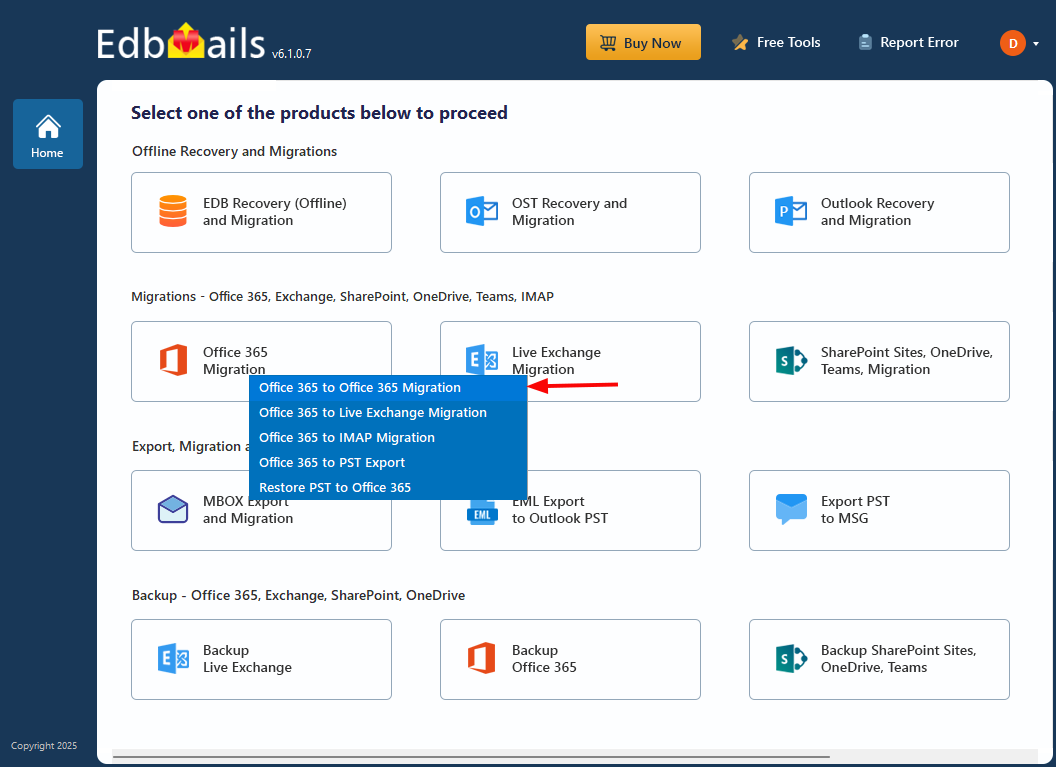
- Optionally, set a custom job name for the migration task.
Step 3: Connect to source Office 365 server
- Click ‘Add New Connection’ to set up a new connection to the source tenant. If a connection was previously established, you can select it from the list and click ‘Connect to Existing’ to continue.
- Use OAuth 2.0 modern authentication and sign in securely via Microsoft.
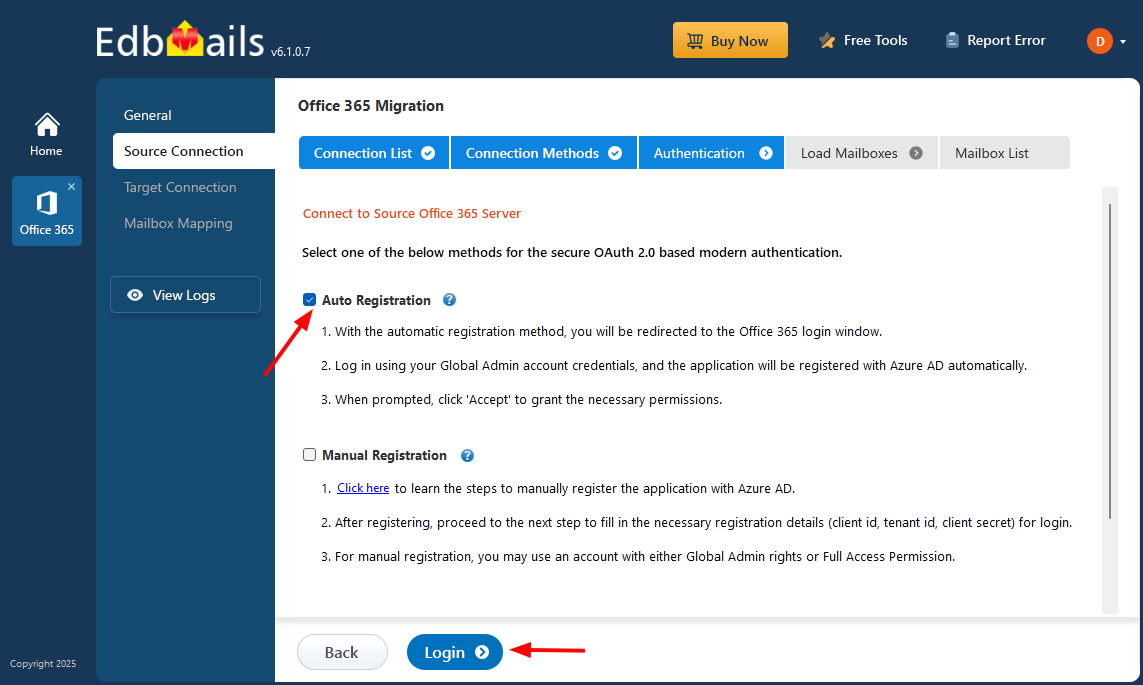
- Load source mailboxes manually or import them using a CSV file.
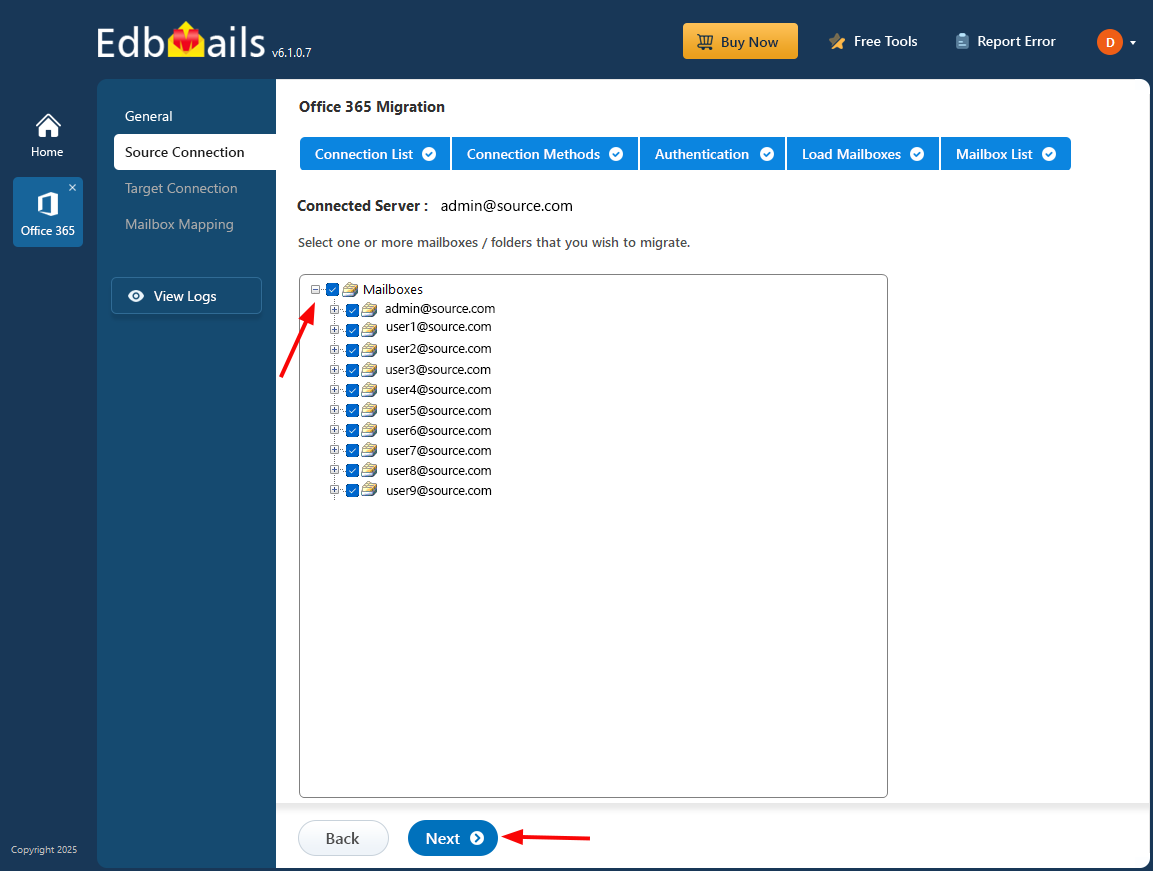
- Select the mailboxes you wish to migrate and click ‘Next’.
Step 4: Connect to target Office 365 server
- Click ‘Add New Connection’ to configure the destination tenant. To reuse an existing connection, select it from the list and click ‘Connect to Existing’ to move forward.
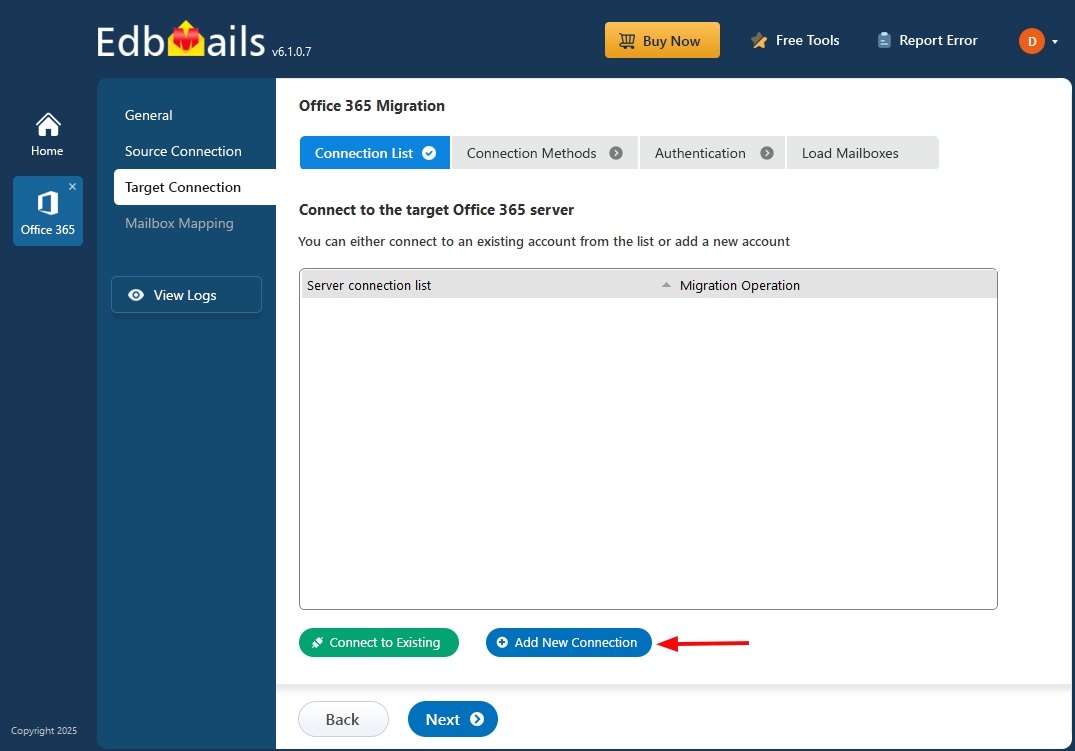
- Authenticate with secure Microsoft login using modern authentication.
- Load the target mailboxes or use a CSV file for bulk import.
- Click ‘Add New Connection’ to configure the destination tenant. To reuse an existing connection, select it from the list and click ‘Connect to Existing’ to move forward.
Step 5: Source and target servers mapping
- EdbMails performs automatic mapping of source and target mailboxes.
- You can also map mailboxes and folders manually for granular control.
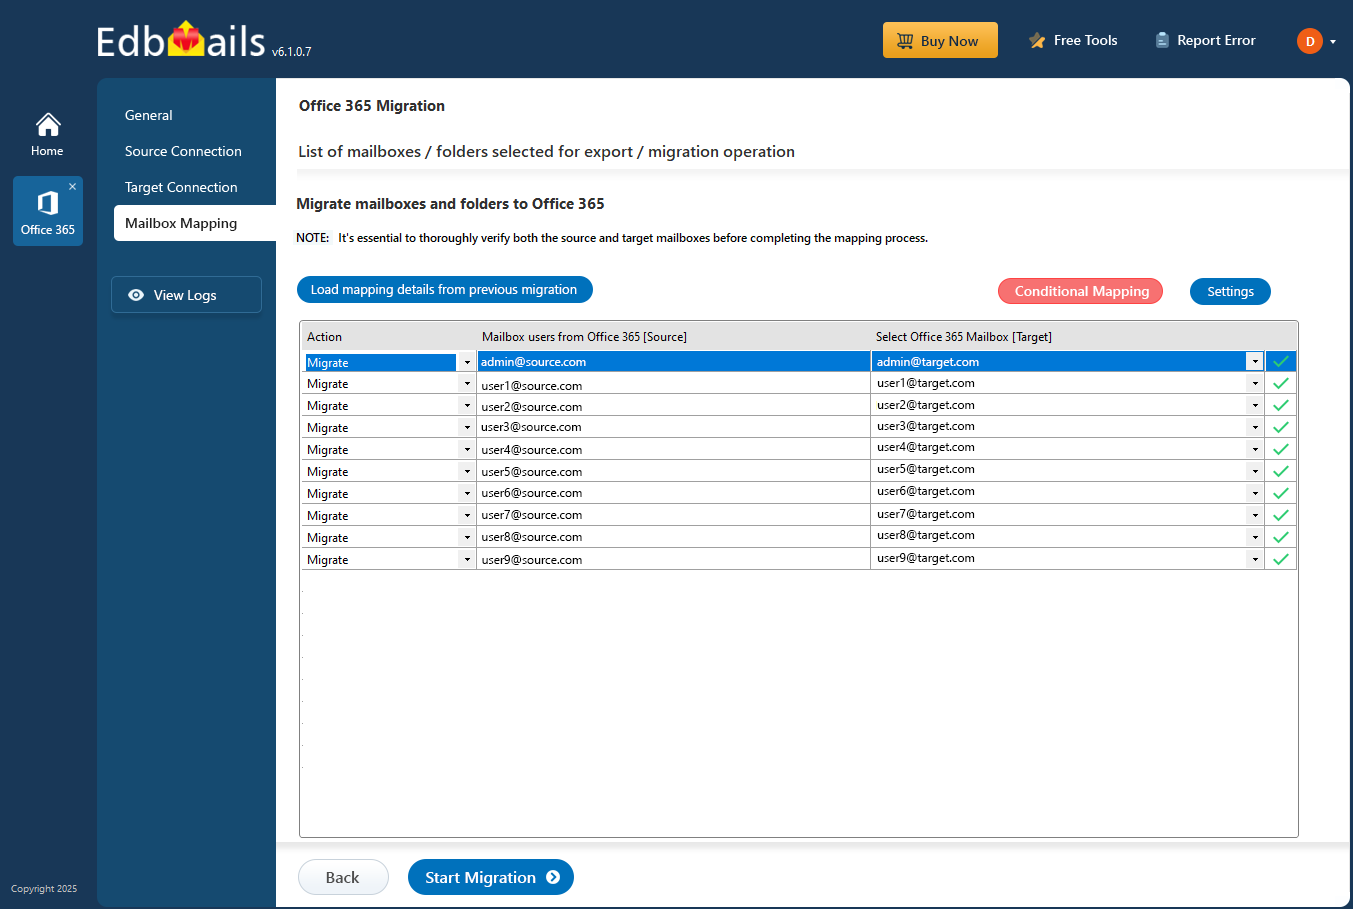
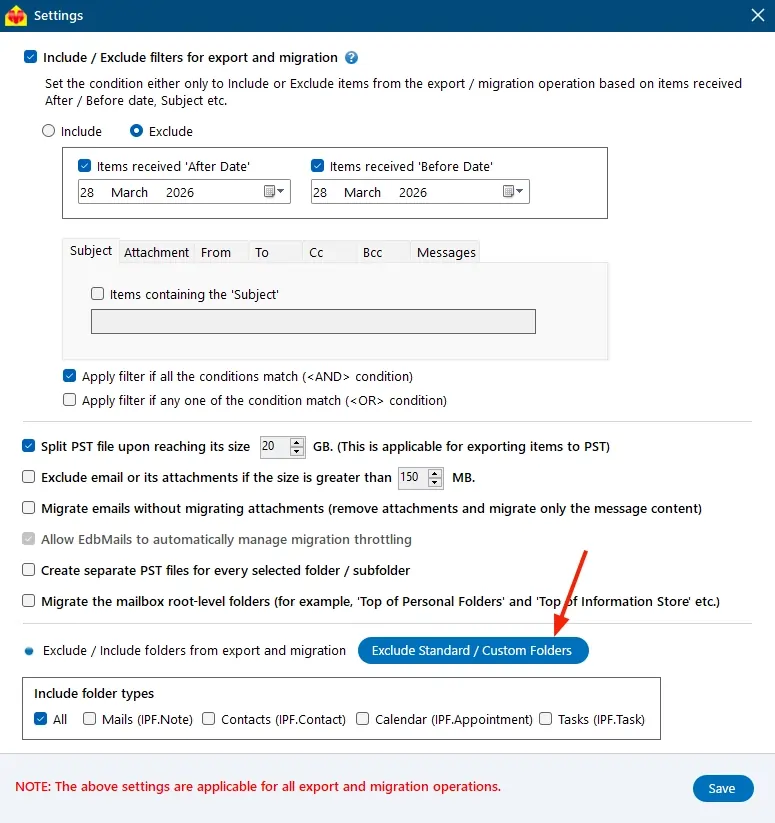
- For instance, if you want to transfer the majority of your data during the first stage of the migration, enable the 'Include Filter' option and select the relevant date range. If your goal is to move to a new Office 365 server as quickly as possible, migrate only the most recent data by choosing the corresponding date range.
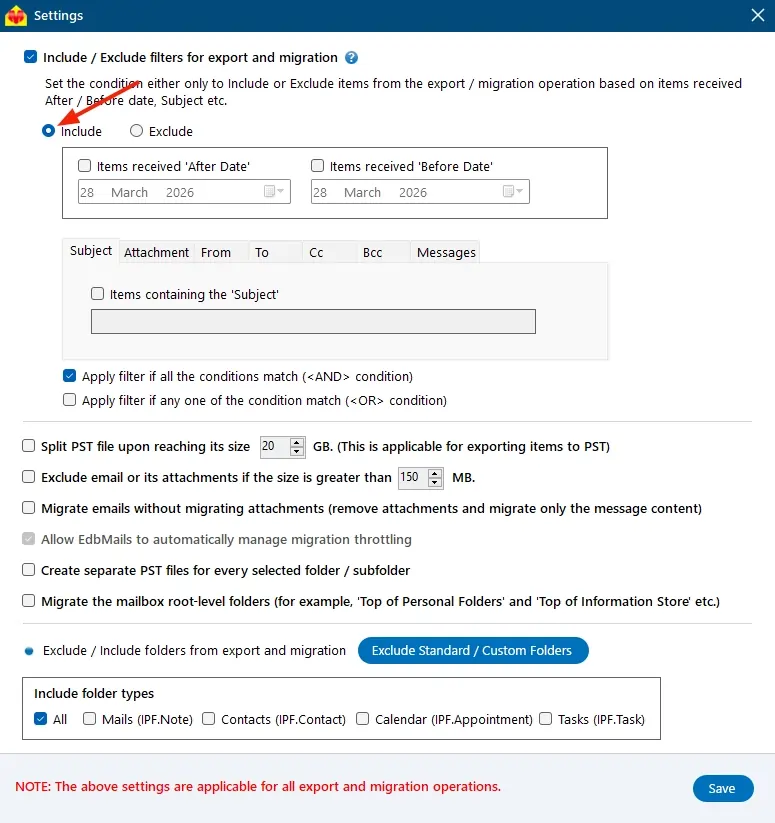
- If you prefer to exclude certain folders from the first stage, click on the ‘Exclude Standard / Custom folders’ button and specify the folders you wish to exclude.
Step 6: Start PST to Office 365 migration
- Click ‘Start Migration’ to begin transferring the data.
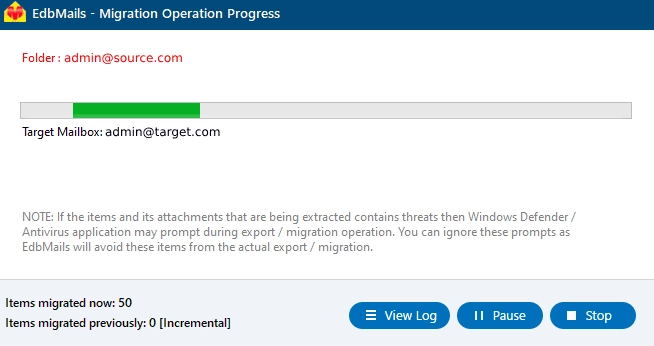
- Monitor the process, pause or resume anytime, and access the migration report through the ‘View Logs’ option.
- Post migration steps
Step 1: Change MX Records to Point to Office 365
The first step is to add your domain to Office 365. If you haven't updated DNS records before, modify the MX records so your email flows to Office 365 without interruption. You'll also want to configure the Autodiscover record — without it, Outlook won't know how to reach the migrated mailboxes.
Step 2: Clear the Auto-Complete List in Outlook
See manage suggested recipients with Auto-Complete.
Step 3: Create a New Outlook Profile After Migration
- Check that each user has the latest Outlook version installed — outdated versions are a common source of post-migration headaches.
- Anyone struggling to connect to their Office 365 mailbox will need a fresh profile. Set up new Outlook profiles for those users across your domain.
- Plug in the new server settings — server address, username, and password.
- Send a test email from a few accounts to confirm sending and receiving both work.
Step 4: Remove the Old Office 365 Subscription Plan
\Once migration is complete and you've spot-checked the migrated mailbox data, remove the Office 365 subscription plan from the source tenant. Don't forget to detach any associated domains at the same time.