


Migrate Office 365 Group mailbox
A migration of Office 365 groups mailbox is important if a company has a merger or a tenant consolidation. Office 365 groups allow collaboration to be easier by combining shared inboxes, calendars, and document libraries. The permissions automatically give new members access which allows them to replace the old distribution lists and shared mailboxes in a modern way. However, migrating a group's mailbox involves moving a whole working space and not just the e-mail information.
This is when EdbMails Office 365 migration tool can assist. This tool is developed to make Office 365 group mailbox migration simpler and more accurate. Zero down-time for your team. EdbMails can migrate multiple office 365 groups email boxes at one time due to its concurrent migration feature, hence a lot of time is saved and speed is achieved. Also EdbMails manages throttling of the Microsoft way of limiting data flow to prevent overwhelming its servers so that you would not be interrupted or delayed.
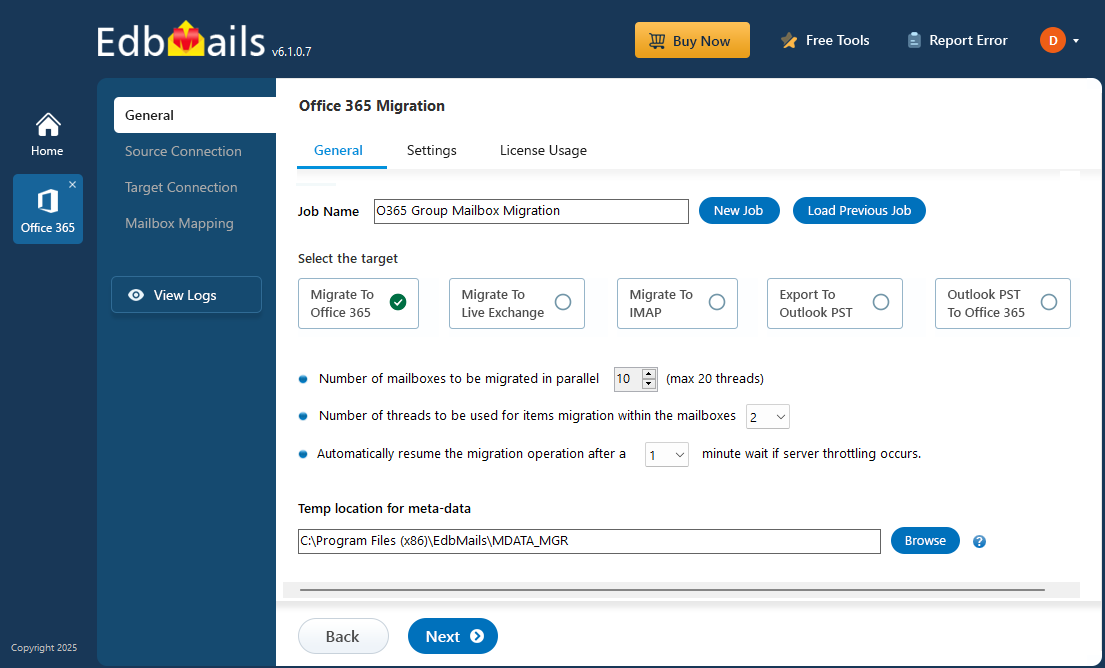
Also you'll receive detailed migration reports with a precise visibility on which files and data have been migrated and their status so you can clearly track its progress and identify any possible problems. With these prominent features EdbMails provides smooth, safe and secure migration of your Office 365 group mailboxes.
Helpful tips for migrating Office 365 Groups
Migrating an Office 365 group can be a complex process, but the following tips can help make the transition smoother:
- Plan the migration in advance, and communicate the changes to all members of the group.
- Consider the impact on any connected apps or services before migrating.
- Test the migration on a smaller group before rolling it out to the entire organization.
If you want to migrate Office 365 groups you can use EdbMails Office 365 migrator which helps you to migrate your Office 365 group data. The application migrates all your Office 365 groups data to the destination mailbox or to another group.
After connecting to the source server, you just have to select the groups in which you want to migrate and then proceed with the destination connection. According to your requirement, move the mailbox to Exchange online and the selected group's data to another group or to a mailbox.
A Common Scenario: Migrate Office 365 Group During a Tenant Merger
- When two organizations merge their Office 365 environments, existing groups on the source tenant, such as project teams or departmental distribution groups, need to move into the consolidated tenant without disrupting the people already using them.
- EdbMails can migrate multiple groups at once through concurrent migration, reducing the time needed to bring every group across.
- Zero-downtime migration ensures group mailboxes remain fully accessible throughout the process, so members can continue sending emails, scheduling meetings, and accessing shared calendars without any service interruption.
- This allows the tenant consolidation to run as a background operation, completing the full migration without requiring a maintenance window or forcing teams to pause active collaboration.
Office 365 Groups to another tenant migration using EdbMails
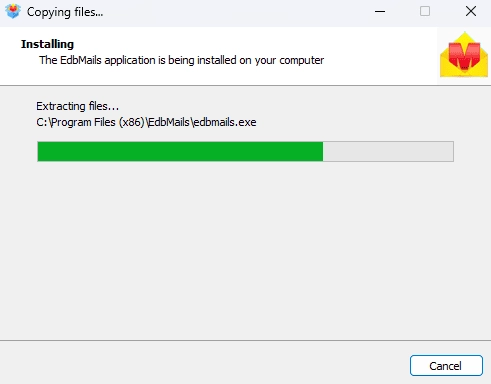
Step 1: Download and install EdbMails software
- Download and install EdbMails software on your computer.
See a detailed list of EdbMails system requirements for Office 365 migration.
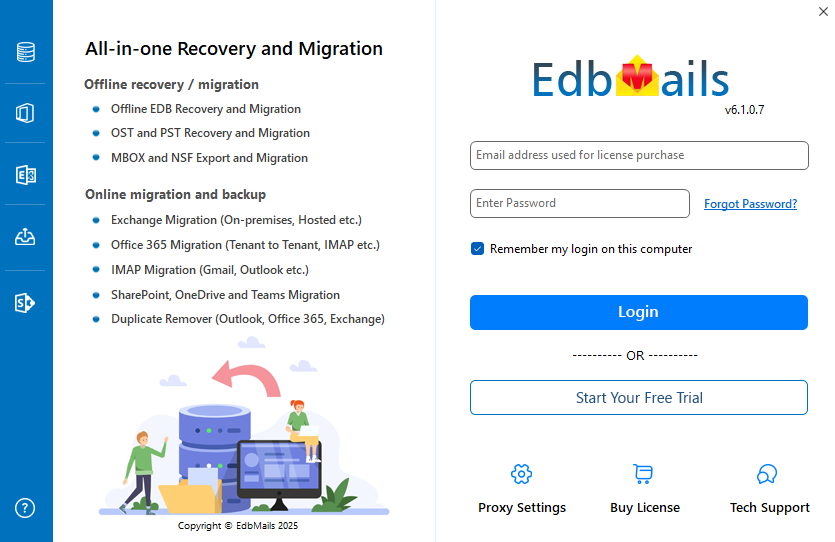
- After you have installed it, click ‘Start Your Free Trial’ to start using the application.
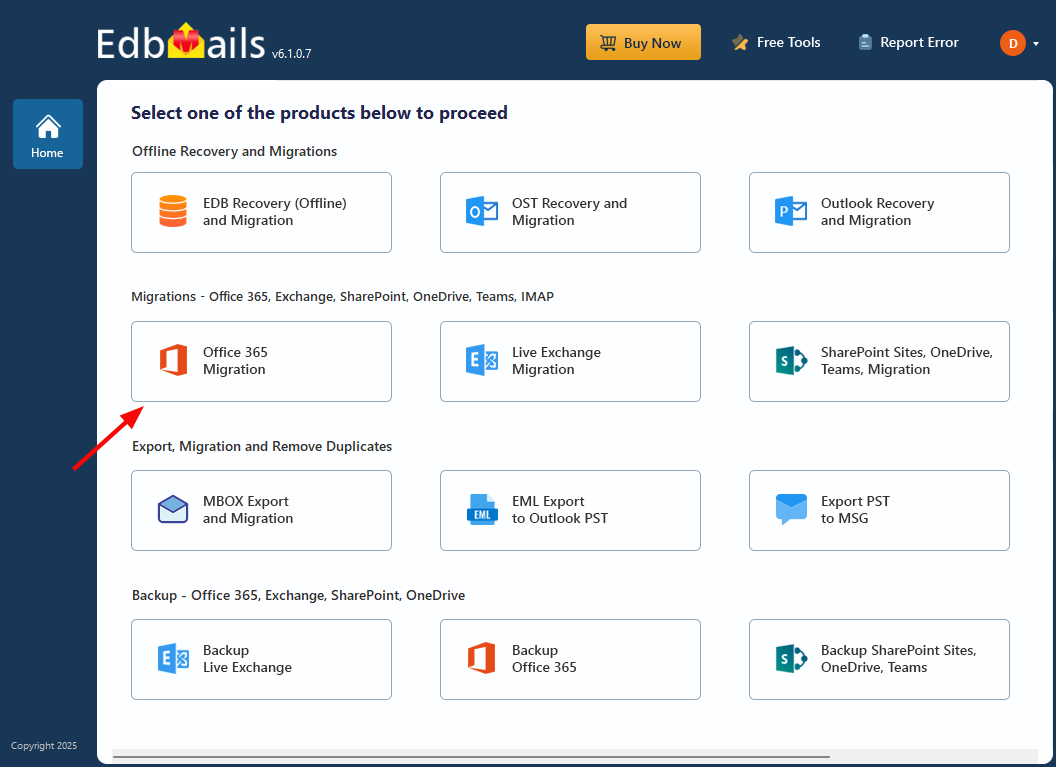
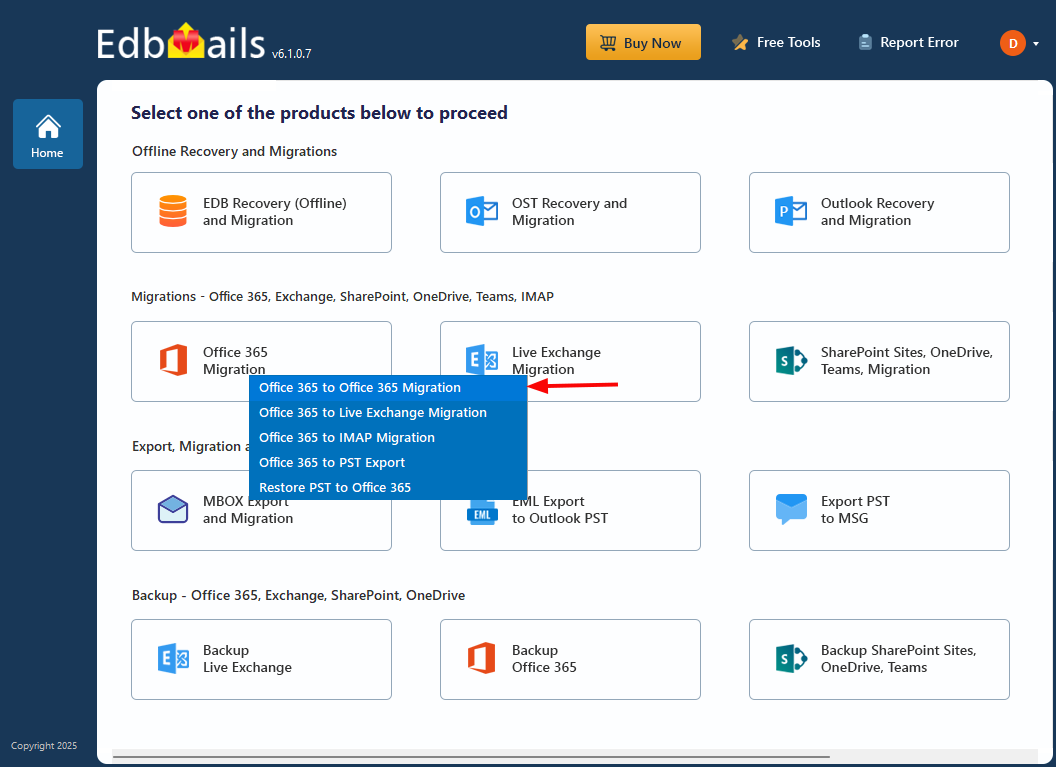
- Select ‘Office 365 Migration’ from the main screen.
Note: If the standard folders such as Inbox, Calendar, or Contacts in your source mailboxes are configured in a different language, they might not automatically map to the corresponding system folders on the target server during migration.
For Instance: If the Inbox in your source mailbox is labeled as ‘Boîte de réception’ (French), it may not automatically map to the ‘Inbox’ (English) on the destination server. To ensure accurate folder mapping, you can choose one of the following options:
Set the same language on both the source and target servers.Steps to set language on Office 365 and Exchange server
List the folders from the target mailbox and manually map them to the source mailbox folders.Steps to manually select and map the specific target mailbox folder
Use a CSV file to define custom mappings between source and target folders. - Select ‘Office 365 to Office 365 Migration’ option from the dropdown list
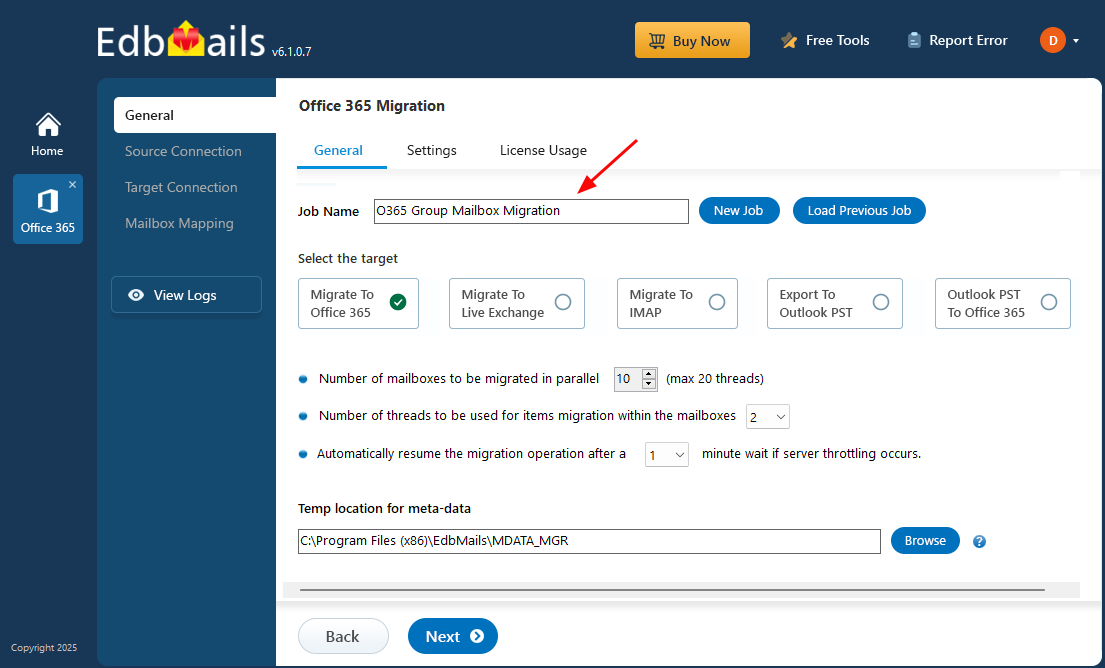
- You can proceed with the default job name, or click the ‘New Job’ button to change the job name.
- Download and install EdbMails software on your computer.
Step 2: Connect to source Office 365 server
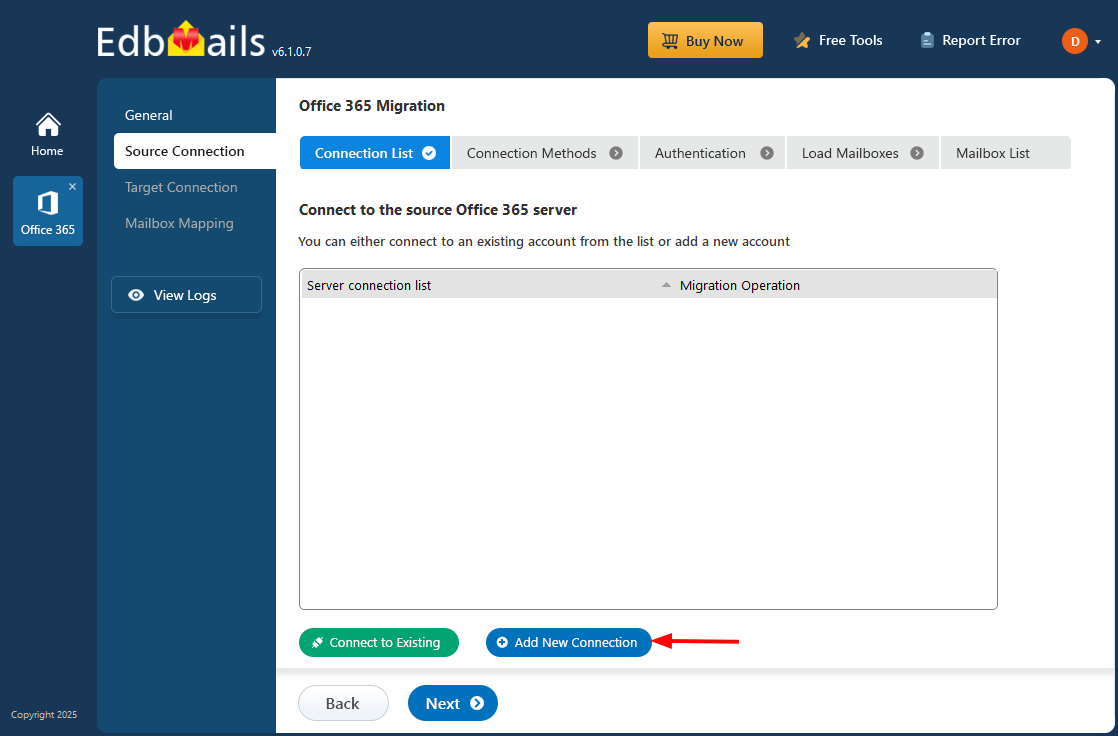
- Click on ‘Add New Connection’ to set up a new connection to the source Office 365 account. If you've connected before, simply choose the existing connection from the list and click ‘Connect to Existing’ to continue.
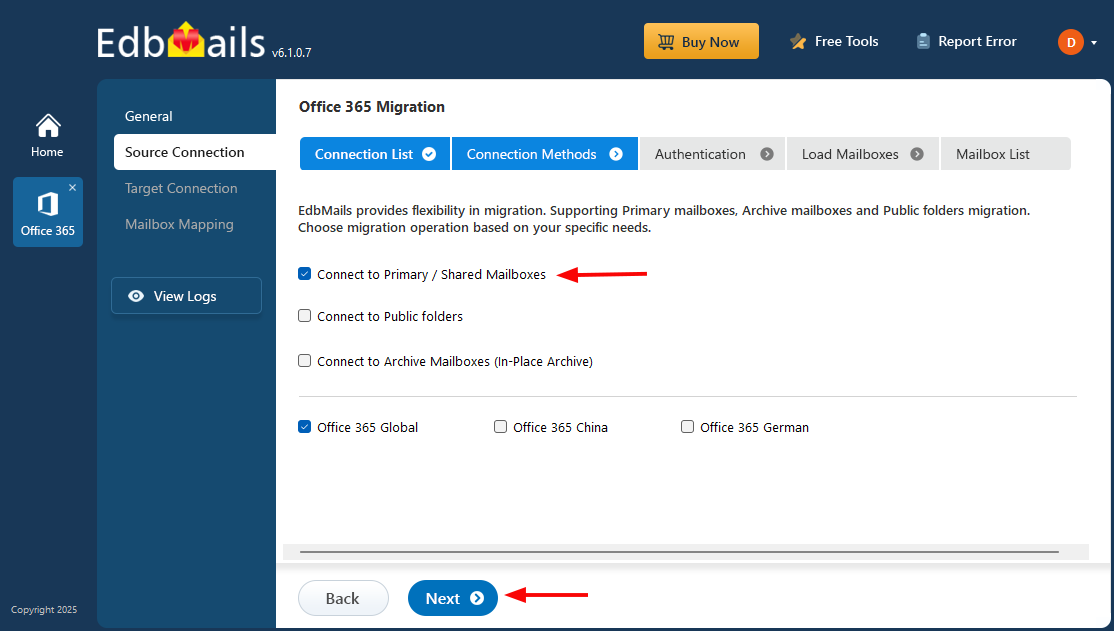
- Select ‘Connect to Primary/Shared Mailboxes’ and click ‘Next’
- Choose one of the authentication methods and click ‘Login’ button to continue.
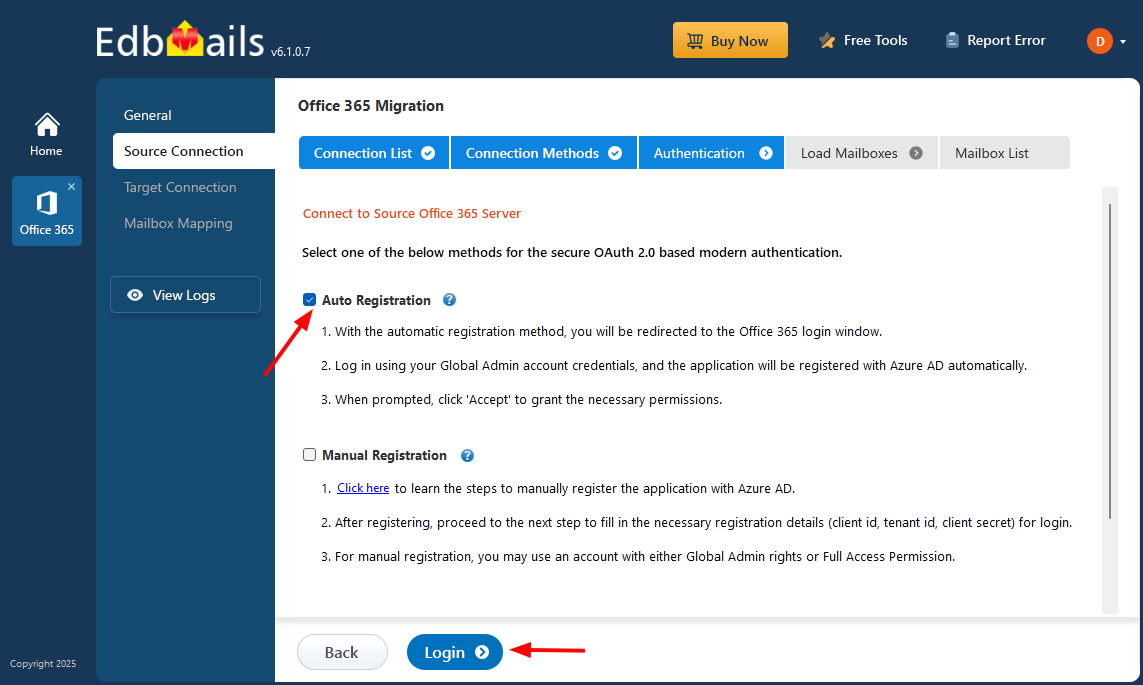
Connect to Office 365 server using secure modern authentication
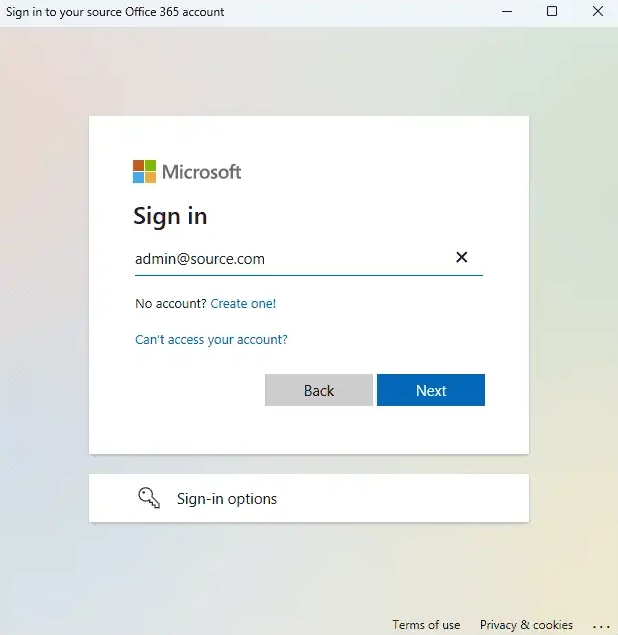
- Authenticate on Microsoft sign-in page.
After the successful authentication, choose one of the methods to load the mailboxes. You can also load and migrate the mailboxes using a CSV file.
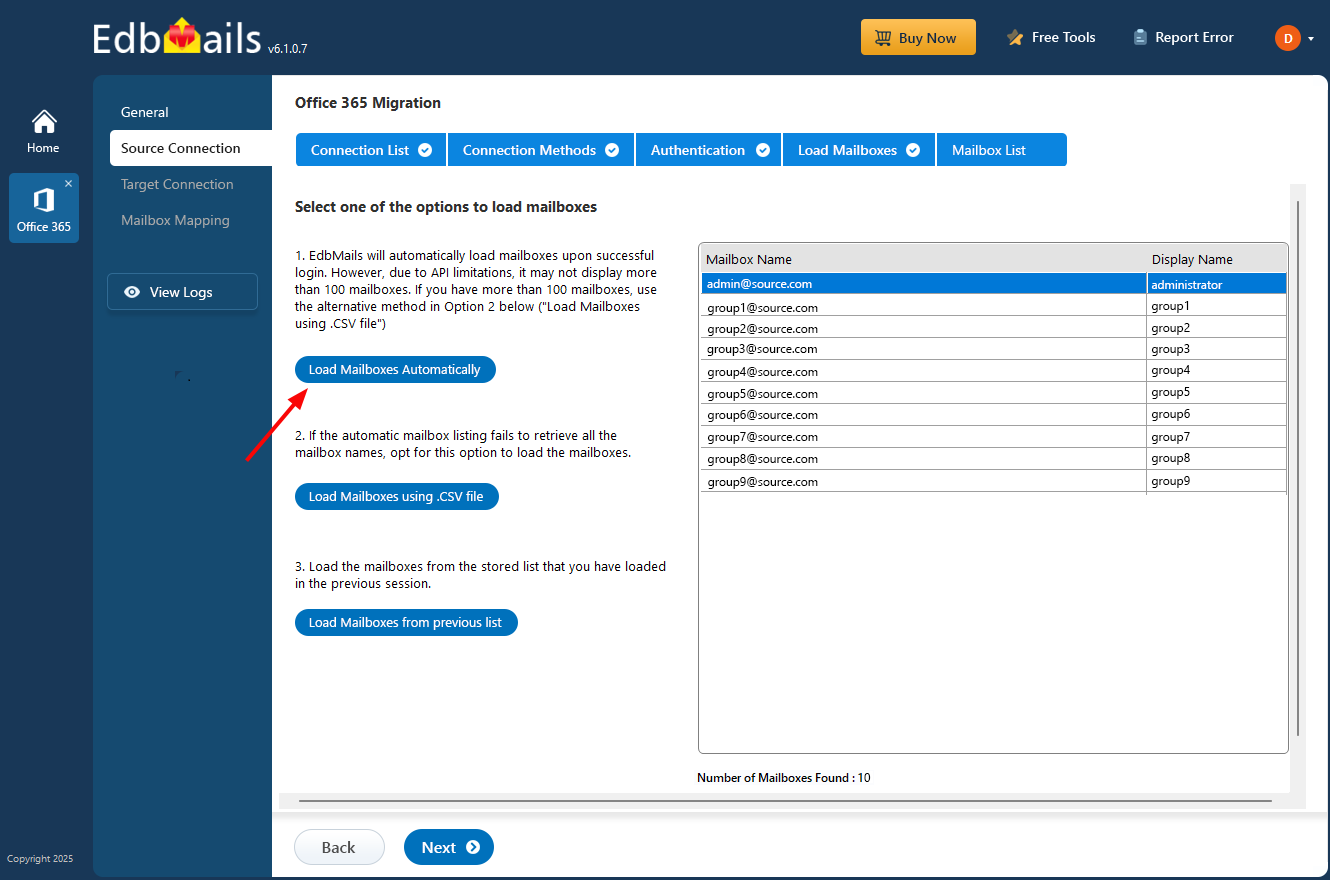
- Click on ‘Add New Connection’ to set up a new connection to the source Office 365 account. If you've connected before, simply choose the existing connection from the list and click ‘Connect to Existing’ to continue.
Step 3: Select source Office 365 Group mailboxes
- EdbMails displays all the group mailboxes and associated mailboxes from your Office 365 tenant.
- Select the group or groups that you want to migrate to the target and click ‘Next’ You can select the required group by browsing through the list of groups.
Tip: In addition to the group migration, you can also export mailbox to PST from Office 365
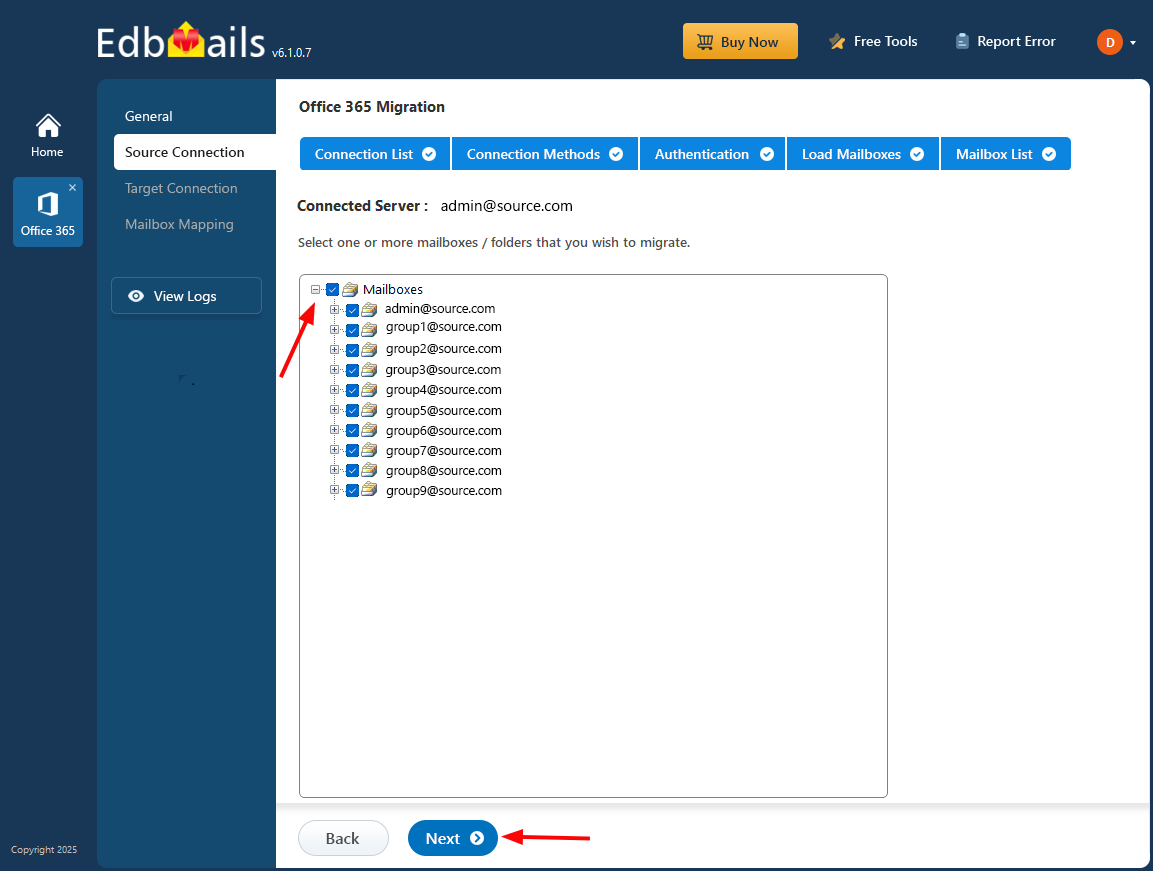
Step 4: Connect to target Office 365 tenant
- Click ‘Add New Connection’ to set up a fresh connection with the target Office 365 account. If you prefer using an existing connection, simply select it from the list and click ‘Connect to Existing’ to continue.
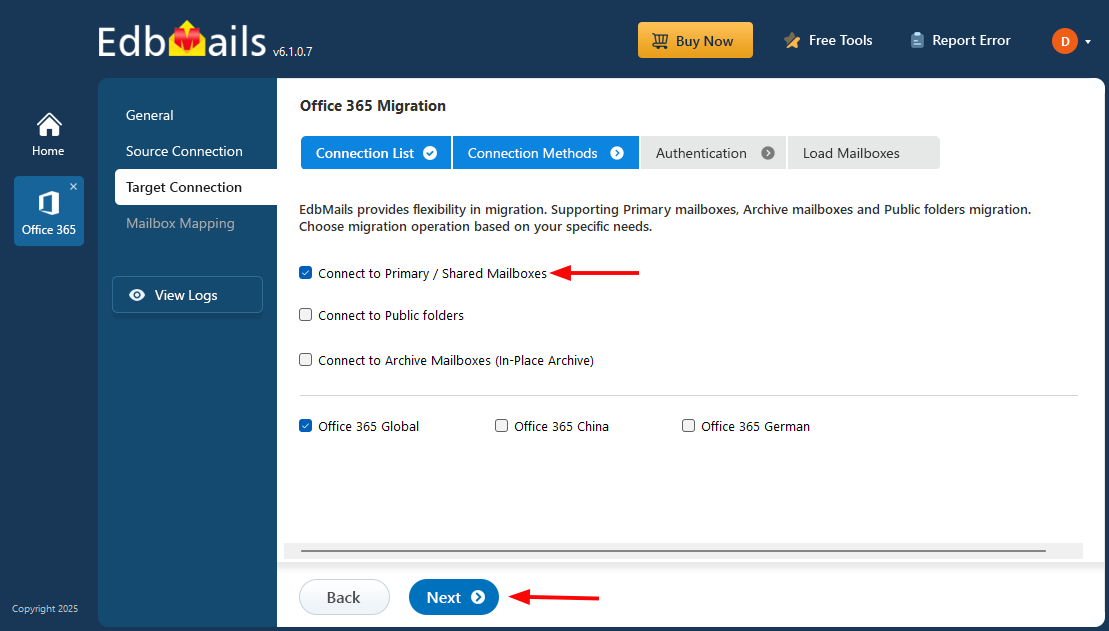
- Select the Connect to Primary/Shared Mailboxes and click the ‘Next’ button.
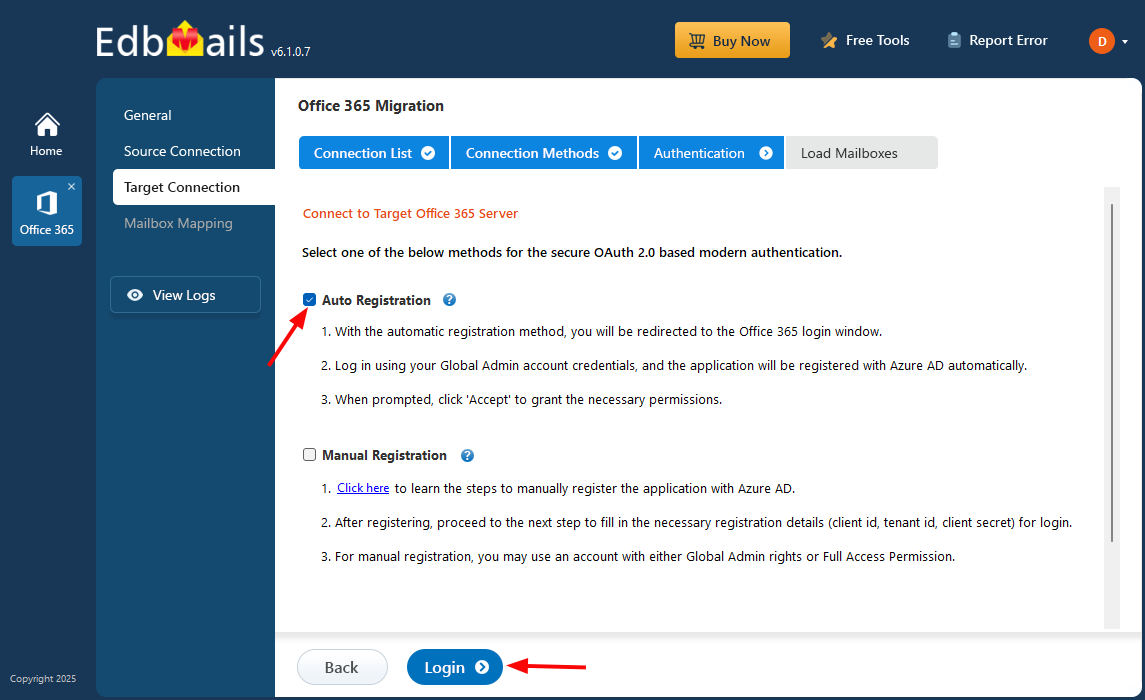
- Select a secure OAuth 2.0-based modern authentication method to establish a connection with the target server.
- Click the ‘Login’ button.
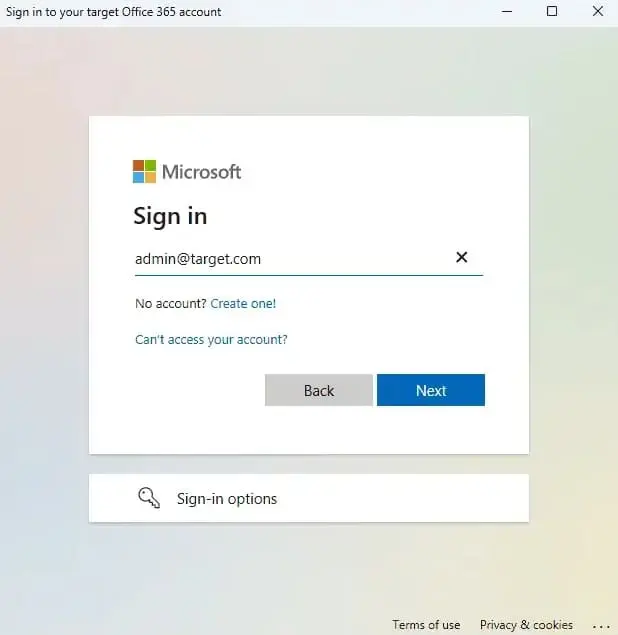
- Authenticate on Microsoft sign-in page.
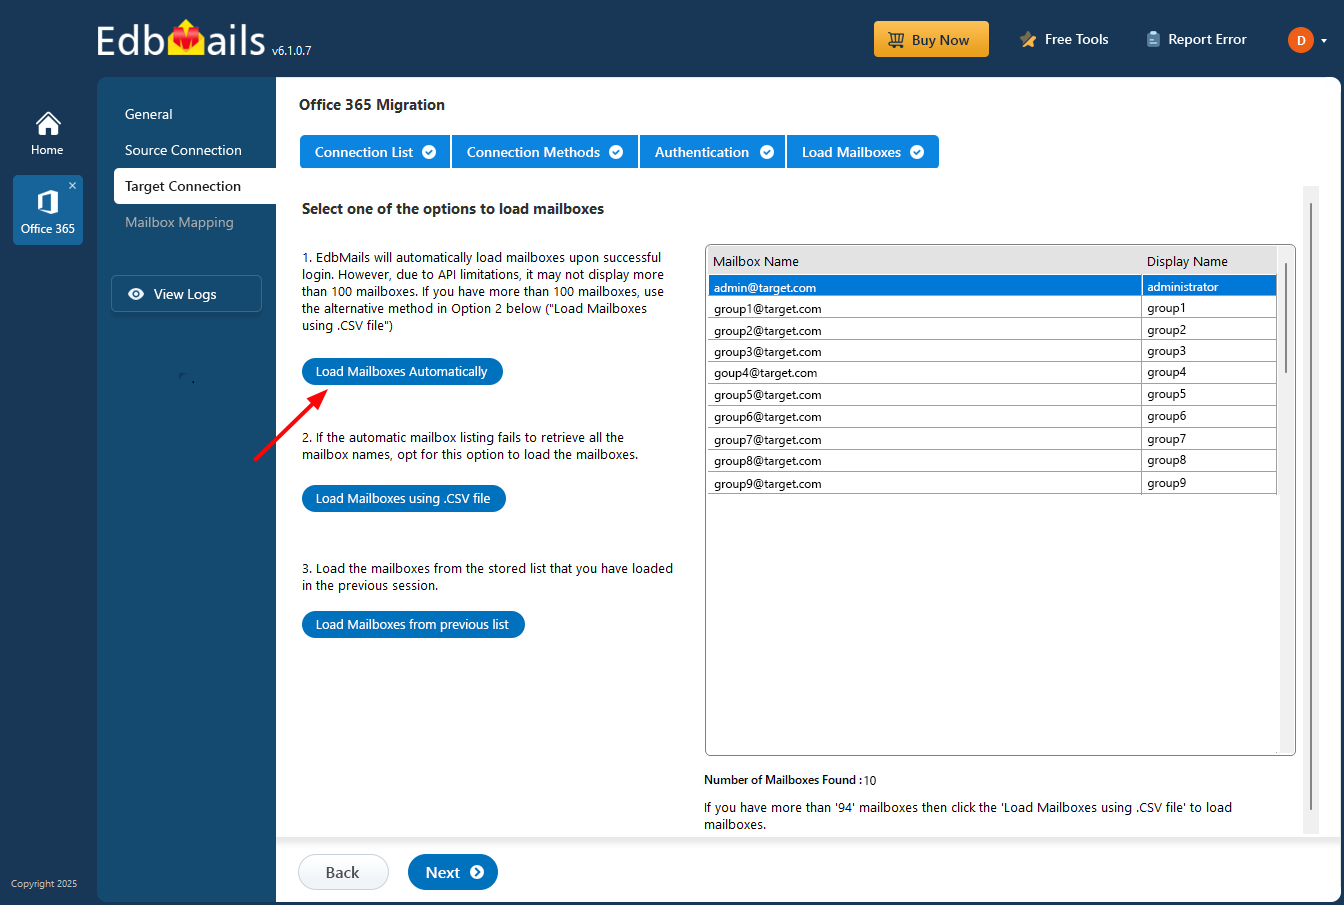
- EdbMails automatically loads mailboxes and also allows CSV file imports for efficient mailbox loading into Office 365.
Step 5: Maps the source and target servers
- Select the mailbox mapping option that best aligns with your requirements.
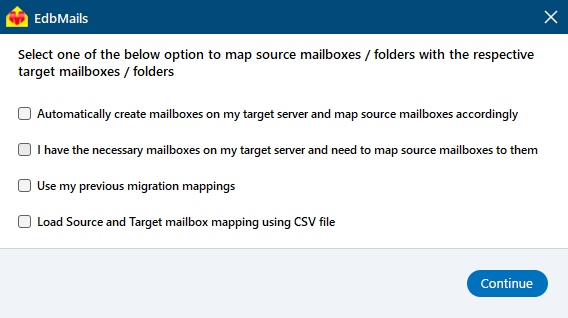
- EdbMails ensures the precise mapping of mailboxes and folders from the source Office 365 server automatically. This feature is crucial for large-scale migrations, optimizing the workflow and ensuring a seamless transfer to Office 365 without manual intervention.
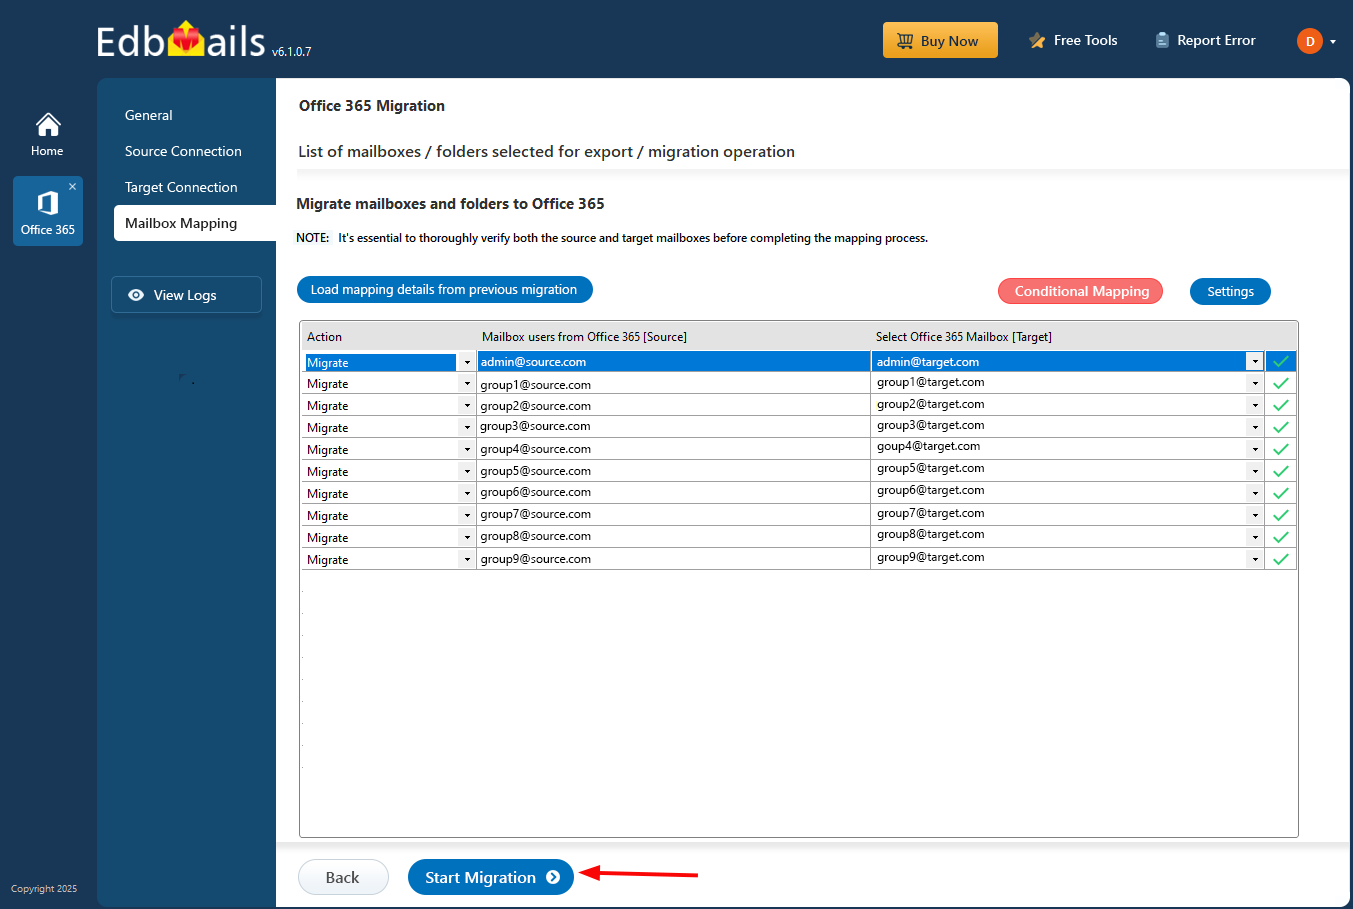
- Select the mailbox mapping option that best aligns with your requirements.
Step 6: Start the Office 365 tenant to tenant group migration
- Once the mailboxes are mapped,click the ‘Start Migration’ button to begin the migration process. To review the migration report, click the ‘View Log’ button, which provides a comprehensive report detailing the number of emails, folders, and mailbox items successfully migrated.
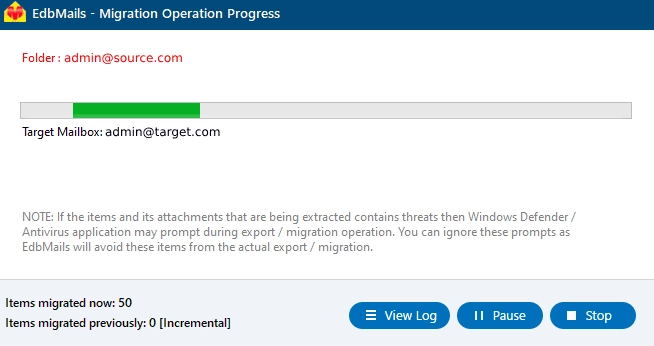
- Once the mailboxes are mapped,click the ‘Start Migration’ button to begin the migration process. To review the migration report, click the ‘View Log’ button, which provides a comprehensive report detailing the number of emails, folders, and mailbox items successfully migrated.
Advantages of EdbMails to migrate Groups mailboxes to Office 365
It becomes very hard if you have to depend on multiple tools for different operations which is hectic to manage and also time-consuming. As a result, it’s always better to go for a solution that has everything in it and EdbMails is one among them.
- Quick and Easy Migration: EdbMails provides a simple and user-friendly interface that makes the migration process quick and easy. The software tool not only allows you to migrate O365 mailboxes to another tenant but it also allows you to migrate your Office 365 groups to another group in just a few clicks.
- No Downtime: EdbMails provides you zero downtime throughout the migration. You can keep working on your office 365 account while migrating the mails.
- Safe and Reliable: EdbMails software is reliable and safe, that guarantees data security while migrating the data. It has special algorithms, to migrate your data without any loss.
- Migrate Multiple Groups: In EdbMails one can migrate multiple Office 365 Groups simultaneously. This saves considerable time and effort by performing the migration of groups instead of performing the same for each group.
- Advanced Mapping Options: The EdbMails supports multiple advanced mapping options. Users can map source and target group members, Calendars, Tasks, Notes and other data items. So, all data will be migrated.
- Incremental Migration: EdbMails has support for the incremental migration, it only migrates new or modified data items during subsequent migrations.
- Pre-migration Analysis: EdbMails also offers the feature of pre-migration analysis by using the free trial software which helps to analyze the migration prior to starting the actual migration process.
- Cost-Effective: EdbMails is a very cost-efficient solution to perform the Office 365 Group migration. It offers a wide spectrum of Office 365 migration plans in accordance with all the budgets.
Frequently Asked Questions
What happens to group membership and permissions after migration?
Can multiple Office 365 groups be migrated at the same time?
Will users experience downtime while their group mailbox is being migrated?