


Office 365 shared mailbox to public folder migration
As businesses today are driven towards collaboration, Shared mailboxes within Office 365 play a very crucial role in allowing multiple users to have access to one mailbox. Whether it’s managing a support desk, customer service requests, or handling internal inquiries, shared mailboxes allow multiple users to manage communications from a single email address. The use of shared mailboxes allows departments such as “IT Support” and “HR Desk” to send and receive messages on their behalf, and therefore it provides easier email administration. However, as businesses change and grow there might be a need to migrate the shared mailboxes into public folders. This might occur when a large amount of historical data needs to be stored, filed, and made accessible to all people across different departments. Public folders are a great place for centrally located email data that every user can access, without needing a license for every user. As a result, many companies opt for an Office 365 shared mailbox to public folder migration where they can gain more benefits.
As we all know, Office 365 shared mailbox to public folder migration is not an easy task. During migration process there are permissions, data volume and difference between shared mailboxes and public folders structure issues could occur. However with an automated migration tool it becomes a lot simpler for companies to migrate the shared mailboxes into Public folders.
EdbMails Office 365 migration software easily migrates Office 365 shared mailbox to public folder. Using EdbMails, you are able to migrate all mailbox elements which are emails, attachment, contacts, calendar, task, note, etc without data lost or corrupted. The most important thing about EdbMails is that it's free of scripts. In fact you will not require to use the complex Powershell script commands or manual interference. This makes it really user friendly and easy for those with limited technical expertise. Furthermore, security of the migration through Multi-Factor Authentication (MFA) ensures that your migration is carried out under a secure setting.
EdbMails offers automatic mailbox mapping, which helps to eliminate manual works by mapping the shared mailboxes to their public folders automatically. It will save a lot of time and prevent human errors. The tool also allows you to perform batch migration. This enables you to migrate a number of mailboxes simultaneously, making it ideal for large organizations that have a large number of mailboxes to migrate. By automating and streamlining the above necessary tasks, EdbMails help to make the process of migrating an Office 365 shared mailbox to a public folder simple and easy so that the users can utilise the time on their main concern.
Top reasons for Office 365 shared mailbox to public folder migration
- Overcoming license and storage limitations
Office 365 shared mailboxes can store up to 50 GB without requiring a license. Once the email is full, users cannot send more emails and can experience disruptions. Public folders do have an almost limitless amount of space in them so there should be no problem managing your email without swapping out licenses too often. EdbMails assists in migrating shared mailboxes into public folders while providing storage solutions.
- Simplified user permissions and access control
It is difficult to control user permissions on shared mailboxes. With public folders you have finer control over who can view and edit your information, which enables you to scale as you grow your organization and also grant secure access to external and internal users.
- Improved security and encryption control
Shared mailboxes cannot have distinct security contexts, making them difficult to encrypt. Public folders have superior encryption and security controls, protecting private communications. With public folders encryption controls can be centralized to further secure information.
- Better organizational efficiency with centralized data
Shared mailboxes can become disorganized as data accumulates. Public folders centralize email storage, making it easier to categorize, retrieve, and manage email data. This organized structure enhances overall productivity and streamlines email management, improving collaboration and access across teams.
- Enhanced compatibility and mobile access
While shared mailboxes may have limited mobile compatibility, public folders provide better access across multiple platforms. Users can have immediate access to their e-mail, calendar, and contacts on the iOS device, Android phone or on a web browser providing the ultimate in mobility collaboration and accessibility to the remote worker.
- Scalable solutions for larger teams
Shared mailboxes support a limited number of users, which can lead to connectivity issues as teams grow. With public folders, there can be more users simultaneously accessing data and this won't affect them adversely. This is very convenient especially with your company growing. EdbMails will help migrate the massive shared mailboxes to public folders and ensure minimum downtime.
- Overcoming license and storage limitations
Office 365 shared mailbox to public folder migration planning
Before you decide to migrate your Shared Mailbox into a Public Folder, there are several prerequisites and considerations about migration. Please use the following checklist.
- Create a full inventory list of everything in your Shared mailboxes.
- Determine the size and number of your Shared mailboxes you need to migrate.
- Decide if you are going to move everything in one big step, or if you will move items in smaller pieces.
- Verify your internet connection speed, and also your network settings.
- Also consider Office 365 throttling and message size limitations.
- Inform your end users about your plan and any associated changes.
- Perform a test Office 365 migration prior to the actual migration.
- Start the migration, confirm the endpoint, and update DNS records.
- Create new Outlook profiles, and verify emails are receiving correctly.
Office 365 shared mailbox to public folder: Pre-migration activities
Before starting the actual migration, there are a few tasks to perform on your environment:
- Creating a Shared Mailbox in Office 365
- The first step of the migration is the creation of a shared mailbox in the Office 365 Admin center.
- To achieve this log in to the Office 365 Admin Center, click on 'Groups' in the left navigation menu and then 'Shared' on the top menu navigation.
- From here click on the 'Add a shared mailbox' and create a new shared mailbox by clicking on the '+' sign and following the screen prompts.
- Granting Permissions to the Shared Mailbox
- Once you have created the shared mailbox you now need to give permissions to the users who need to access it.
- You can add this by going to the 'Permissions' tab of the shared mailbox and adding the users you want to grant permission to.
- There are several permission types that you can add for example 'Full access', 'Send As', 'Send on Behalf'.
- Creating a Shared Mailbox in Office 365
Steps to migrate Office 365 shared mailbox to public folder
Step 1: Download and install EdbMails Office 365 migration software
- Download and install the EdbMails application on your computer running on Windows OS.
- Start the application and enter the required details and click the ‘Login’ button or click the ‘Start Your Free Trial’ button to continue.
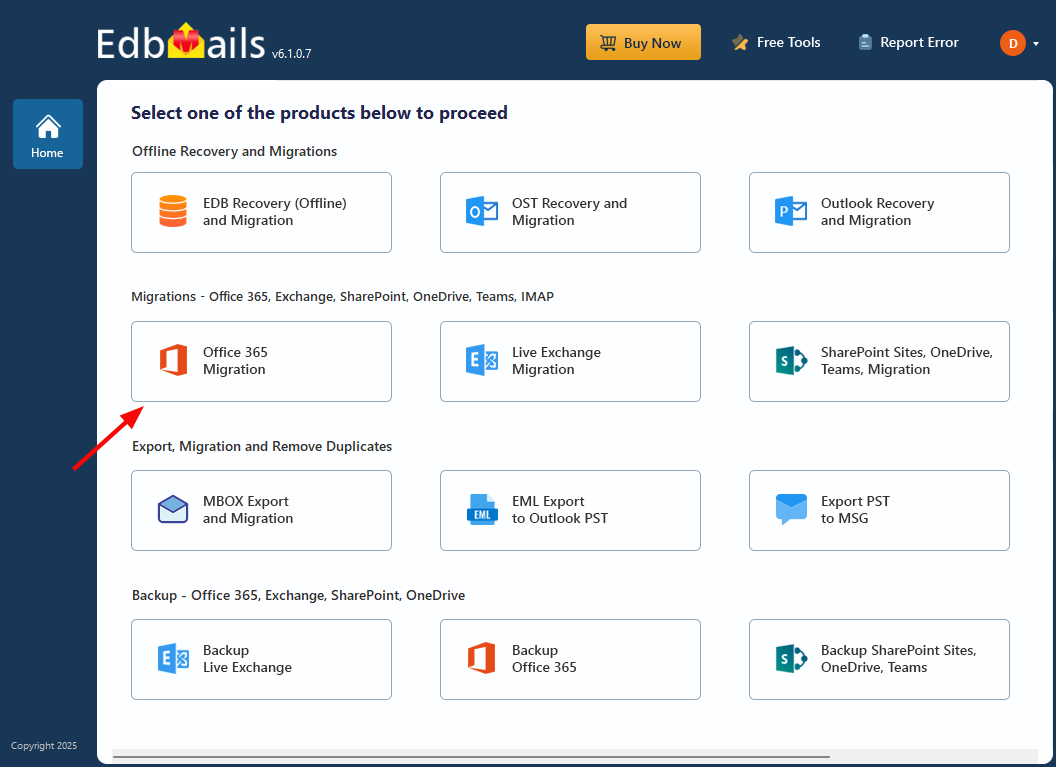
- Select the ‘Office 365 Migration’ option
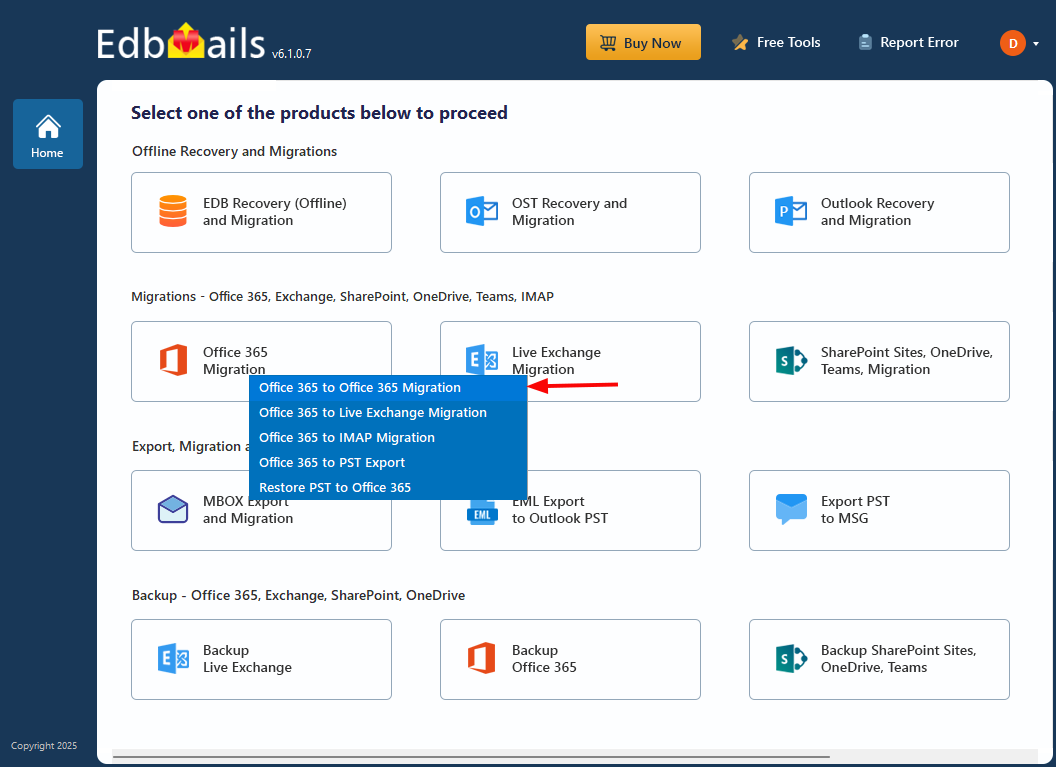
- Select the ‘Office 365 to Office 365 Migration’ option
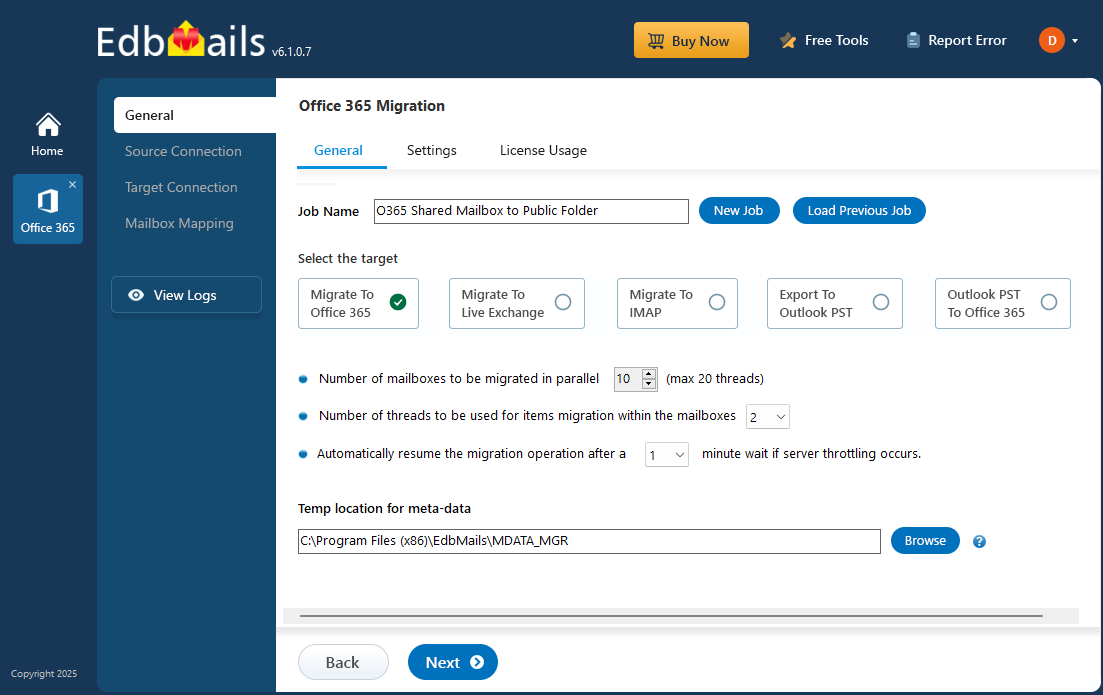
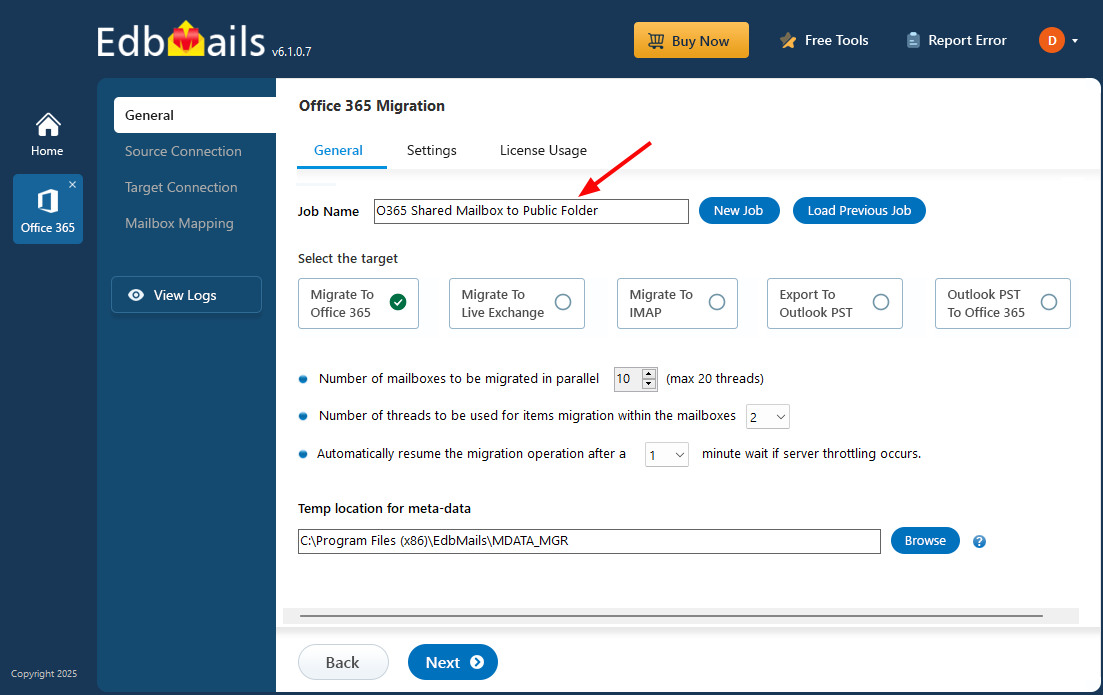
- Keep the default job name or click the ‘New Job’ button to change it.
Step 2: Connect to source Office 365 server
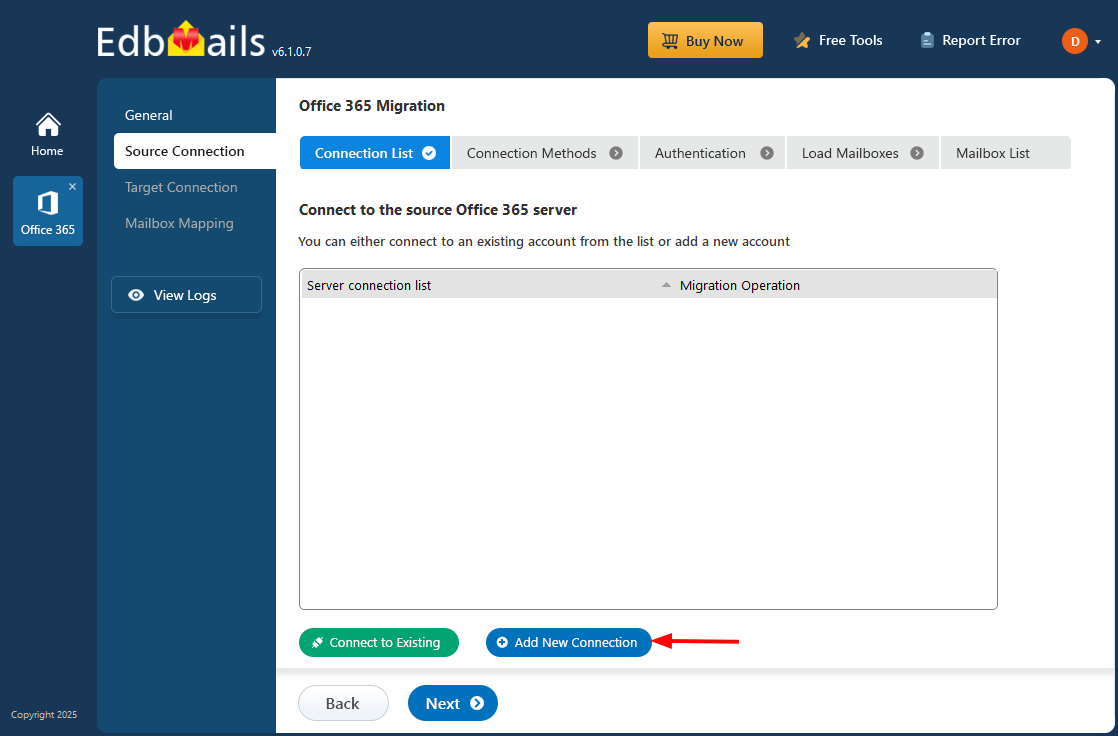
- Click the ‘Add New Connection’ button to create a new connection to the source Office 365, or select a previous connection from the list and click ‘Connect to Existing’ to proceed.
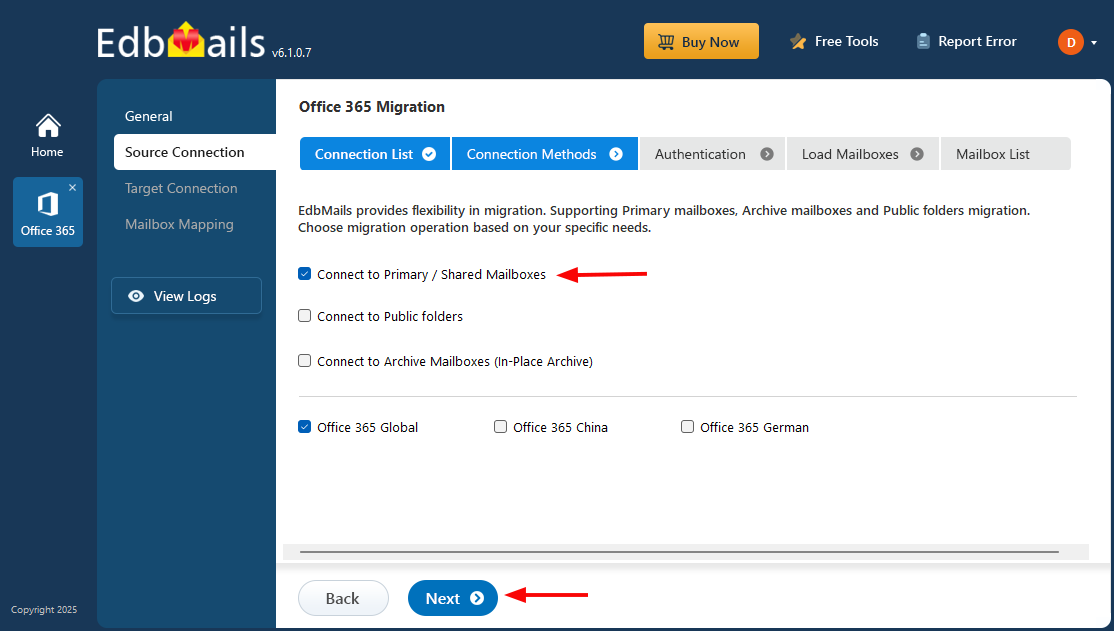
- Select the ‘Connect to Primary/Shared Mailboxes’ option.
- Click the ‘Next’ button to proceed.
- Select a secure OAuth 2.0-based modern authentication method and click the ‘Login’ button to continue.
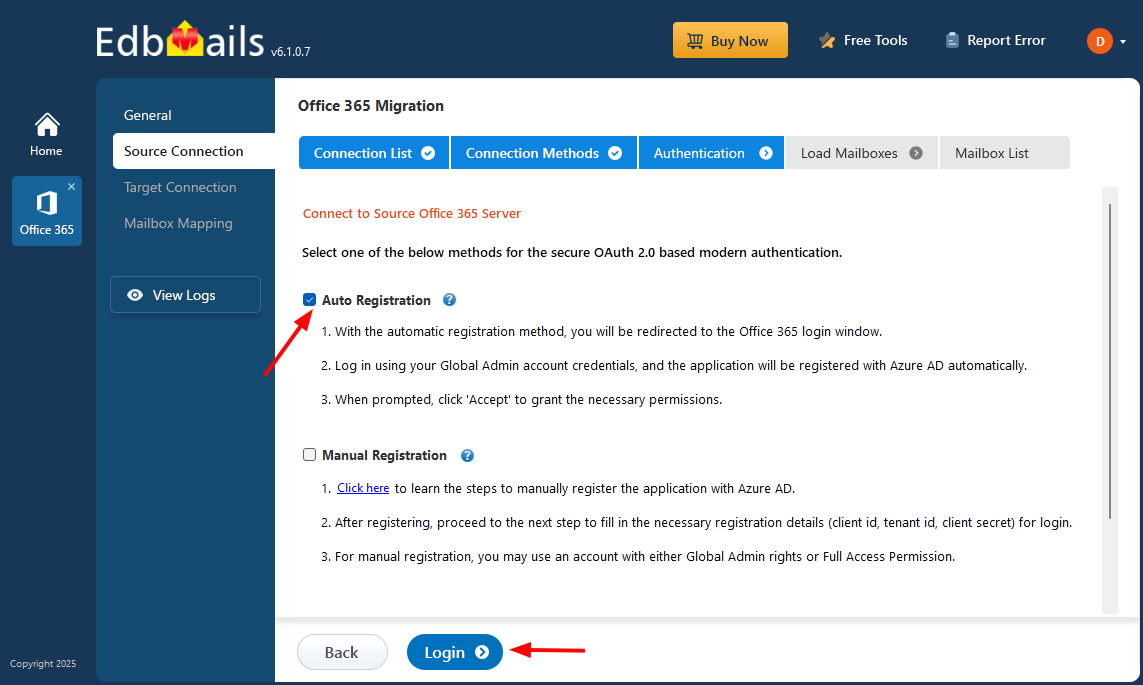
Connect to Office 365 server using secure modern authentication
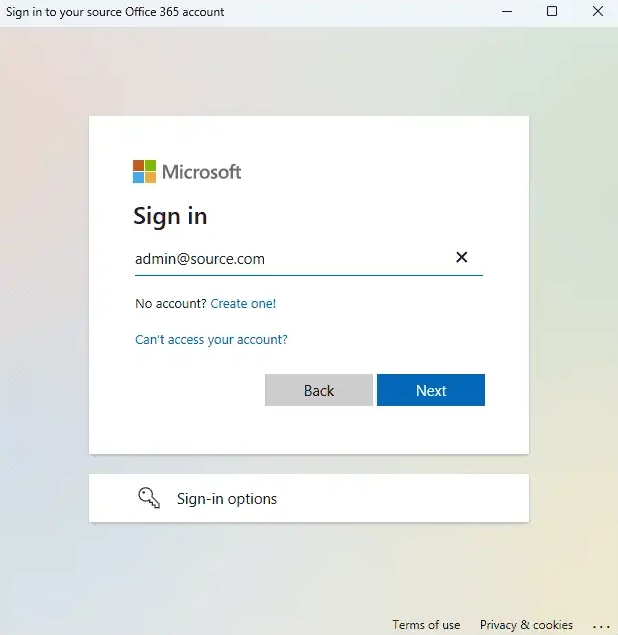
- Authenticate on Microsoft sign-in page.
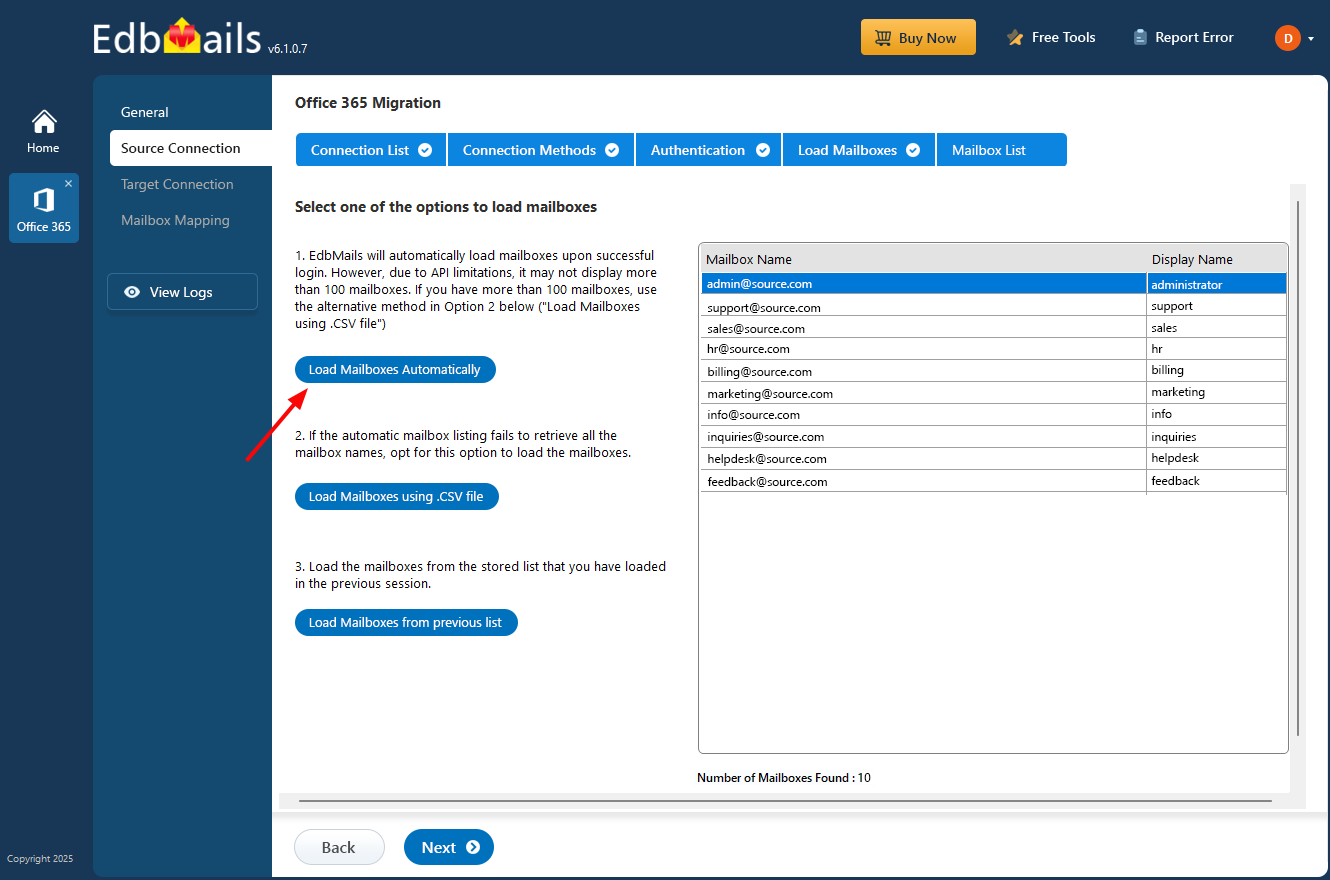
- After successfully connecting to your Office 365 server, select an option to load the mailboxes. Alternatively, you can also load the mailboxes using a CSV file.
- Click the ‘Add New Connection’ button to create a new connection to the source Office 365, or select a previous connection from the list and click ‘Connect to Existing’ to proceed.
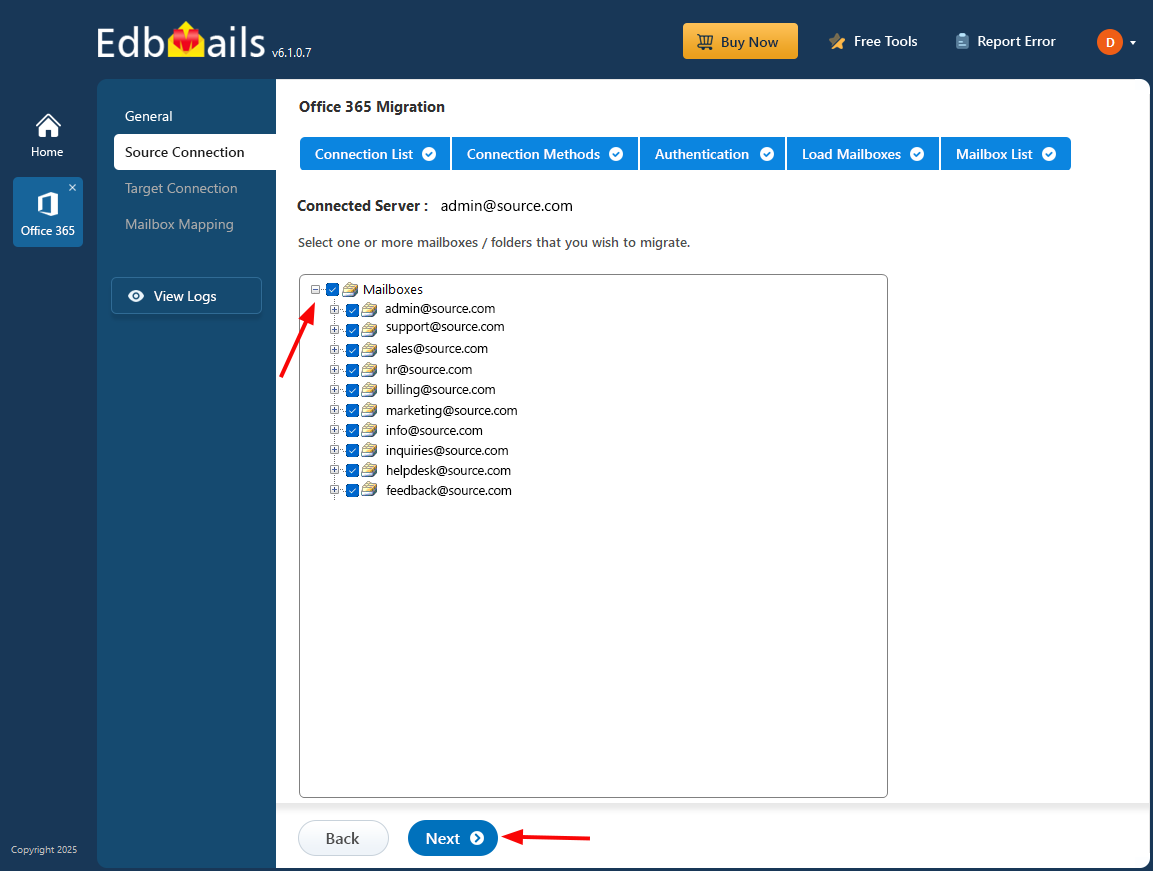
Step 3: Select Office 365 Shared mailboxes
- Select the Shared mailboxes from the left pane
- Click ‘Next’ to continue
Step 4: Connect to target Office 365 server
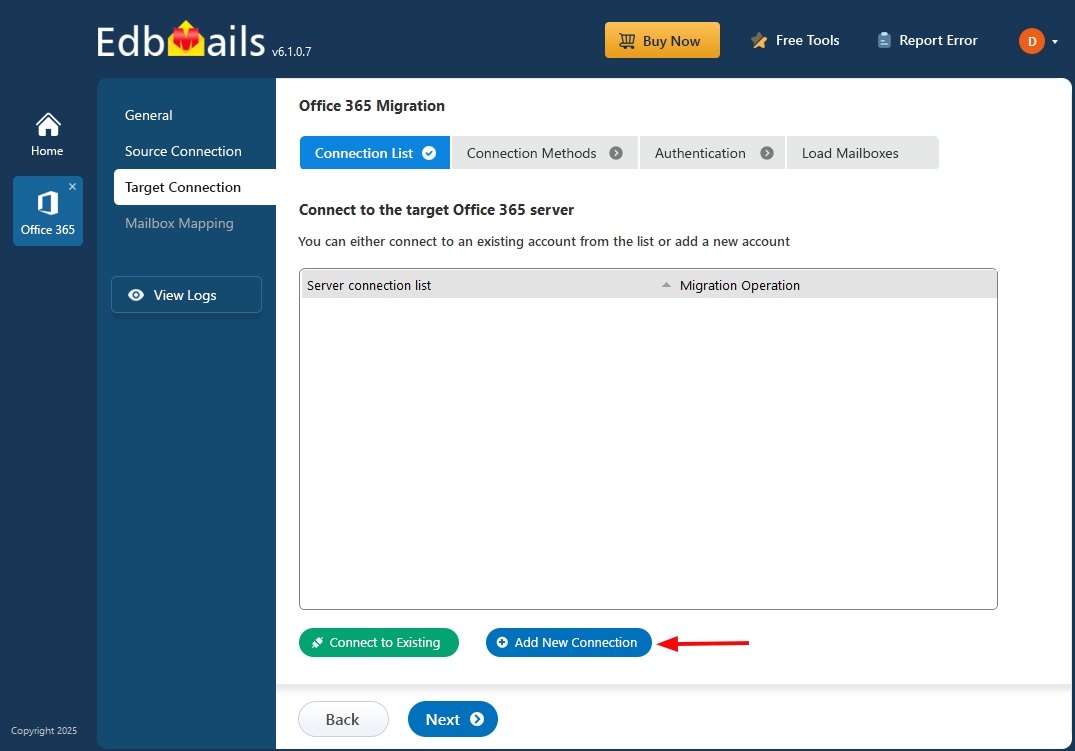
- Click the ‘Add New Connection’ button to create a new connection to the target Office 365.
- To use a previous connection, select it from the list and click ‘Connect to Existing’ to proceed.
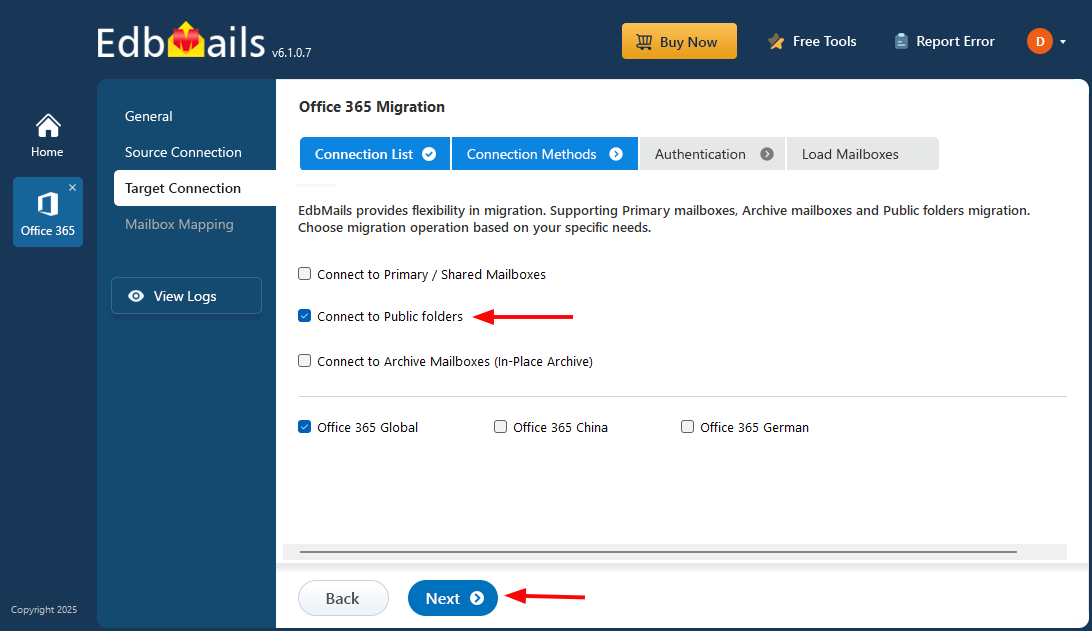
- Select ‘Connect to Public Folder’ as your connection method, then click ‘Next.’
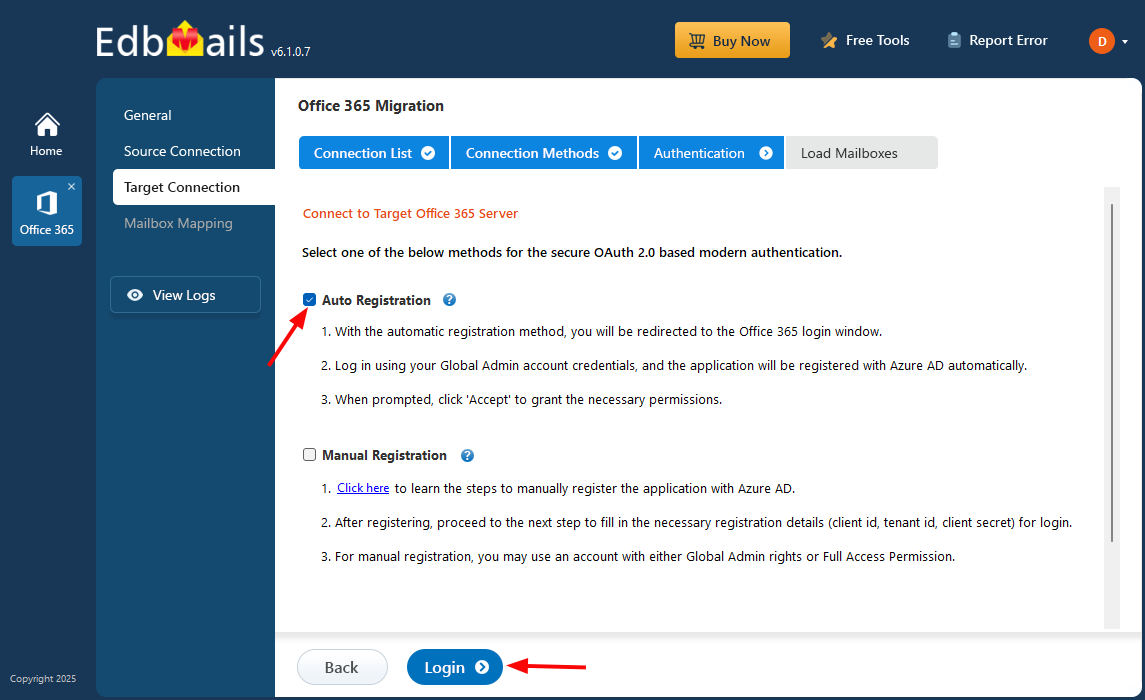
- Select your preferred authentication method and click the ‘Login’ button to continue.
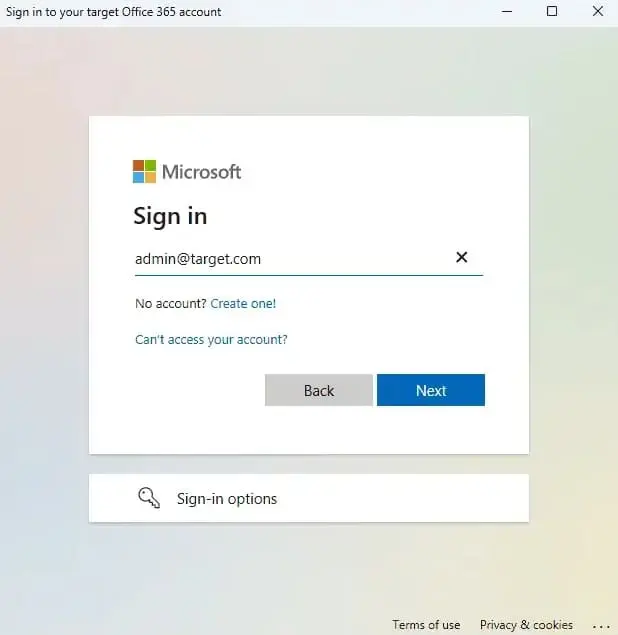
- Sign in on the Microsoft login page.
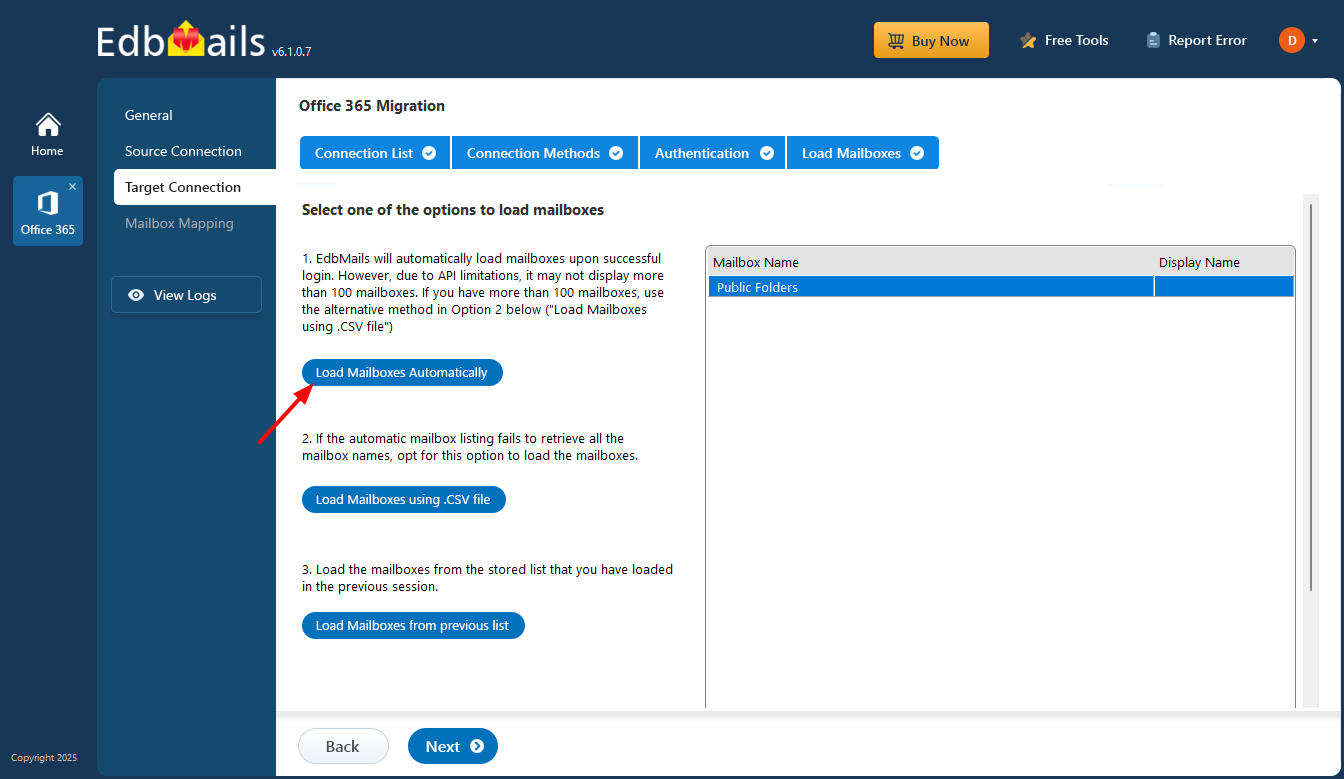
- Choose a method to load the mailboxes and click the 'Next' button to continue.
Step 5: Map Shared mailboxes to public folders
- EdbMails provides an automatic mailbox creation feature for the target Office 365 server, along with a mapping function that accurately connects mailboxes and folders from the source Office 365 server. This is especially useful for efficiently managing numerous public folders.
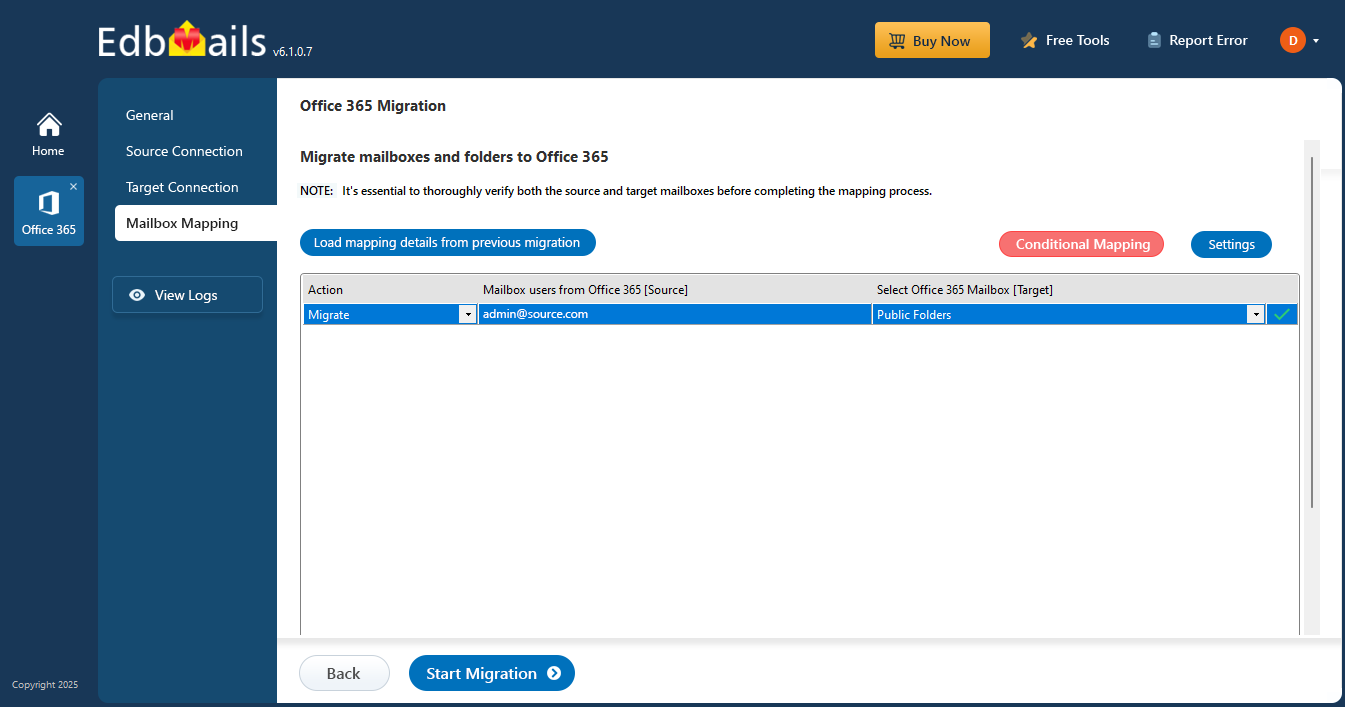
- EdbMails provides an automatic mailbox creation feature for the target Office 365 server, along with a mapping function that accurately connects mailboxes and folders from the source Office 365 server. This is especially useful for efficiently managing numerous public folders.
Step 6: Start Office 365 Shared mailbox to public folder migration
- Once the mailboxes are mapped, click the ‘Start Migration’ button to initiate the migration process.
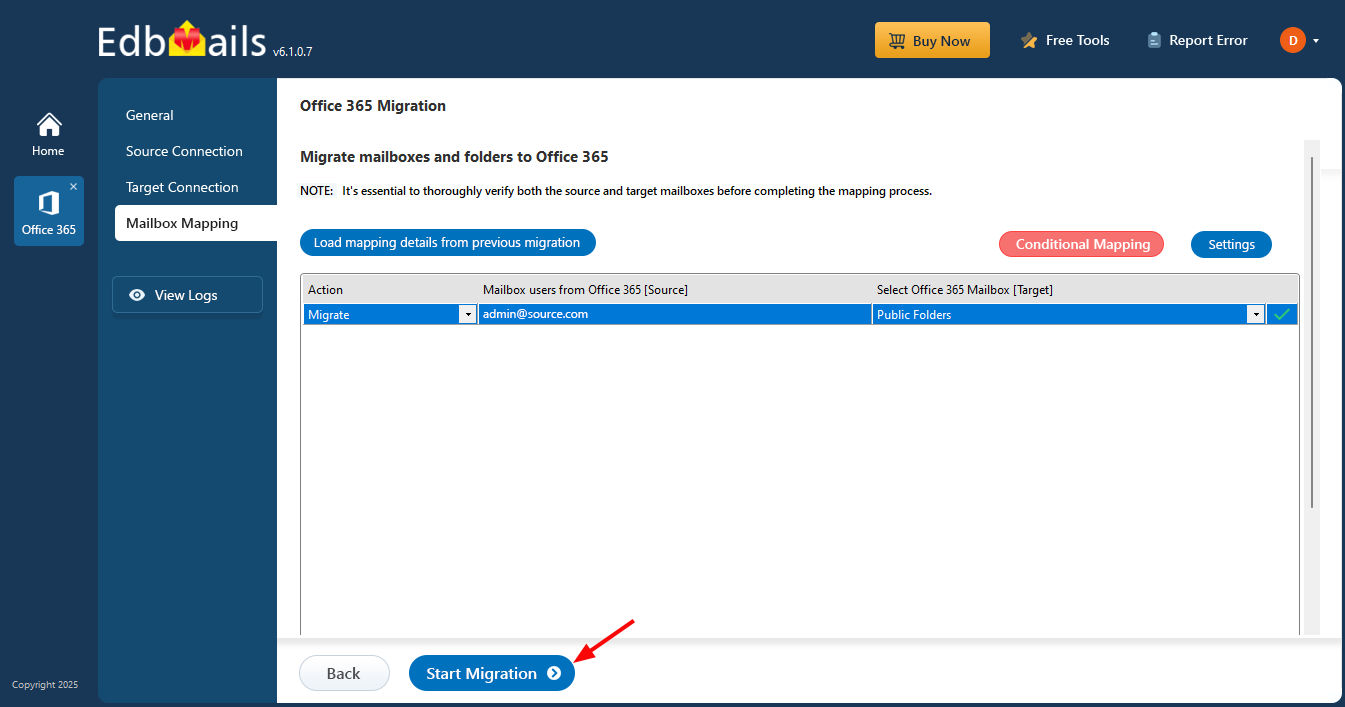
- The migration has started. Click the ‘View Log’ button, which provides a comprehensive migration report detailing the number of emails, folders, and mailbox items successfully migrated.
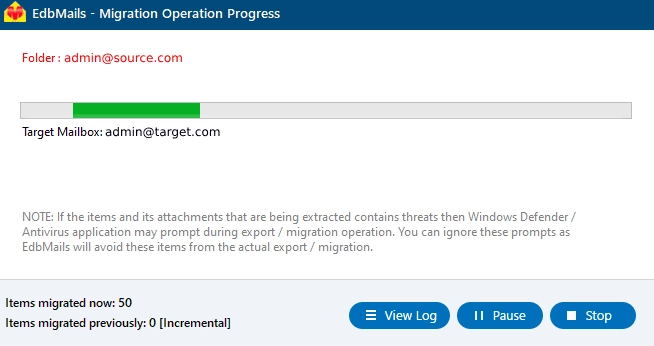
- Once the mailboxes are mapped, click the ‘Start Migration’ button to initiate the migration process.
Office 365 Shared mailbox to public folders post-migration activities
Step 1: Update the MX records to point to Office 365
If you did not complete this earlier, you will also need to change the MX records (DNS records) to send and receive the mail at the destination Office 365 server, and to allow Outlook to connect to the mailboxes on the migrated servers, you will need to set the Autodiscover record.
Step 2: Create a new Outlook profile for users in the new domain
Set up and recreate Outlook profile for every user in the domain, if the Outlook cannot be connected to the Office 365 mailboxes.
Office 365 Shared mailbox to public folder migration troubleshooting
Refer to the Office 365 migration troubleshooting guide and Public folder troubleshooting for possible solutions related to migration errors. For more information on EdbMails Office 365 migration, see frequently asked questions (FAQs).
Benefits of EdbMails for Office 365 Shared mailbox to public folder migration
- Delta migration
With EdbMails, you can perform a delta migration (also known as an incremental migration), which means you will only transfer the new, modified or added data. Thus, there will be reduced data load to save your bandwidth. As a result, data synchronization takes place seamlessly.
- Migrate everything from Office 365 mailboxes
EdbMails enables migration of all common data types from the Office 365 shared mailboxes to the public folders. This includes emails, contacts, calendars, tasks, and more. This tool guarantees that not a single piece of data is missing in the process of migration.
- Automatic throttling management
While migrating, EdbMails automatically manages throttling, so the services will not go down during the migration. EdbMails senses the migration speed and controls it smartly so that it does not cross Office 365 throttling limits and delays the migration or failed.
- Advanced filtering options
EdbMails provides advanced filtering to transfer the selected and required amount of data. This includes filter such as date range, folder selection and various others, which reduces time and efforts, in terms of data transfer.
- Metadata integrity
Maintaining the integrity of metadata is essential while migrating, EdbMails maintain the originality of the metadata, the folder structure, read/unread state, etc. So nothing essential to the mailbox is lost in the process.