


Steps to change the language & regional settings on Office 365 server
For companies that have a range of users in various geographic locations, modifying the language and regional settings of an Office 365 server becomes an integral part of administration. By setting them correctly, it is possible to make sure that folders in emails, the format of the calendar, how the date and time are displayed, system notifications, etc. All fit the user's local preferences and avoid misunderstandings, scheduling problems and other disruptions.
For instance, a source Inbox folder named 'Boîte de réception', written in French. Directly migrating this folder to the destination server will not automatically map to the 'Inbox' folder at the destination server. For proper folder mapping and a successful Office 365 migration, the region settings on the Office 365 target server should match the language of the source mailbox.
In this guide, we will take you step-by-step through changing language and regional settings on Office 365. No matter if you have a single mailbox to change or a whole organization of users, you maintain consistency, avoid errors, and have a steady and smooth end-user experience.
Follow these steps to adjust language settings for Office 365:
- Log in to your Office 365 account.
- Navigate to the Outlook app from the list of available applications.
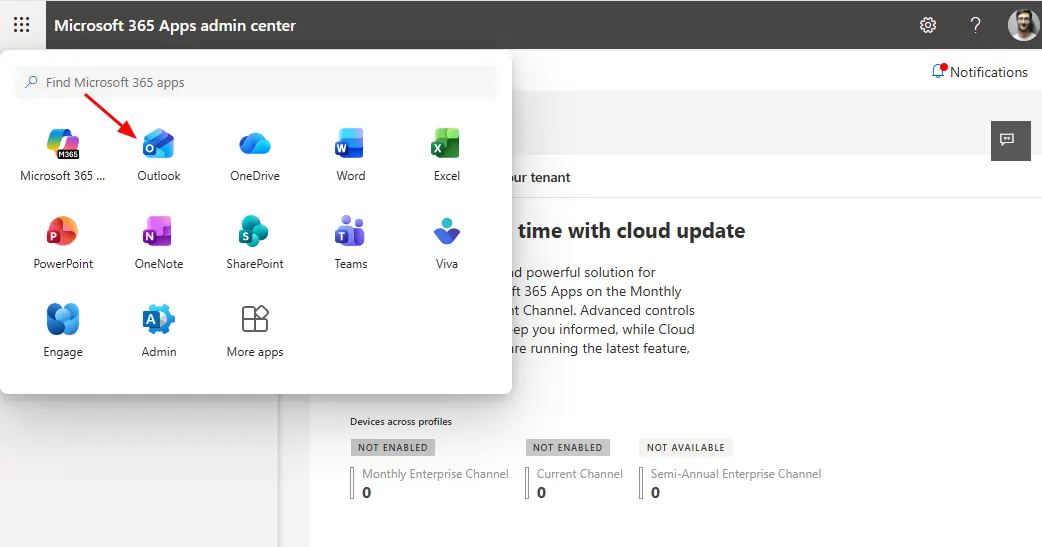
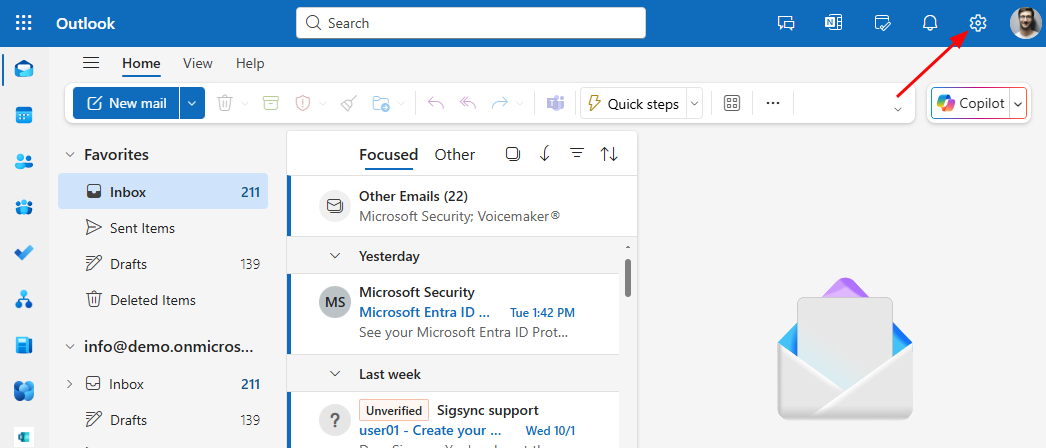
- Click on the Settings icon in the upper-right corner of your screen.
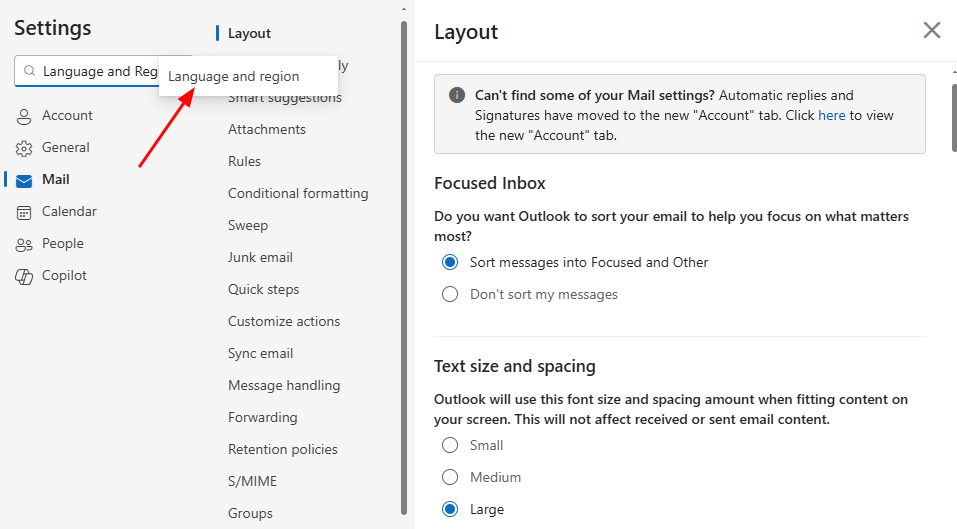
- Under the Settings, use the search bar and find the Language and Region section.
- Select the language you would like to use from the Language drop-down.
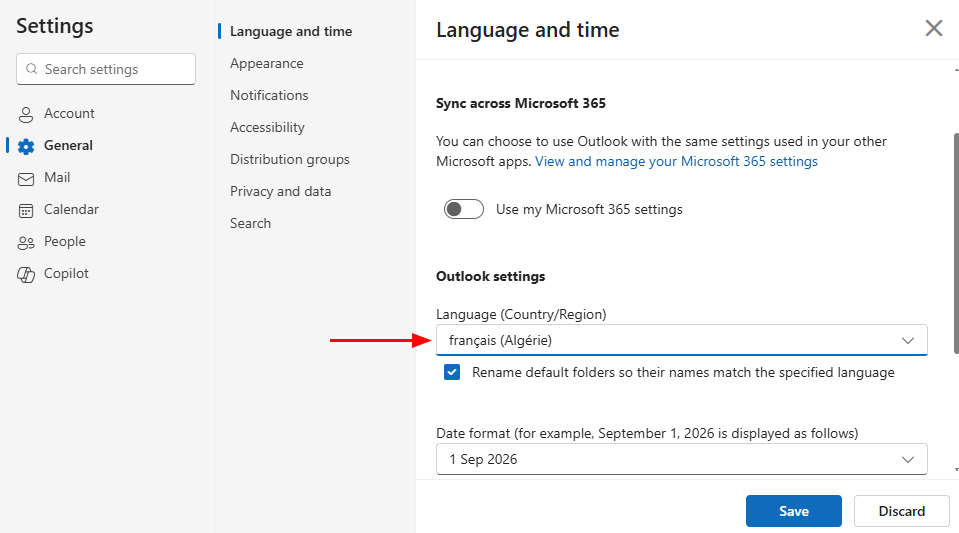
- Enable the option to rename default folders so their names align with the selected language.
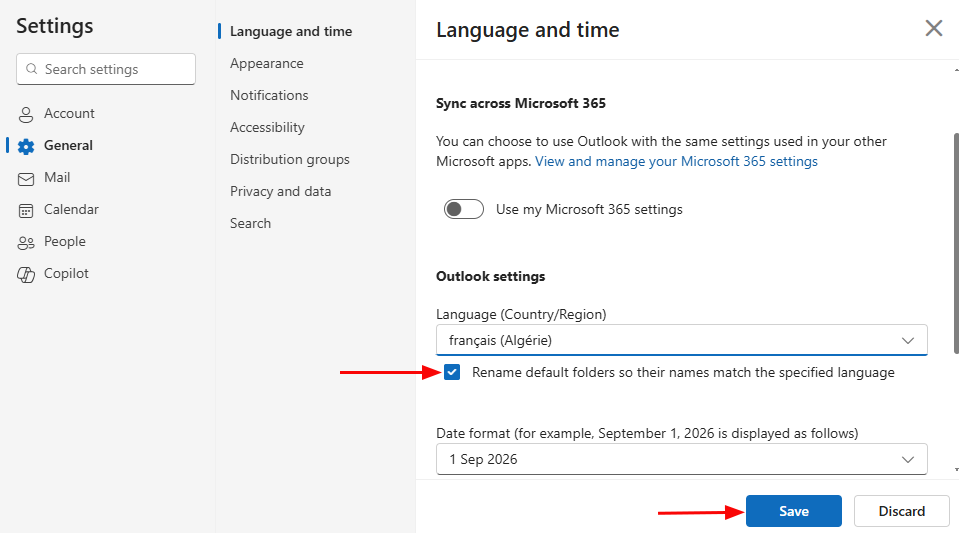
- Click Save to apply the changes.
- Default system folders will now appear in the selected regional language.