


Restore Multiple PST Files to Office 365
PST files have a way of piling up — old email archives, legacy mailboxes, personal Outlook data from employees who left years ago. At some point, keeping all of that outside Office 365 stops making sense. Bulk importing PST files into Office 365 pulls everything into one place, makes historical data searchable, and keeps the organization on the right side of data retention requirements.
EdbMails Office 365 migration software was built for exactly this. Importing multiple PST files doesn't demand a specialist — the interface is straightforward enough that most administrators get through it without hand-holding. Where things get particularly useful is the automatic mailbox mapping — EdbMails matches each source PST mailbox to the right Office 365 mailbox on its own, no manual pairing needed. For teams that want more control, the target Office 365 folder listing can be browsed and selected manually, keeping data in the right folders and the original structure exactly as it was.
Nothing gets dropped or altered in transit either. Emails, attachments, contacts, and calendar items all land intact. The migration reports sit alongside the whole process — administrators can track what's moving, spot anything that needs attention, and sign off once everything checks out.
Large data volumes, concurrent PST imports, complex folder hierarchies — EdbMails handles the lot. The prerequisites and step-by-step import process are covered in the sections below.
Prerequisites to Import Bulk PST Files to Office 365
- Before migrating PST import to Office 365, Microsoft Outlook needs to be installed on the machine running the operation and an Outlook profile should already be configured and working.
- EdbMails takes care of automatically creating Office 365 mailboxes and assigning licenses on the target server. If manual mailbox creation is preferred, the links below walk through the process:
- Explore and go through the available Office 365 licensing plans before committing — there's a 30-day free trial worth using before settling on a plan. Compare Office 365 business plans and compare Office 365 enterprise plans side by side to find what actually fits your organization's requirements.
- Planning to migrate PST files into Public folders on Office 365? Ensure that you create and configure the corresponding public folders on the target server.
- Connecting to In-Place Archives on the target server won't work unless the archive mailbox is enabled first — here are the steps to enable online Archive in Office 365.
- For Automatic Registration of EdbMails on Entra ID (Azure Active Directory), a global administrator account that has an active mailbox is what's needed. If your security team won't hand over global admin rights, manual registration is an option that accepts any account with full access rights.
- Configure Office 365 to send and receive large messages.
Follow the steps to increase the message size on Office 365 to 150MB.
Steps to import multiple PST files to Office 365 using EdbMails
Step 1: Download and install EdbMails software
- Download and install EdbMails application on your computer
See EdbMails system requirements to import multiple PST files to Office 365.
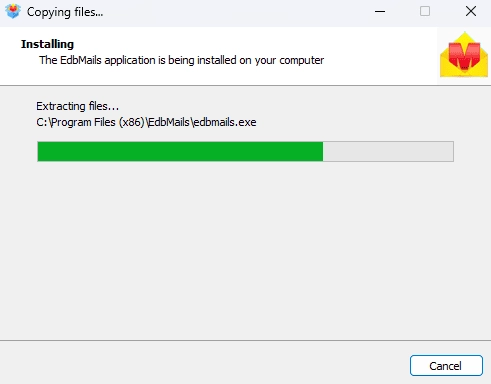
- Download and install EdbMails application on your computer
Step 2: Launch EdbMails Software
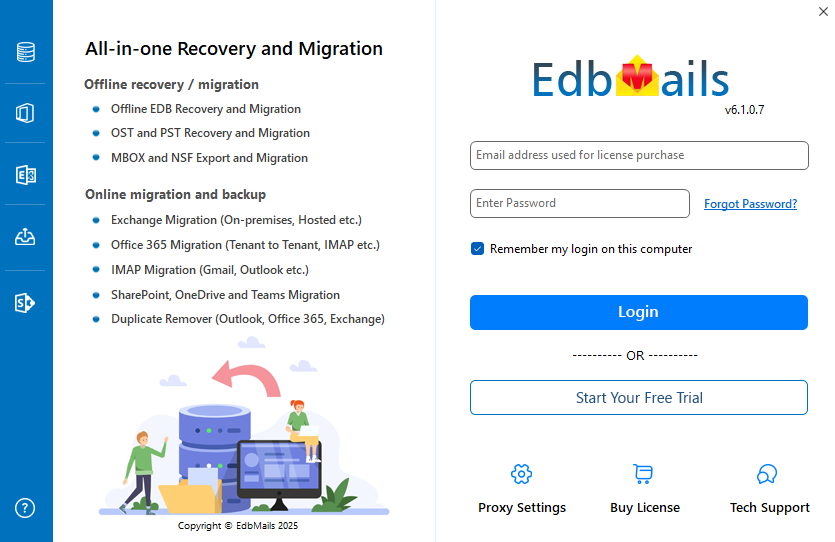
- Run the EdbMails application. Insert your login credentials, which is email address and password, then click 'Login' or 'Start Your Free Trial'.
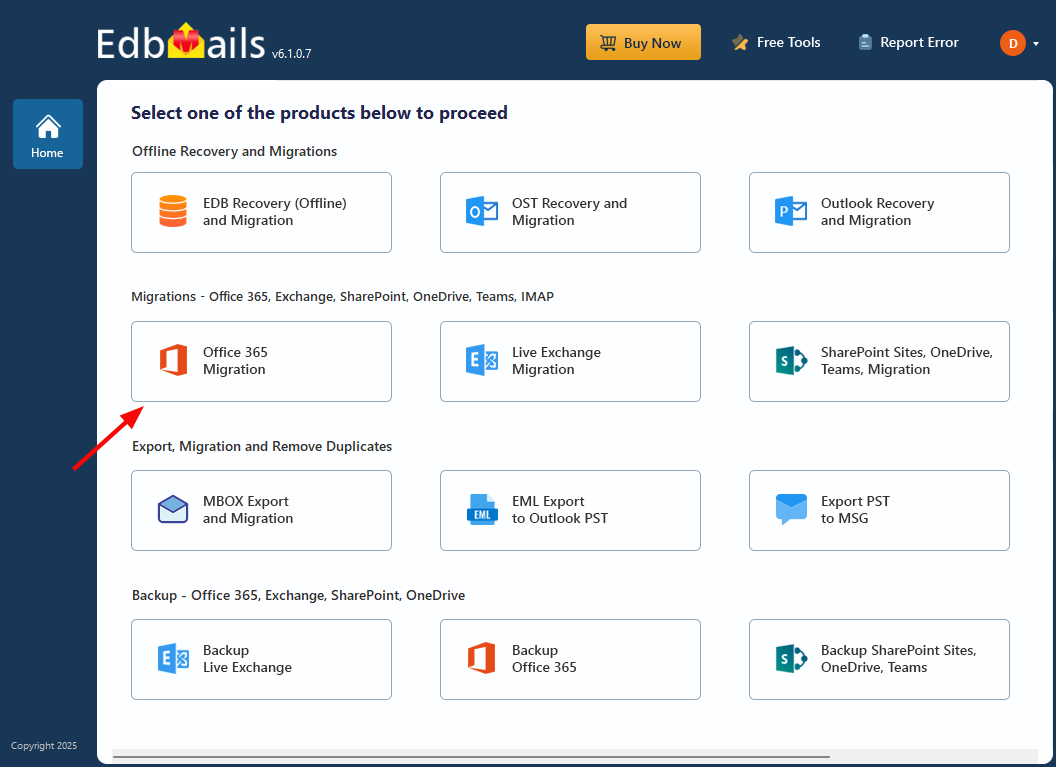
- Select ‘Office 365 Migration’ option
- Select ‘Restore PST to Office 365’.
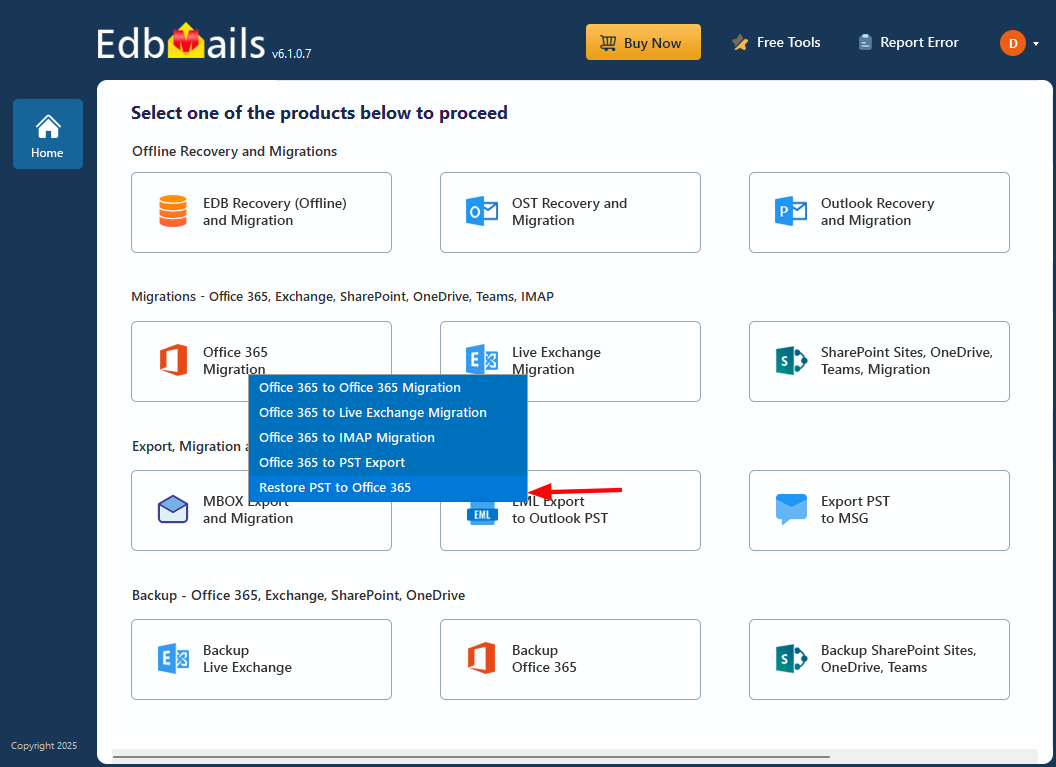
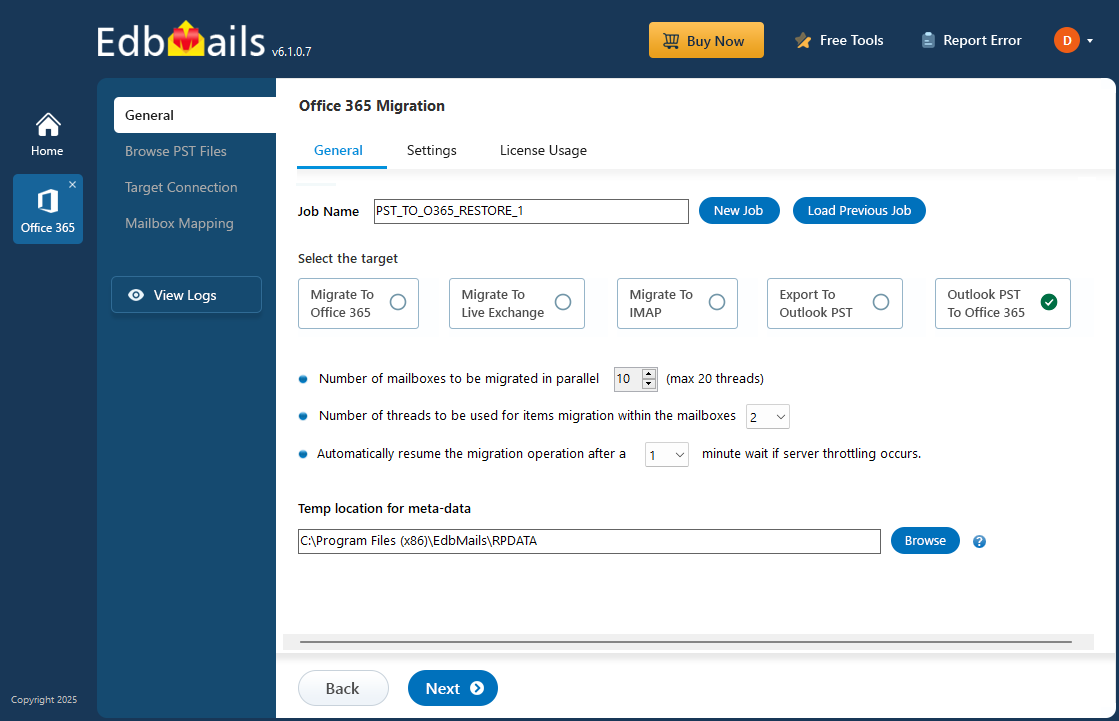
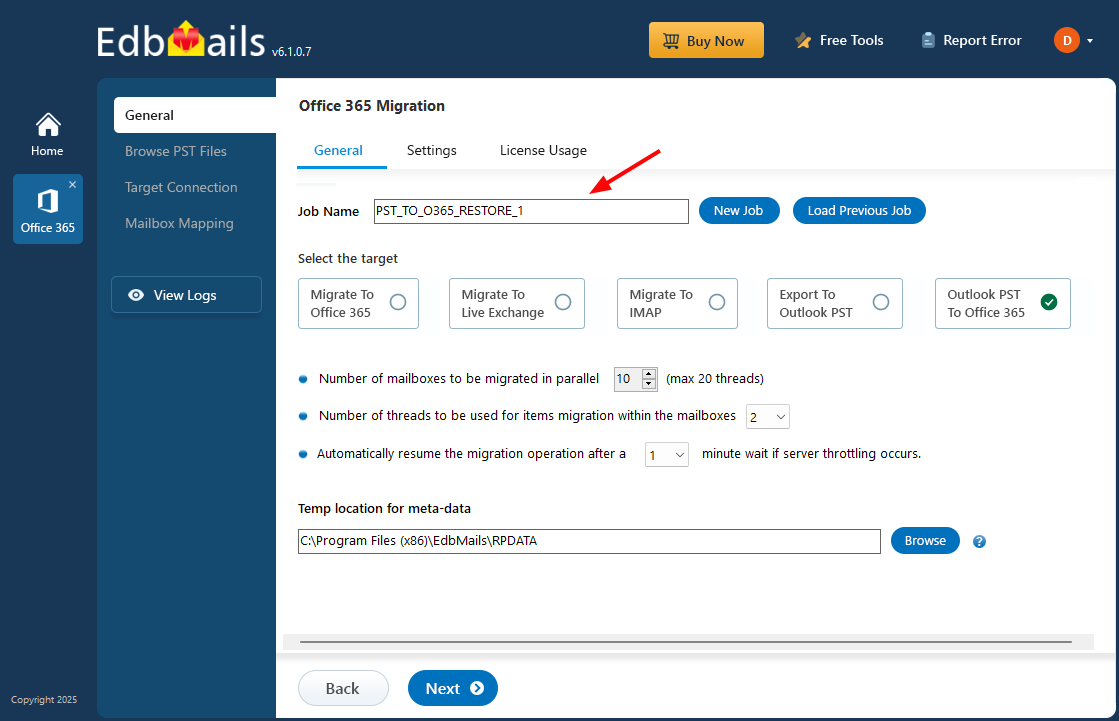
- You can either keep the default job name or click the ‘New Job’ button to modify it to a name of your choice.
- Run the EdbMails application. Insert your login credentials, which is email address and password, then click 'Login' or 'Start Your Free Trial'.
Step 3: Add multiple PST files
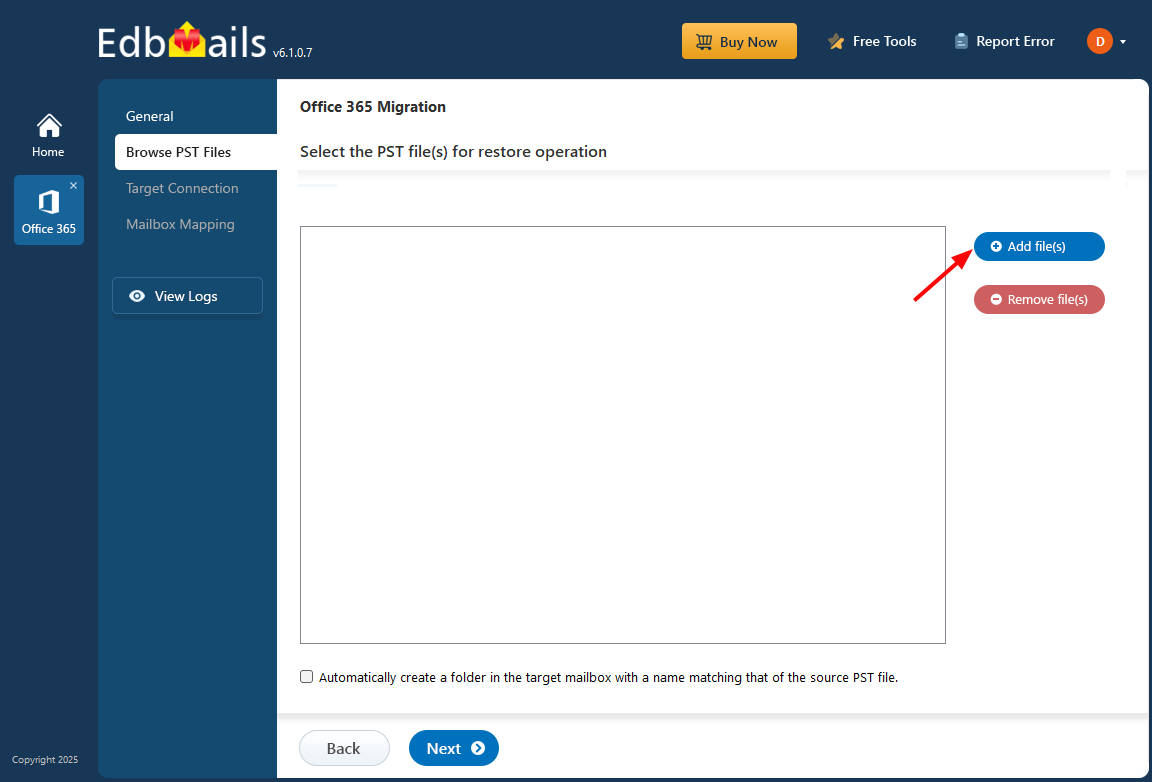
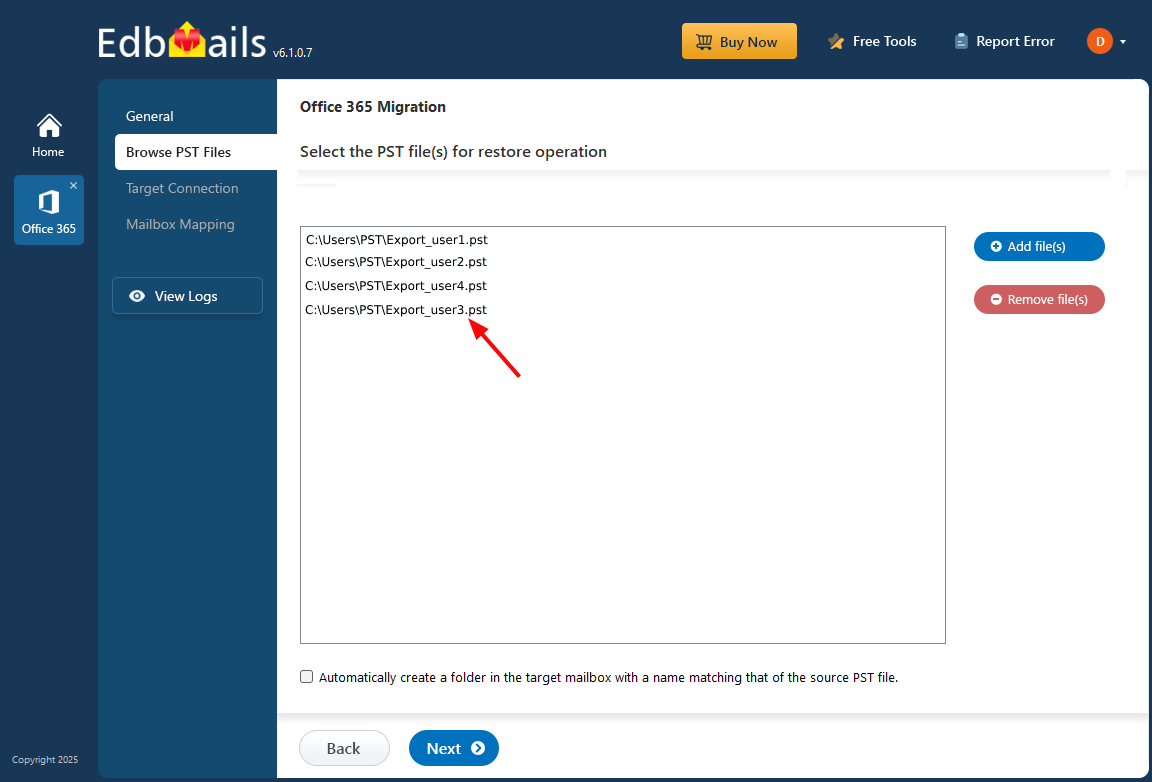
- Click the ‘Add file(s)’ button to add PST files to the user interface.
- Choose the multiple PST files you wish to select from your computer drive.
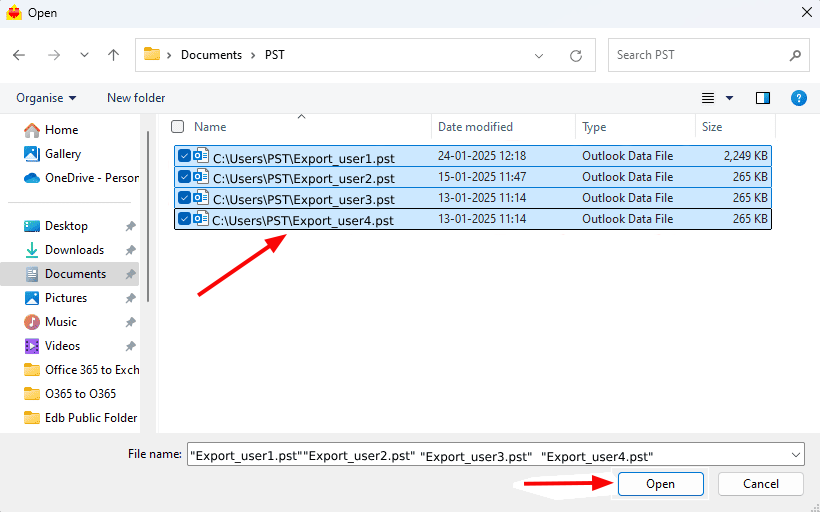
- Verify the selected PST files.
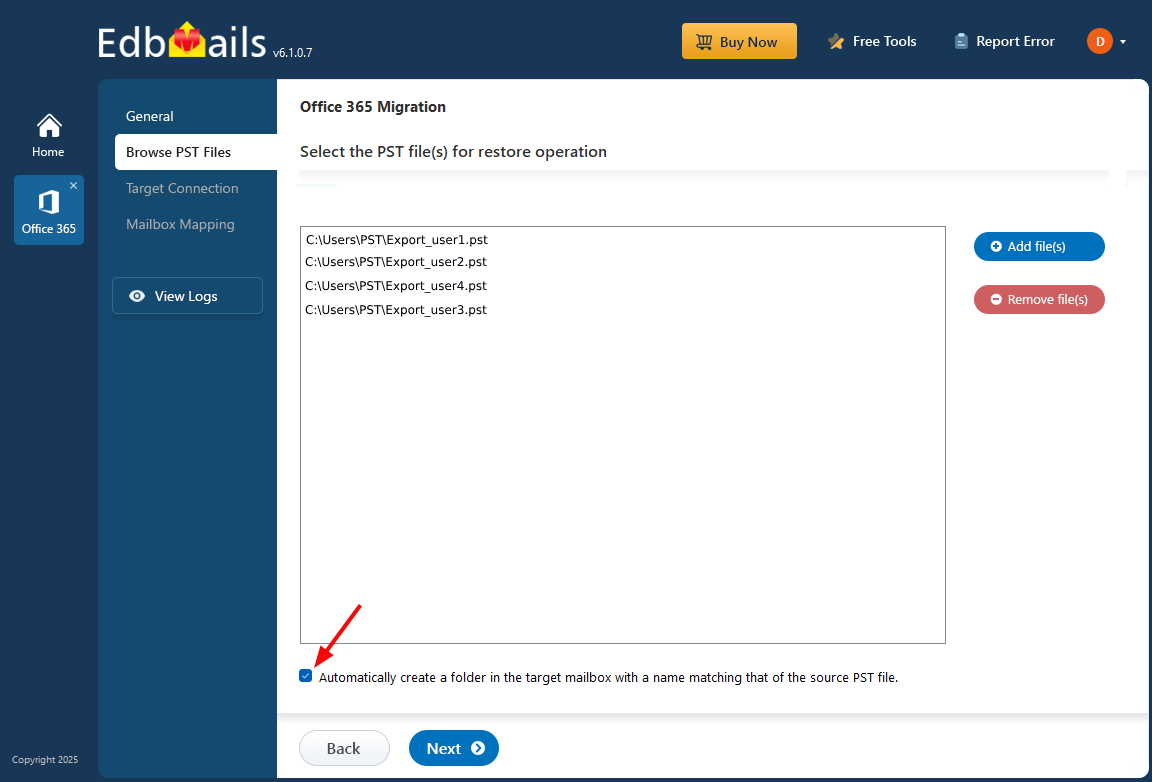
- Enable the option indicated in the screenshot below to create a folder in the target mailbox with the name equal to the source PST file name. Click 'Next'.
- Click the ‘Add file(s)’ button to add PST files to the user interface.
Step 5: Connect to target Office 365 server
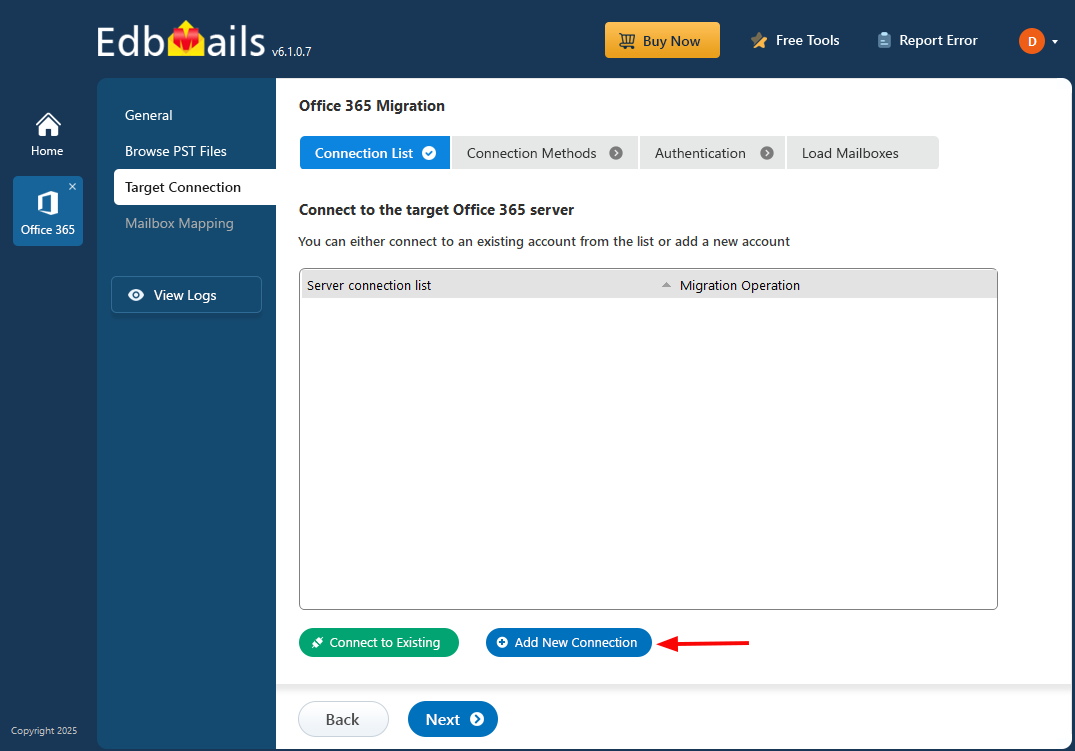
- Click the ‘Add New Connection’ button to set up a new connection with the target Office 365 server. To use an existing connection, select it from the list and click ‘Connect to Existing’ to continue.
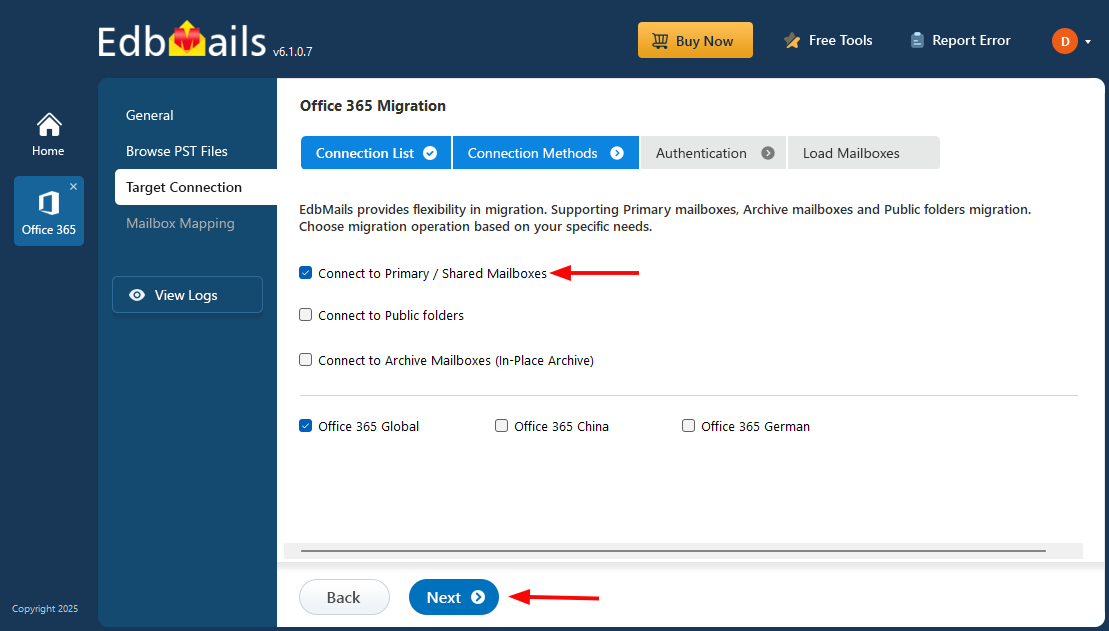
- Select the required connection options and click the ‘Next’ button
- Choose the desired target connection method. Then, click the ‘Login’ button to proceed.
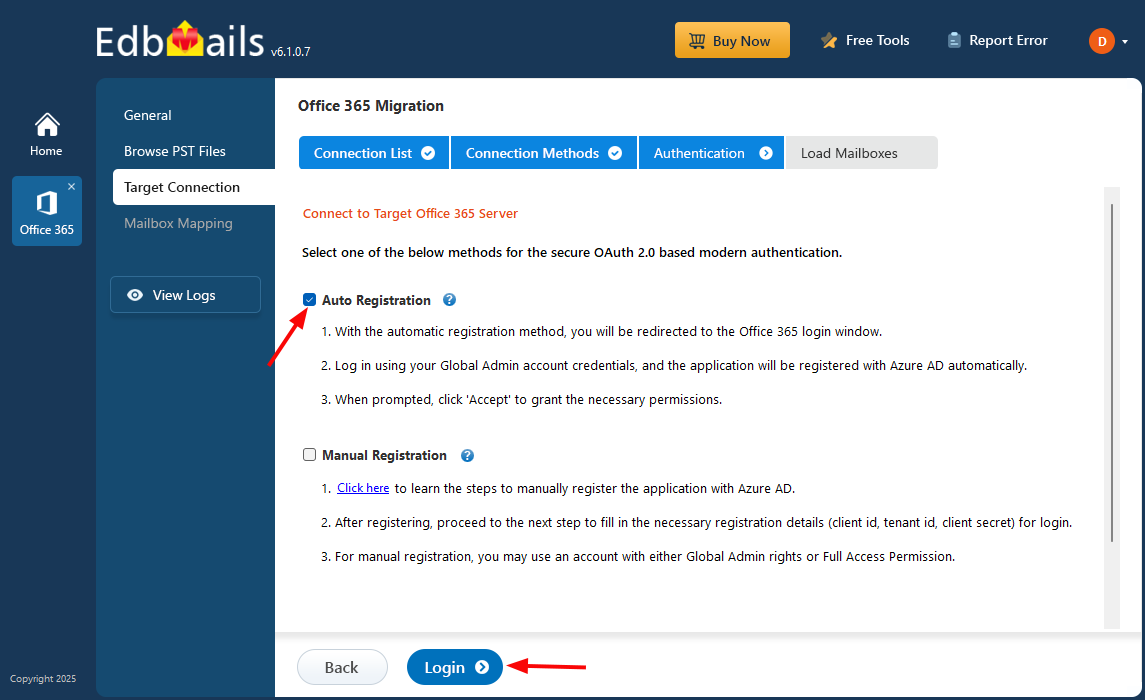
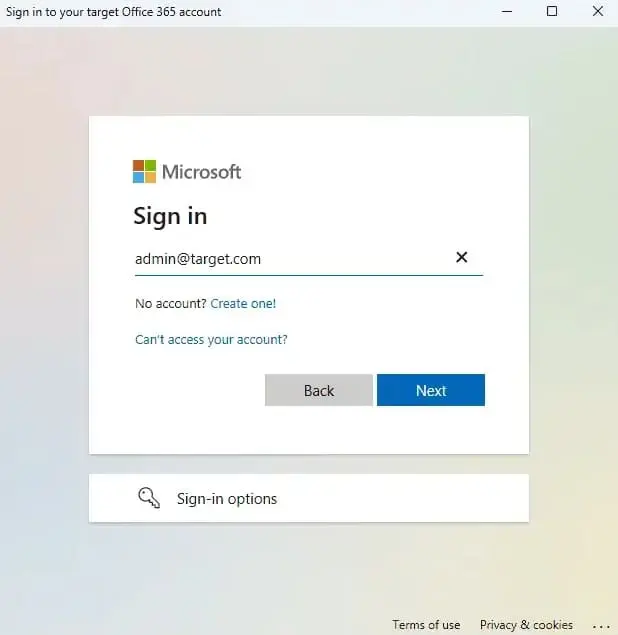
- After selecting the desired migration option, proceed with the login on the Microsoft sign-in page.
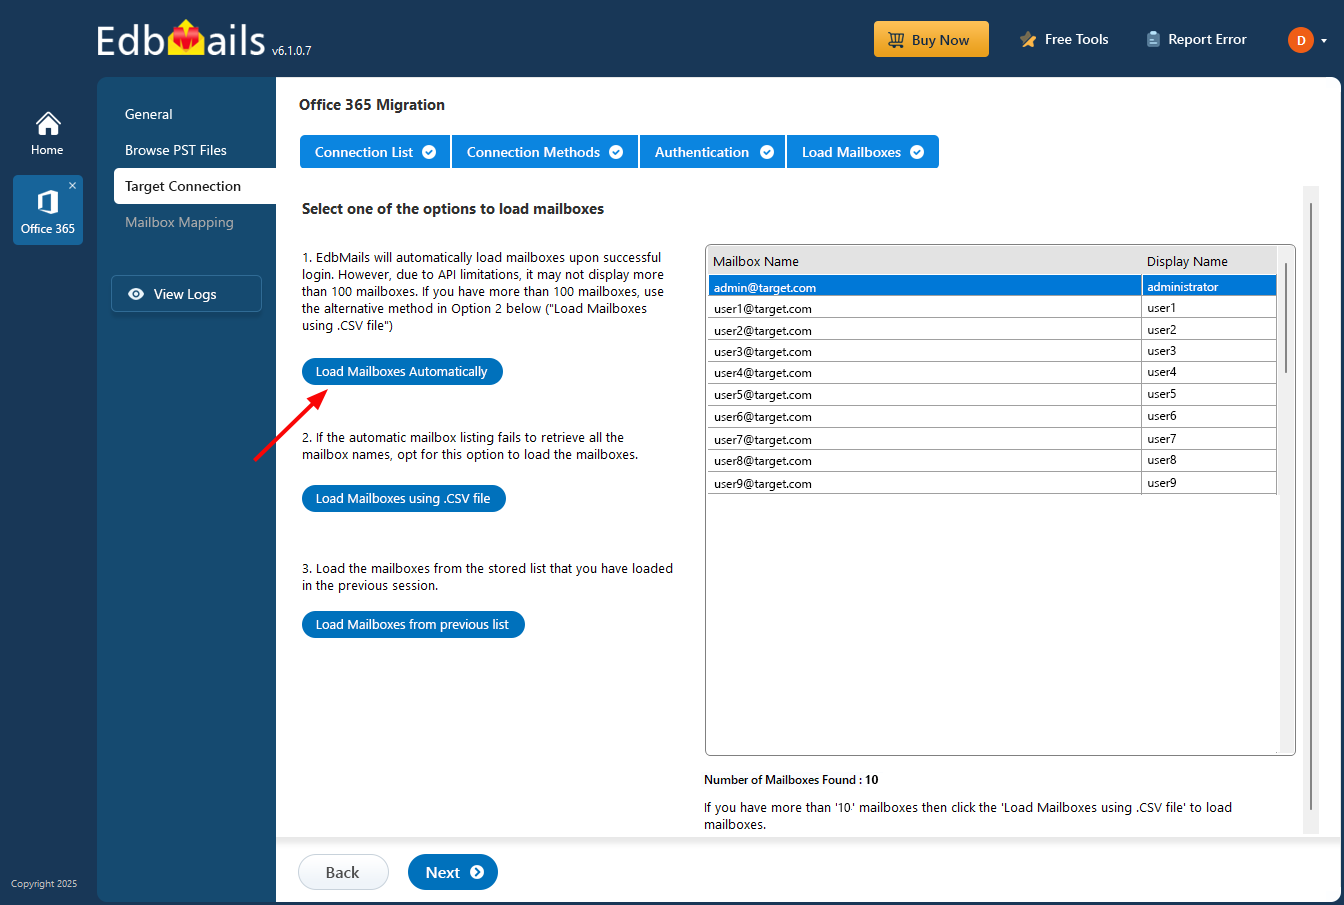
- After you authenticate and log in successfully, select one of the methods to load the mailboxes. You can also load and migrate the mailboxes using a CSV file.
- Click the ‘Add New Connection’ button to set up a new connection with the target Office 365 server. To use an existing connection, select it from the list and click ‘Connect to Existing’ to continue.
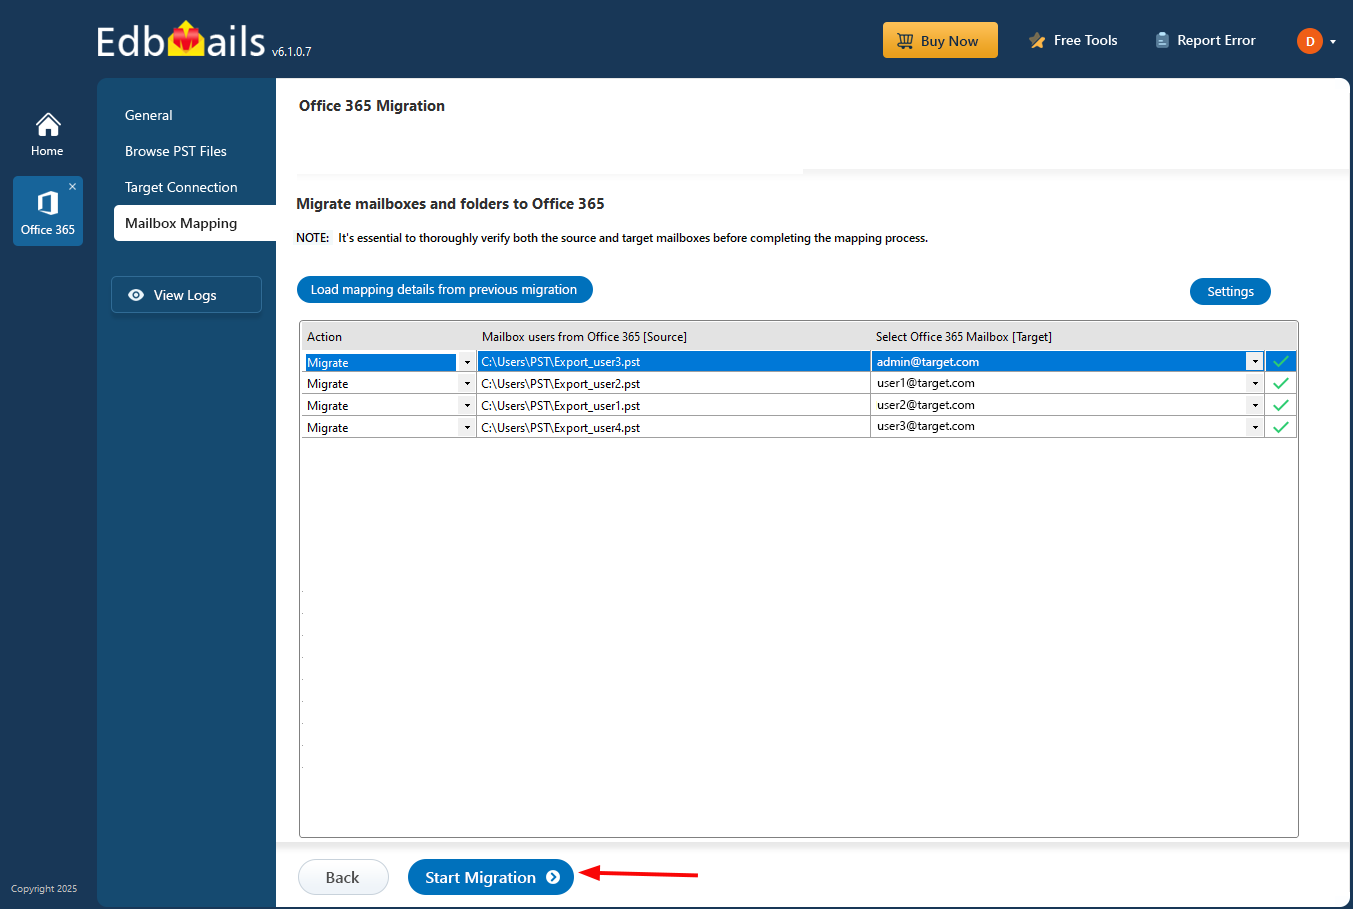
Step 6: Map source and target mailboxes
- Select the required option for mapping.
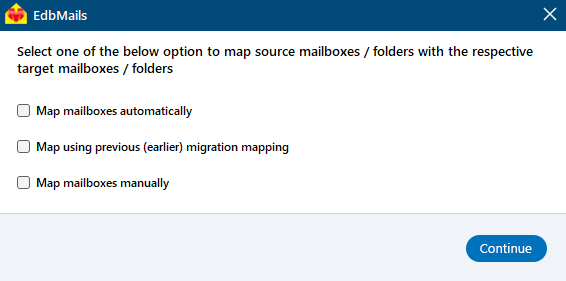
EdbMails automatically maps all mailboxes and folders to source & target tenants, which is very helpful when you migrate a big size of data. You can also have options to manually map source folders & subfolders to any specific target folders if required.
- Select the required option for mapping.
Start PST to Office 365 migration
- After completing the mailbox mapping, click the ‘Start Restore’ button to begin the process.
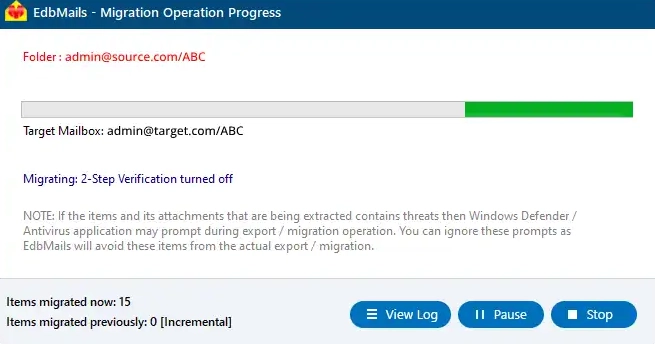
- Upon migration completion, a message will appear. You can click the ‘View Log’ button and check the migration report.
- After completing the mailbox mapping, click the ‘Start Restore’ button to begin the process.
The Best Features of EdbMails for PST to Office 365 Migration:
- Bulk PST files Migration: Import Bulk PST files Migration to Office 365 in a single process, which would be helpful for all large-scale migrations. The manual efforts would be minimized and the migration for more than one user would be finished sooner.
- Incremental Migration: For subsequent migrations, the remaining newly added or modified items are transferred. In this way, no redundant entries are stored and a quicker migration is carried out.
- Retains Folder structure: EdbMails retains original mailbox hierarchy and structure, along with data and metadata of the emails, etc. It helps the end users access the transferred data with the same structure.
- Filter migration: allows users to migrate data from the selected date range, selected folder or item type and reduce the total migration time. The migration process becomes more precise and accurate.
- Concurrent Mailbox Migration: Multiple mailboxes can be migrated simultaneously to speed up the migration process. This dramatically cut down the time taken to complete the large mailbox migration.
- Secure Migration process: Migrates with the advanced authentication processes such as OAuth 2.0 and also supports Multi Factor Authentication to access the mailbox and data transfer securely.