


Office 365 to Exchange Migration Step-by-Step Guide
Organizations may migrate from Microsoft 365 (Office 365) to on-premises Exchange Server to address compliance requirements, data residency policies, infrastructure management needs, or specific organizational requirements. EdbMails simplifies Office 365 to Exchange migration by establishing a secure connection between the source Microsoft 365 tenant and the target Exchange Server environment. The software supports migration to Exchange Server 2007, 2010, 2013, 2016, and 2019 while preserving mailbox data, folder hierarchy, emails, contacts, calendars, notes, tasks, and mailbox permissions. With features such as automatic mailbox mapping, incremental migration, and centralized migration management, administrators can efficiently migrate user mailboxes, Shared Mailboxes, Public Folders, Archive Mailboxes, and Microsoft 365 Groups with minimal downtime. The migration can be performed from a single system or multiple systems without requiring PowerShell scripts or complex manual configurations. For a complete overview of supported migration capabilities, see the Office 365 Migration Software page. New to Office 365 migration planning? See What is Office 365 Migration for an overview of migration methods, scenarios, and timelines.
Office 365 to Exchange Migration: Pre-Migration Activities
On source Office 365 server:
- A Global Admin account with an active mailbox is needed for Auto Registration of the EdbMails application on your Entra ID (Azure Active Directory). If you're going with Manual Registration instead, either a Global Admin account or a user account with full access permissions will do the job.
- Your network and bandwidth need to be up to the task before migration.
See network and migration planning and the performance factors and best practices guide specific to Office 365 to Exchange migrations.
On target Exchange server:
Step 1: Check that your system meets the Exchange server setup requirements.
Work through the links below to get the target Exchange server environment ready based on whichever Exchange version you're migrating to. Network, hardware, and operating system requirements for installing Exchange server are all covered there.
Step 2: Prepare your target server with the following prerequisites
Active Directory, Windows Mailbox server, and Windows Edge Transport servers all need their prerequisites handled before the Exchange server installation starts.
Step 3: Set up Exchange Server for migration
Here's what needs to be in place before the Exchange server is ready for migration:
- Prepare AD and Domains
- The Active Directory forest and its domains need to be prepped for the new Exchange version before the Exchange server goes in.
- If you have a separate team to manage the Active Directory schema, you need to first extend the active directory schema, else proceed to the next step to prepare the Active Directory.
- Multiple domains in play? There's an extra step — prepare the Active Directory domains as well.
- Install Exchange Server on Your Computer
System requirements and prerequisites from the earlier steps need to be confirmed before anything gets installed. Once that's done, use the setup wizard to install Exchange 2016 or install Exchange 2019 depending on your target version.
- Prepare a Clean Exchange Target Environment
- Set up and configure a Send connector so outbound mail can leave the Exchange organization.
- Exchange sets up receive connectors on its own when the mailbox server is installed — but if your setup calls for something custom, here's how to configure receive connectors manually.
- Add accepted domains so recipients across different domains can send and receive mail without issues.
- Set up the default email address policy to roll the accepted domain out to every recipient in the organization.
- Configure external URLs on the virtual directories in Client Access services — this is what lets users outside the organization's network reach the server.
- Configure internal URLs on the same virtual directories for users connecting from the internal network.
- SSL certificates from a third-party certificate authority need to be configured to cover services like Outlook Anywhere and Exchange ActiveSync.
- Run Get-ExchangeServer in the Exchange Management Shell to verify the Exchange server installation is clean.
- Create Mailboxes and Public Folders on the Exchange Server
EdbMails automatically creates mailboxes on the target Exchange server — but if manual creation is preferred, the steps to create mailboxes in Exchange server are there to follow.
Planning to migrate Public folders from Office 365 to Exchange? See the steps to create Public folders in Exchange server beforehand.
- Set Impersonation Rights to Global Admin Account
Using a global admin account to connect to the Exchange server? Impersonation rights need to be in place for it to migrate all other mailboxes.
See the steps to set impersonation rights for a global admin account on the Exchange server.
- Verify the mailbox of the admin account
Confirm that the admin account assigned management roles has a valid, non-hidden mailbox sitting on the Exchange server.
- Settings Related to Throttling and Message-Size Limits
- If Microsoft starts throttling the migration, go ahead and change the EWS throttling settings on the Exchange server.
- Migration stalling because of an oversized message? Set the message size limit to the maximum on the Exchange server to clear it.
- Prepare AD and Domains
Migrate from Office 365 to Exchange server with EdbMails
Step 1: Download and Install EdbMails application
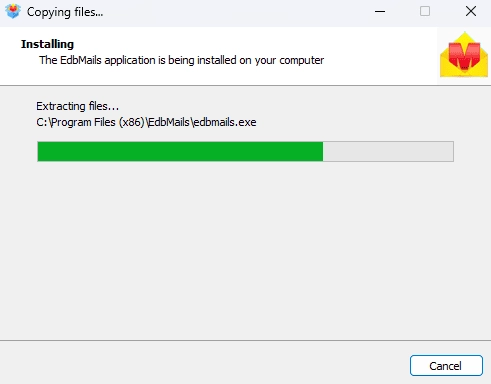
- Download and install EdbMails on your computer.
- Double click the EdbMails setup (EdbMailsSetup.exe) to install the application.
- Follow the instructions that appear to complete the installation.
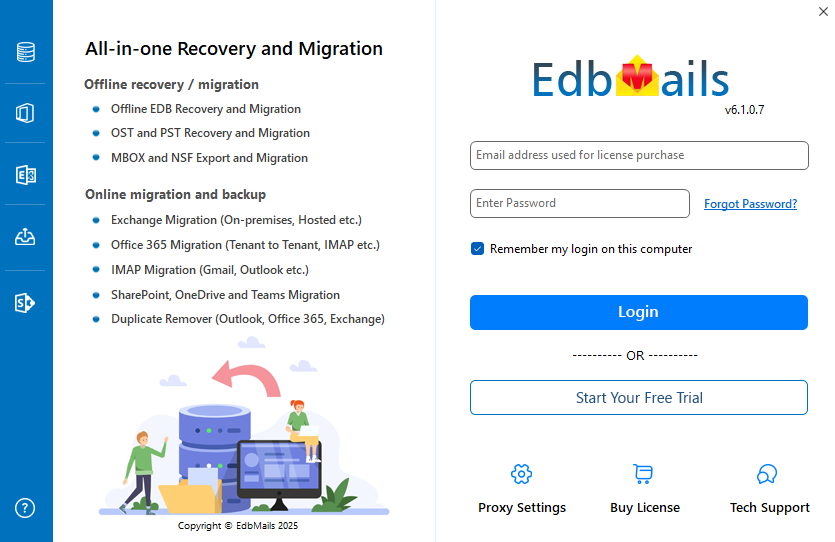
- Click 'Login' or 'Start Your Free Trial' to access the application
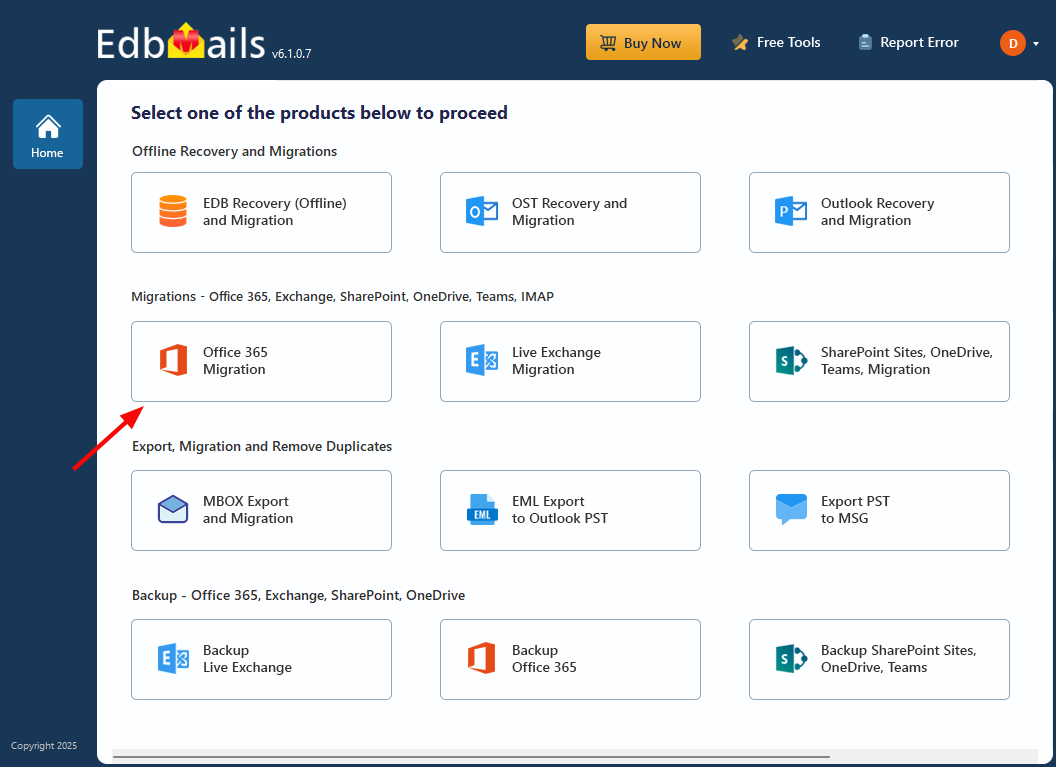
Step 2: Select Office 365 to Exchange Migration option
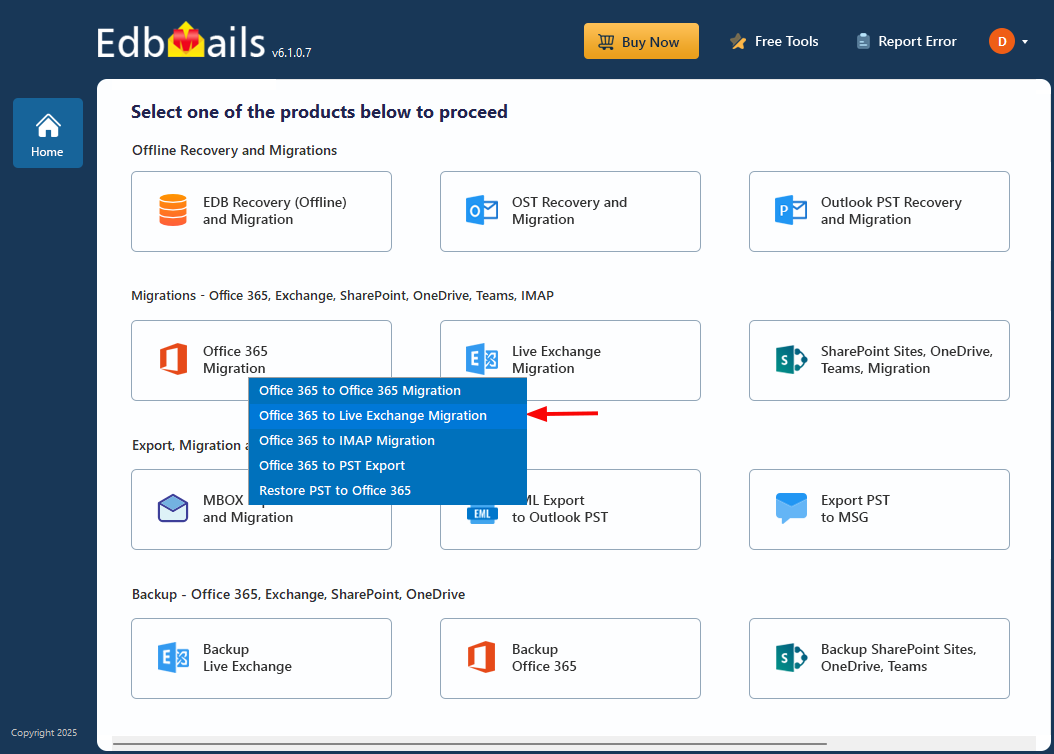
- Select the option 'Office 365 Migration'
- Select ‘Office 365 to Live Exchange Migration’
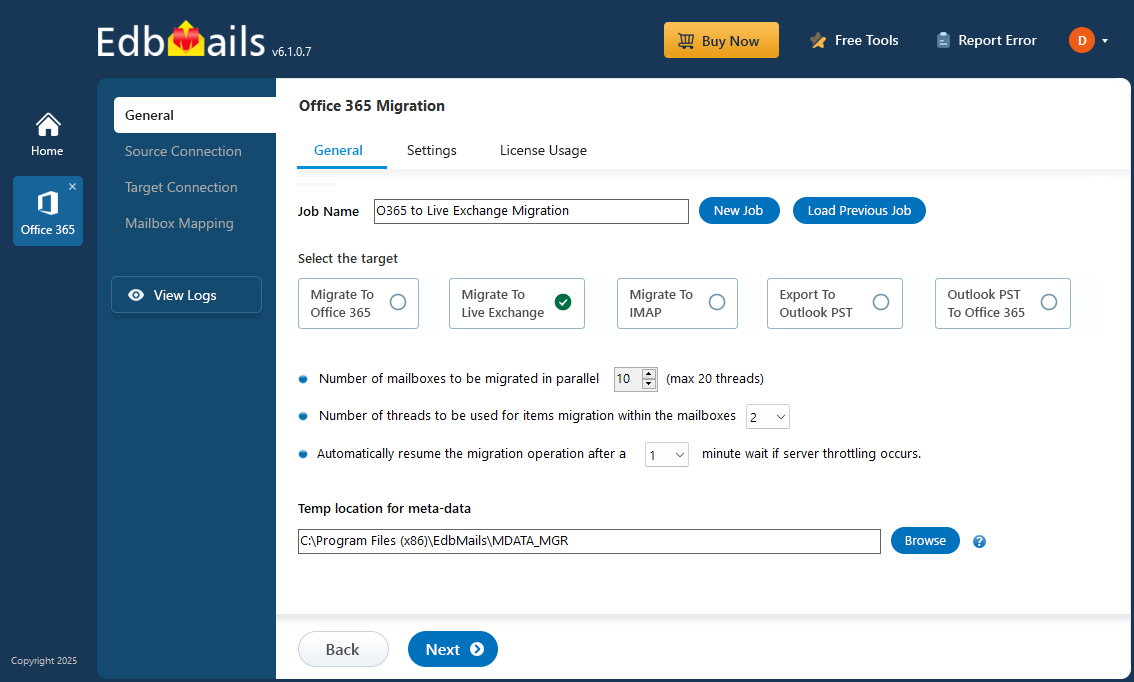
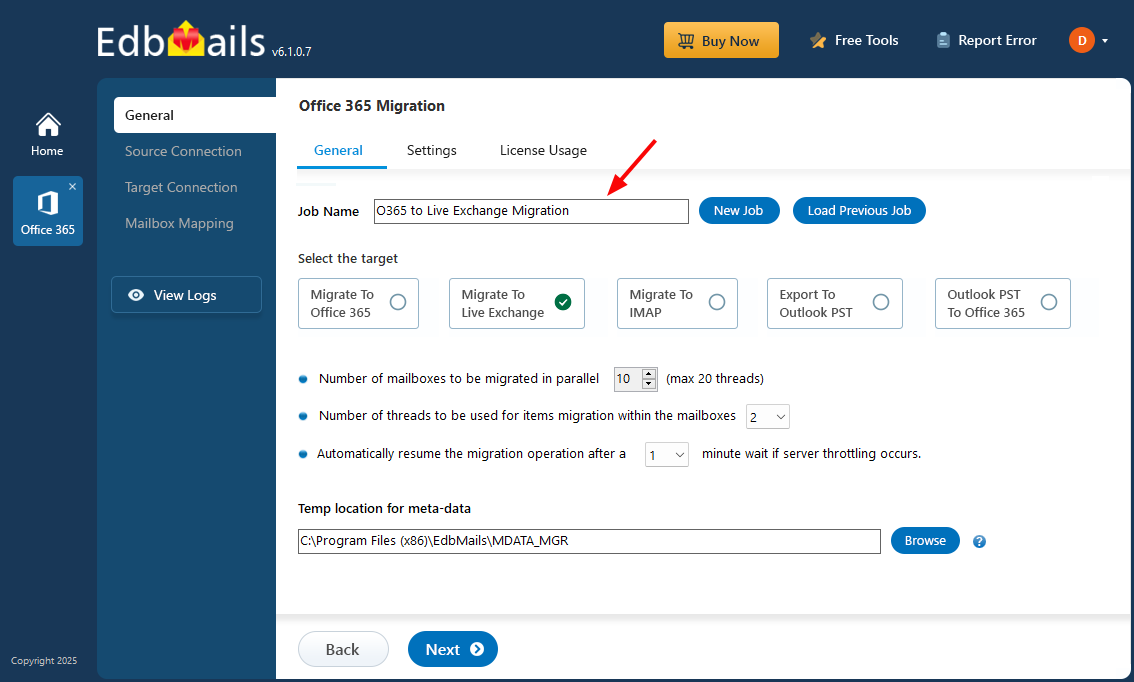
- Keep the default job name, or click ‘New Job’ button to change the name of your choice.
- Select the option 'Office 365 Migration'
Step 3: Connect to source Office 365 server
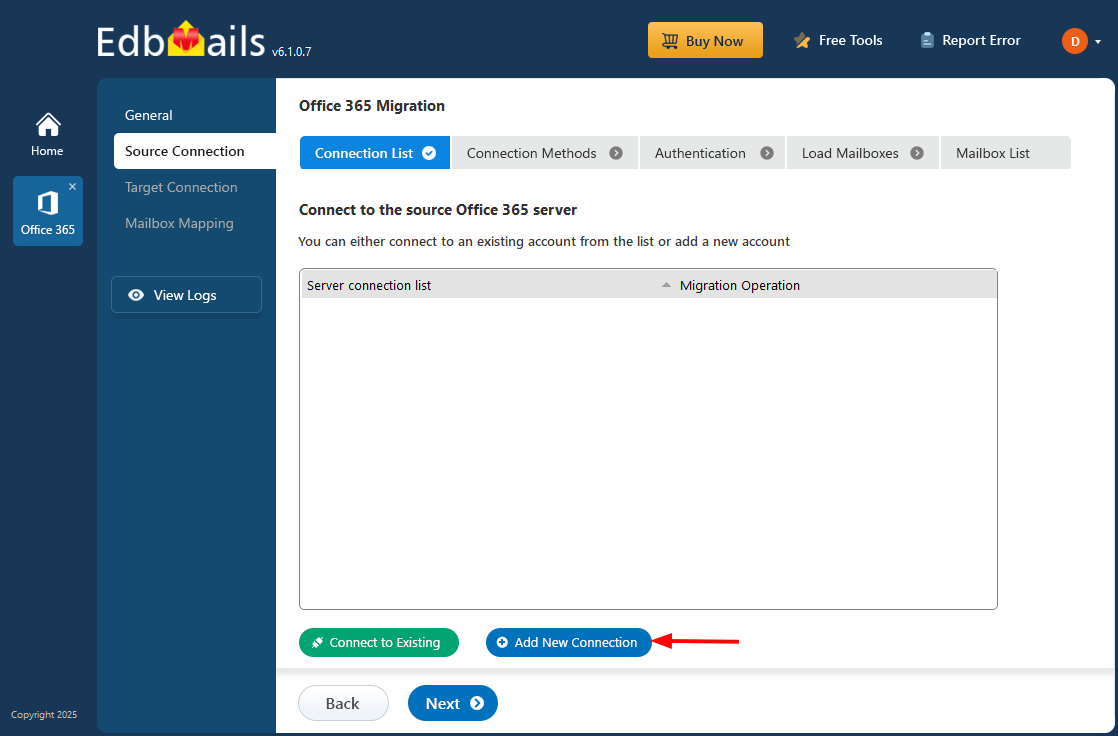
- Click the 'Add New Connection’ button to establish a new connection to the source Office 365. To use the previous connection, select it from the connection list and click the ‘Connect to Existing’ button to proceed.
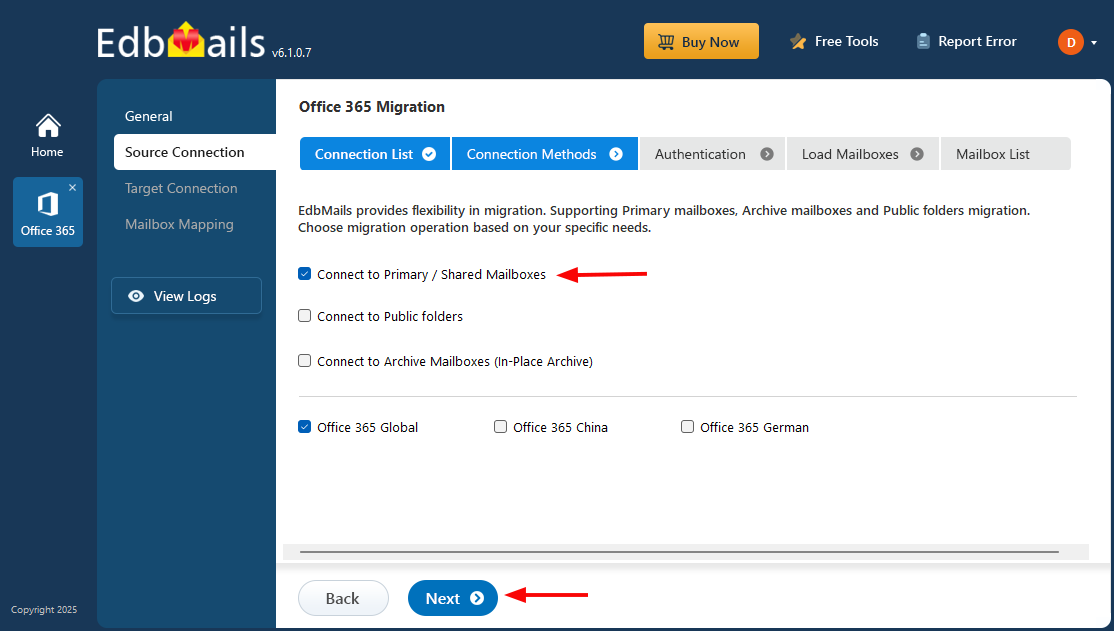
- Choose the required connection options and click the ‘Next’ button
- Select the appropriate connection method and click the ‘Login’ button to continue.
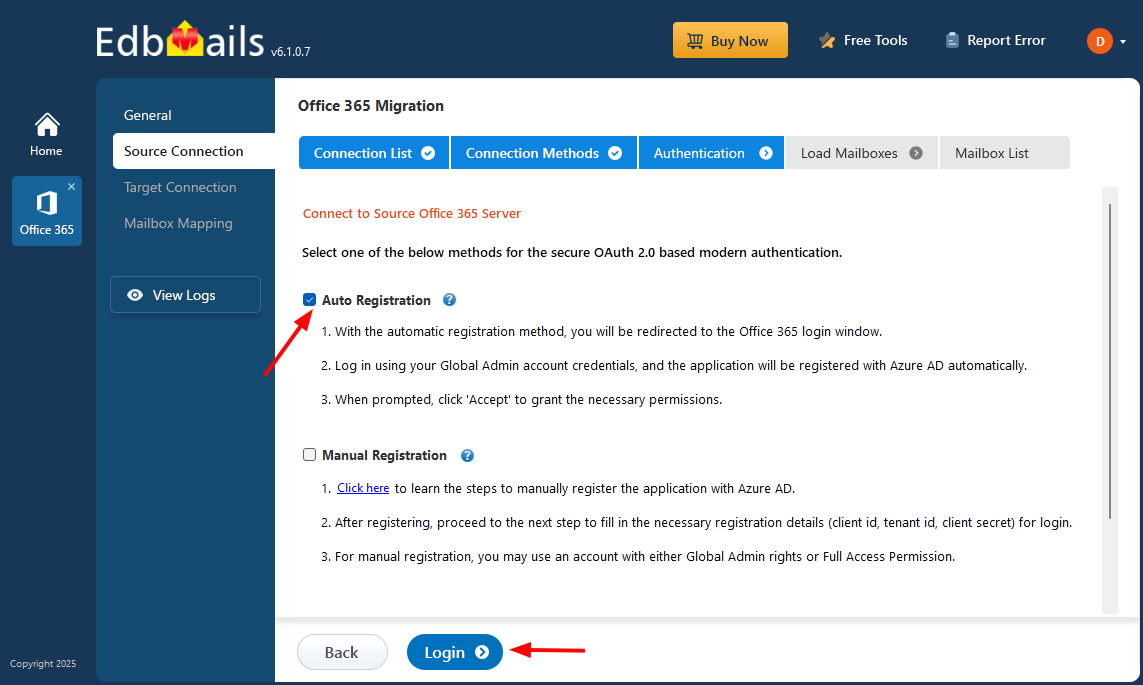
Connect to Office 365 server using secure modern authentication
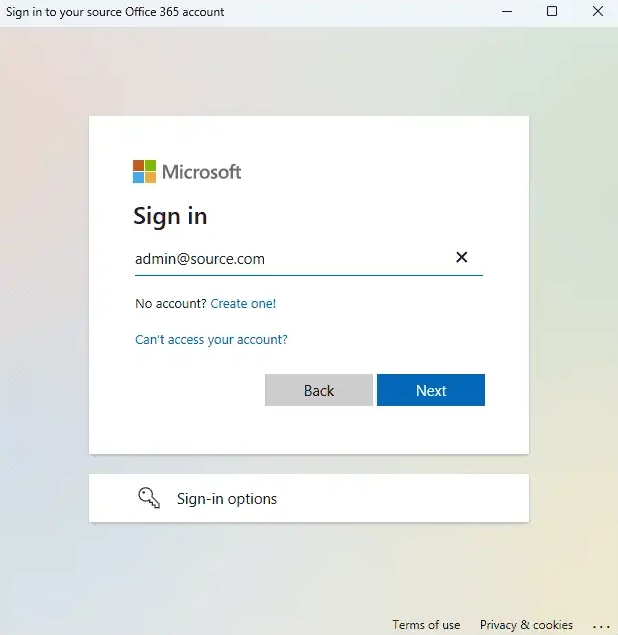
- Authenticate on Microsoft sign-in page.
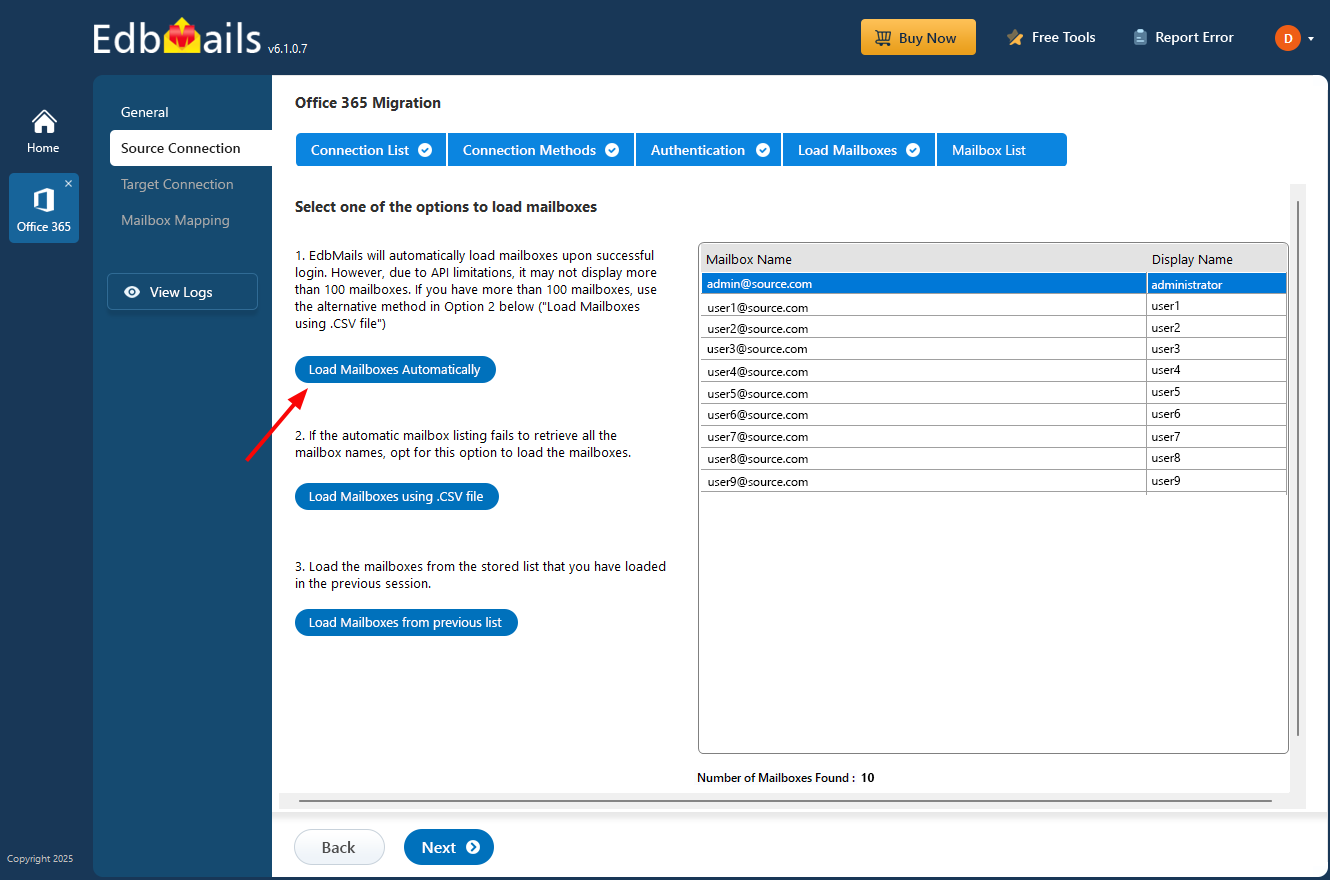
After the successful authentication, choose one of the methods to load the mailboxes. You can also load and migrate the mailboxes using a CSV file.
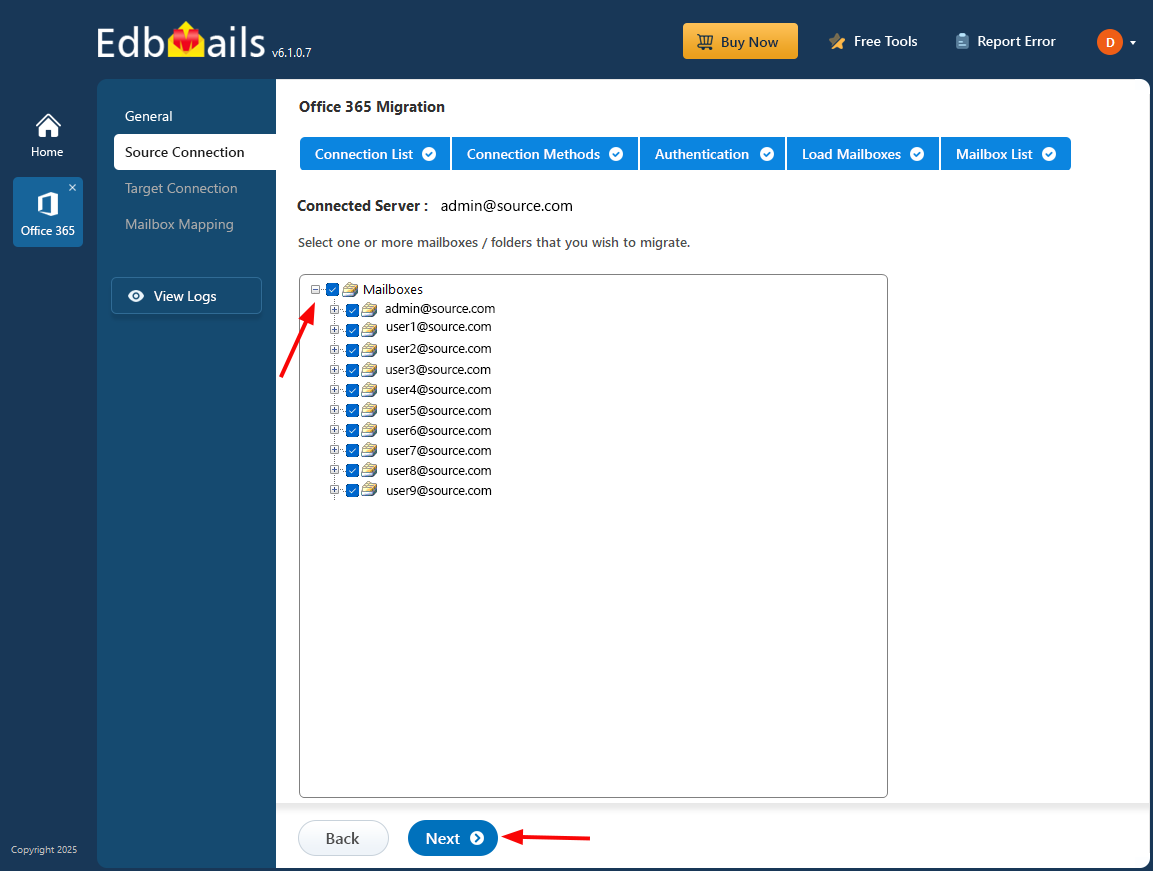
- Select the mailboxes you want to migrate from the source Office 365 server.
- Click ‘Next’ to proceed.
- Click the 'Add New Connection’ button to establish a new connection to the source Office 365. To use the previous connection, select it from the connection list and click the ‘Connect to Existing’ button to proceed.
Step 4 : Connect to target Exchange server
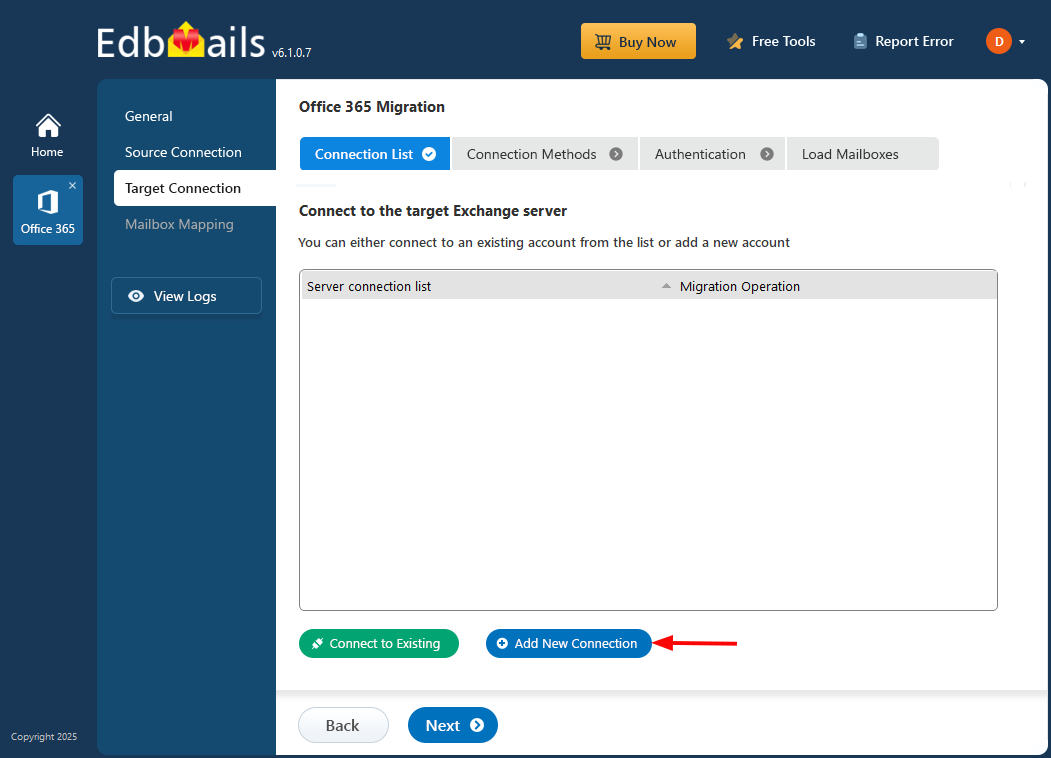
- Click the ‘Add New Connection’ button to establish a new connection to the target Exchange server. To use a previous connection, select it from the connection list and click the ‘Connect to Existing’ button to proceed.
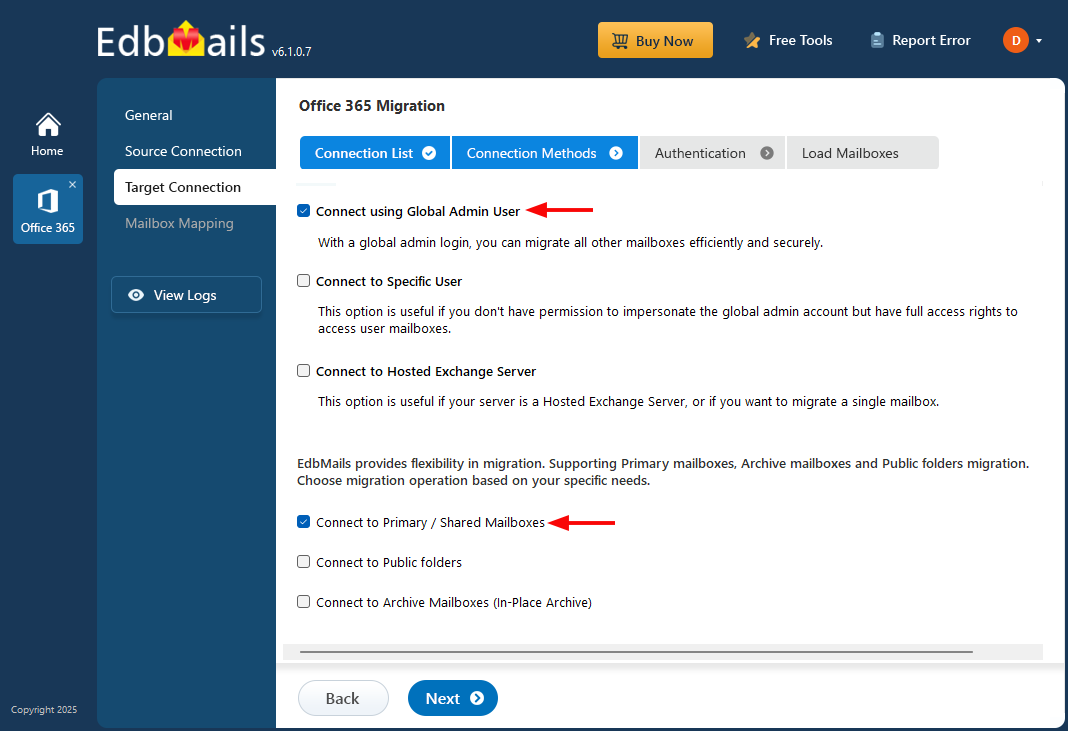
- Select the required connection options and click the ‘Next’ button.
Different options to connect to Exchange server in EdbMails
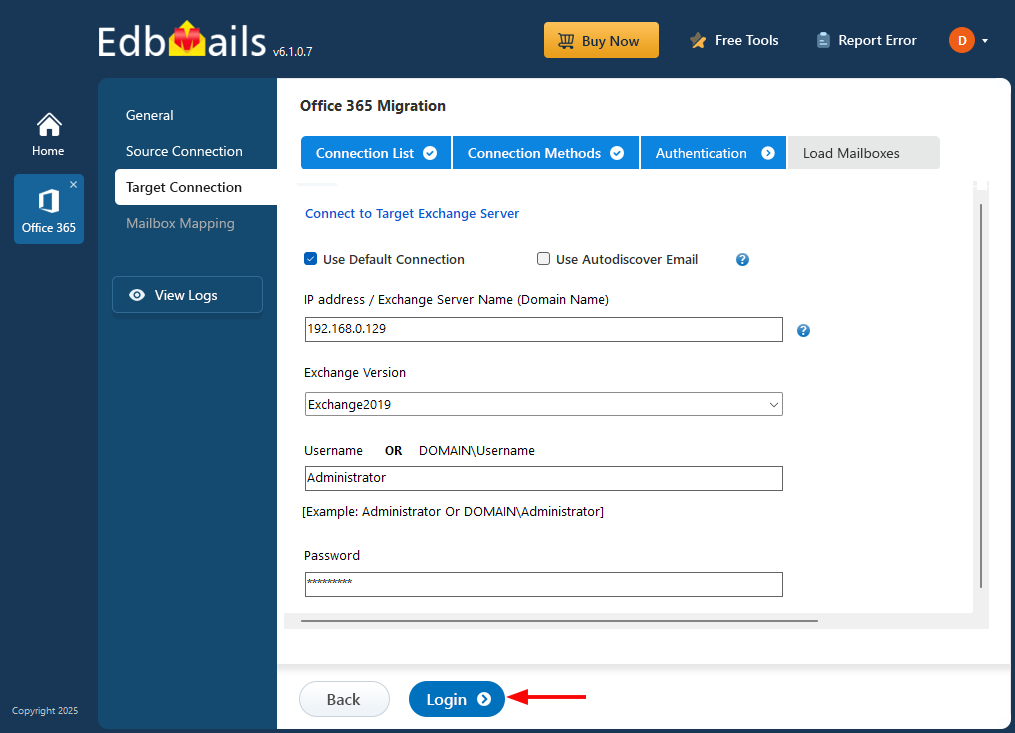
- Enter the target Exchange server details and click the ‘Login’ button
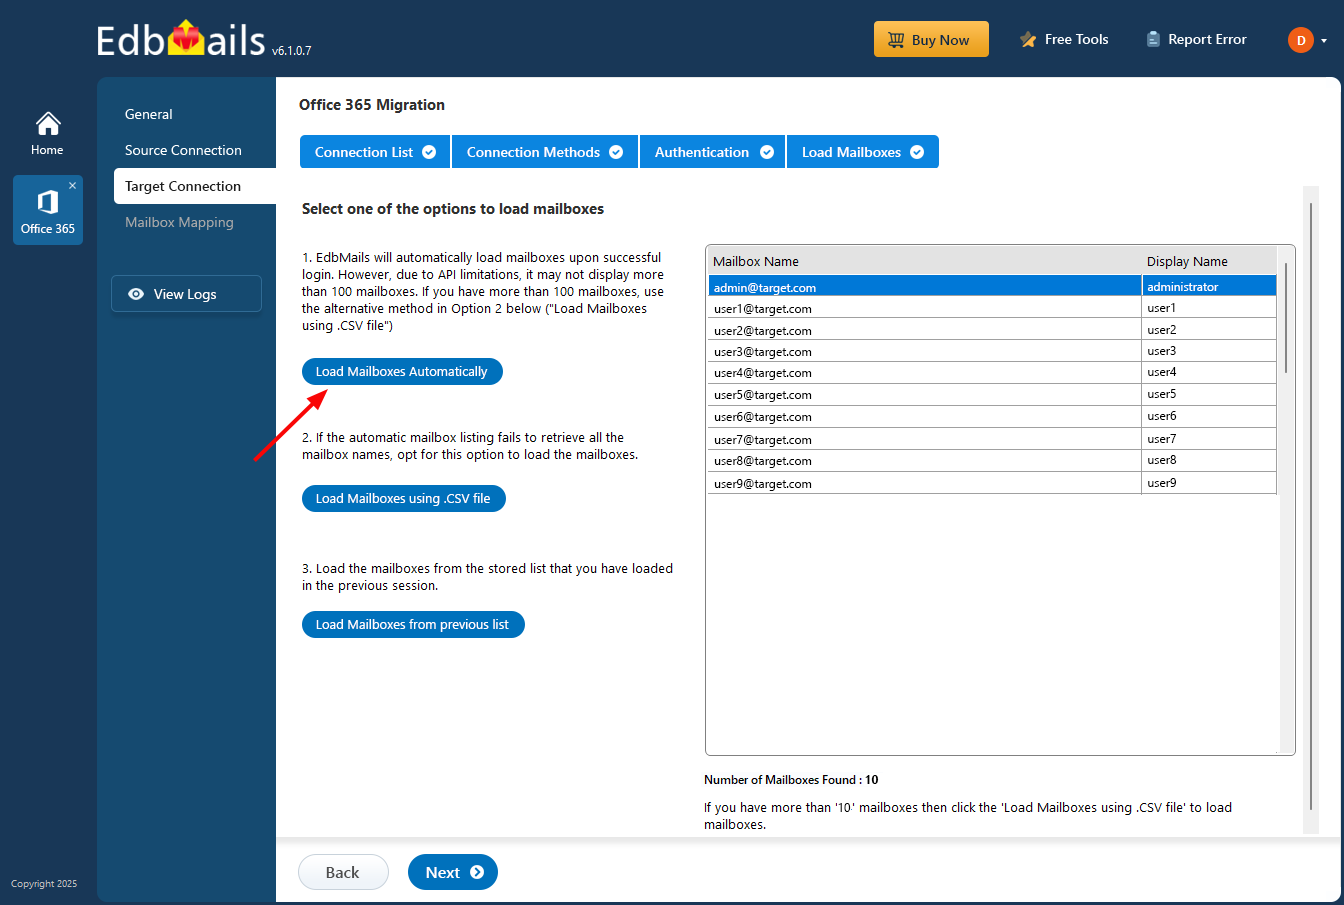
- Select one of the methods to load the mailboxes.
- Click the ‘Add New Connection’ button to establish a new connection to the target Exchange server. To use a previous connection, select it from the connection list and click the ‘Connect to Existing’ button to proceed.
Step 5: Map source and target mailboxes
- Select the required mapping option
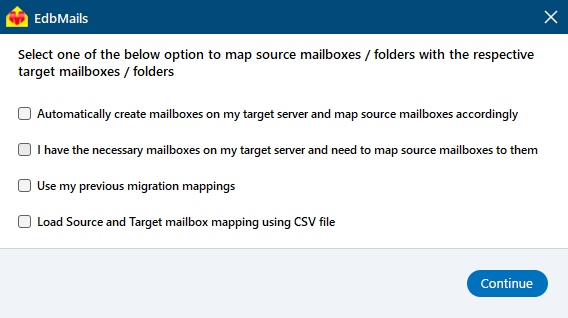
- If EdbMails is installed on your Exchange server, you can opt to automatically create mailboxes on the target Exchange server
Click here to know more about automatic mailbox creation.
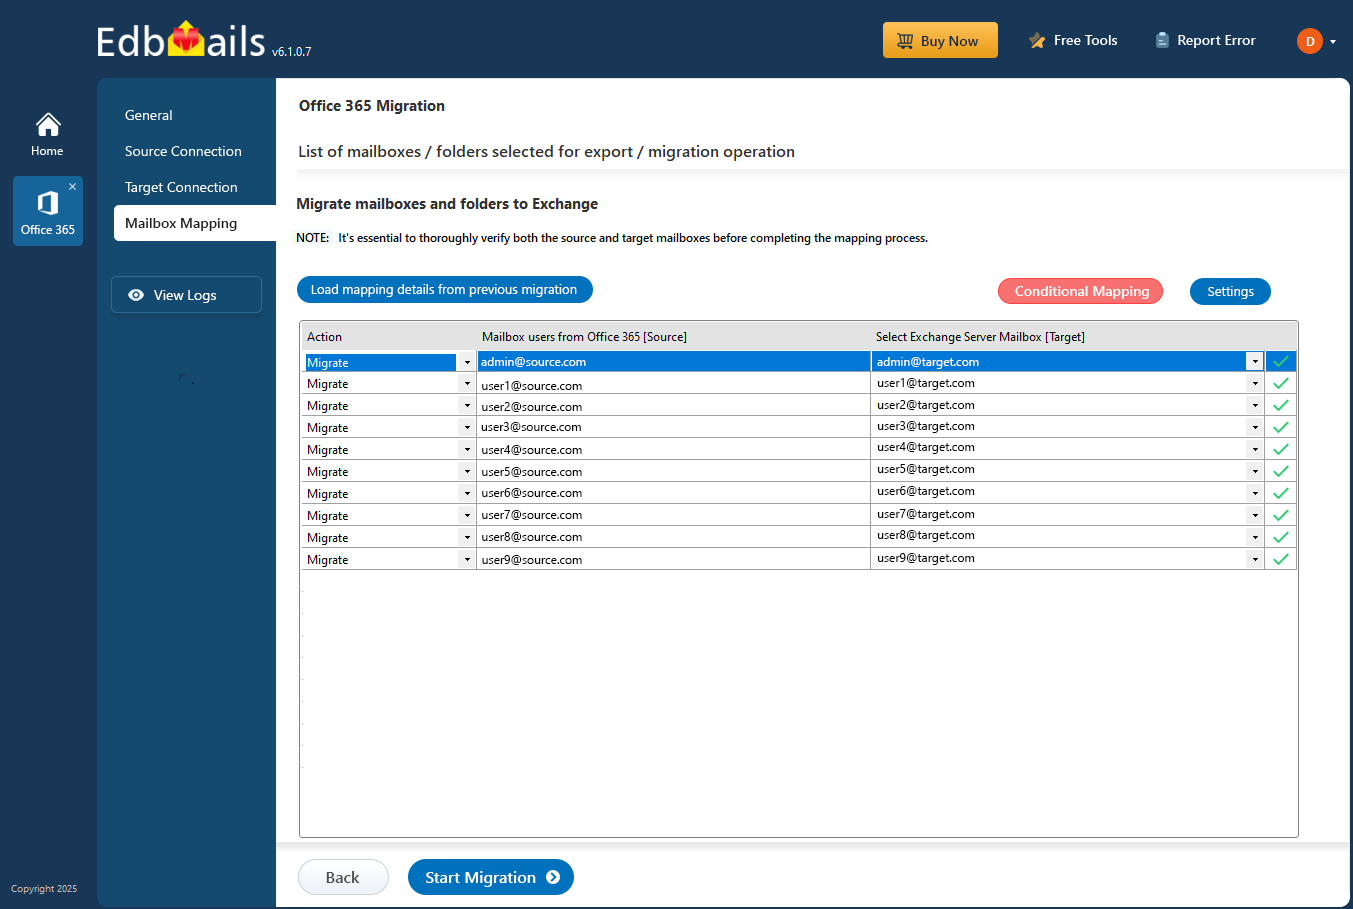
- Select the required mapping option
Step 6: Start Office 365 to Live Exchange migration operation
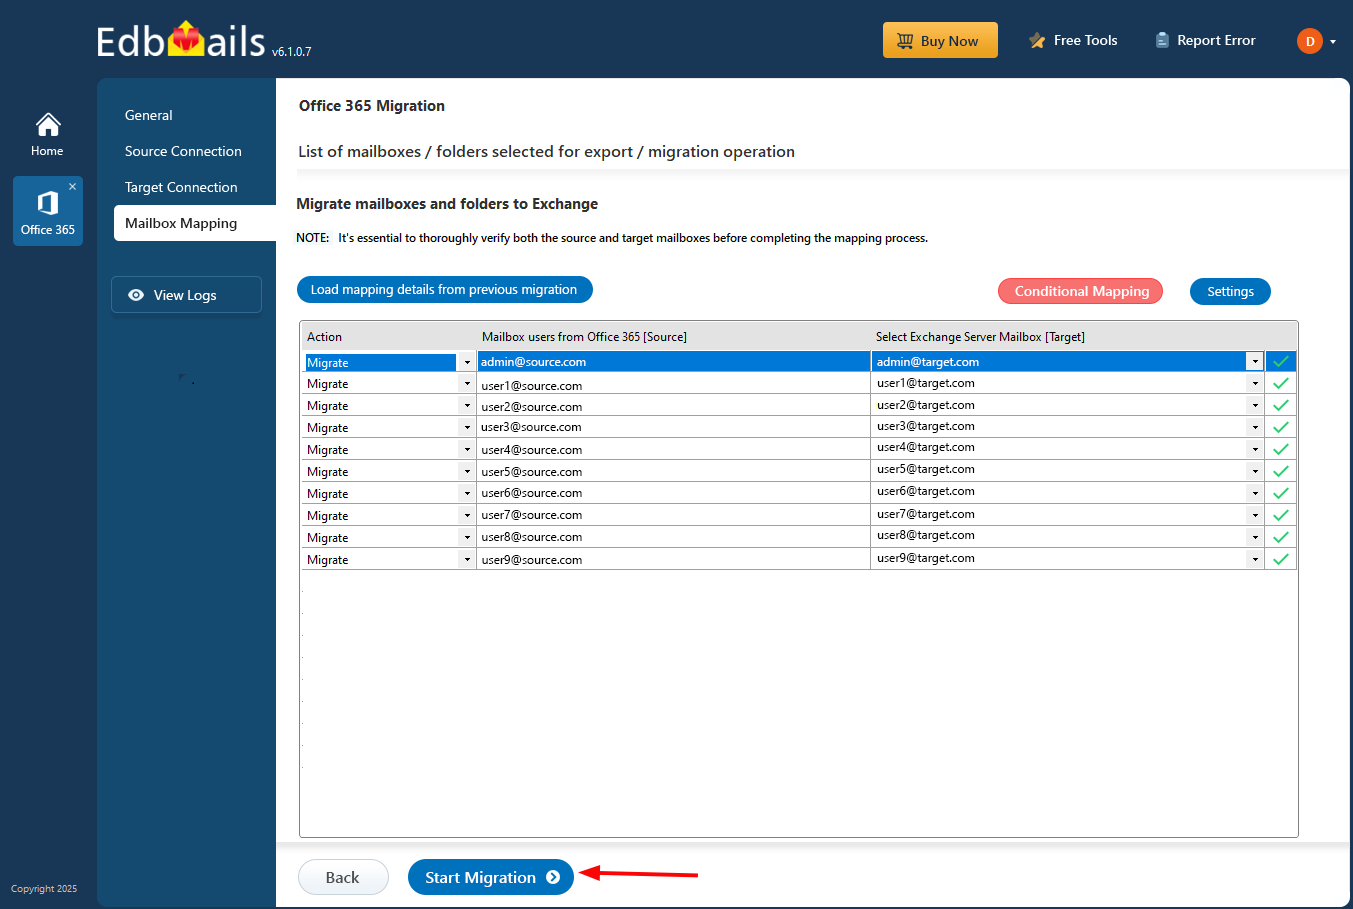
- After completing the mailbox mapping, click the ‘Start Migration’ button to initiate the process.
- During migration, you can track progress in real-time. Once completed, a confirmation message will appear.
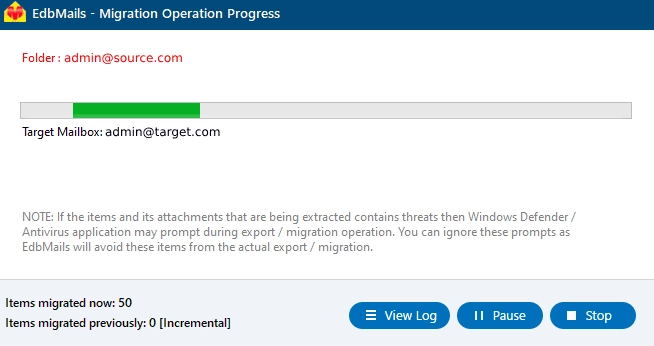
- Click the 'View Log' button to access the migration report. Also, log in to your target Exchange server to verify the migrated items.
- After completing the mailbox mapping, click the ‘Start Migration’ button to initiate the process.
Post-migration activities
- Step 1: Update MX Records to the Exchange server
Update the MX records in your DNS settings to forward mail to the new server after the migration is completed. Also, update the Autodiscover record to enable Outlook to connect to the new mailboxes.
- Step 2: Create a New Outlook Profile for Users in the New Domain
- The latest version of Outlook needs to be on every machine to avoid compatibility problems.
- Set up Outlook profile for each user of the domain in case Outlook is having a problem communicating with the Office 365 mailbox.
- Pull up the account settings in Outlook and swap in the new server address, username, and password.
- Fire off a test email and wait for a reply — that's the quickest way to confirm mail flow is actually working end to end.
- Step 3: Remove the Old Office 365 Subscription Plan
Migration done, data verified — at that point, the old Office 365 subscription is just an unnecessary expense. Go ahead and cancel it, and clean up any domains still linked to it that you no longer need.
- Step 1: Update MX Records to the Exchange server
Office 365 to Exchange migration troubleshooting
See the troubleshooting solutions for Office 365 and Exchange migration. For more information related to EdbMails Office 365 migration, see the frequently asked questions.
Additional resources:
- What is Office 365 Migration?
- Office 365 to Office 365 migration step by step guide
- Migrate mailbox data from Office 365 to IMAP server
- Office 365 to PST export steps
- Disable EWS throttling in Exchange online
- Steps to set a custom throttling policy on an Exchange server
- Set impersonation rights on Exchange server